How to Make a Dollar Tree Winter Wreath
If you’re looking for winter front door decor inspiration, this Dollar Tree Winter Wreath is the perfect project. Today we’re going to take a Dollar Tree wreath frame and turn it into a super cute winter wreath using three Dollar Tree scarves.

Be sure to PIN this one for later!
This blog post contains affiliate links. The opinions are wholly my own from my own experience. I may earn a small commission from clicks through to the websites that end in a purchase.
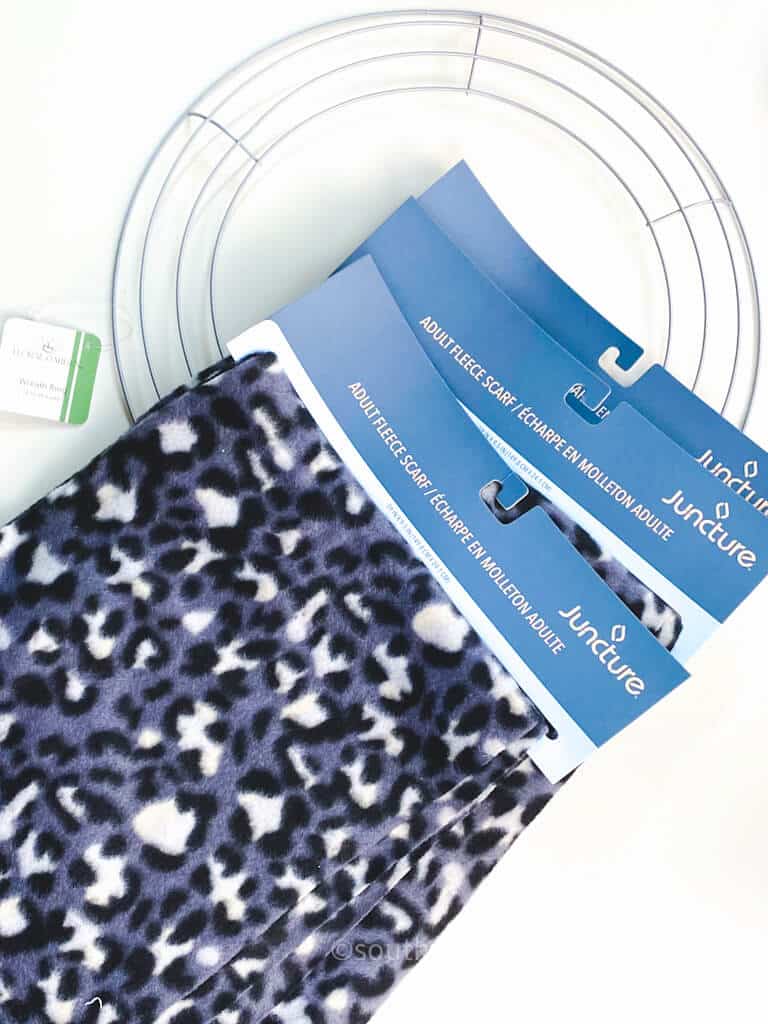
Oh, my goodness, my friend. I am so excited to share this wreath with you. All you’re going to need is a wreath frame, string, and three separate scarves, I found these cute leopard print scarves at dollar tree.
Supplies Needed to Make this Winter Wreath
- Dollar Tree Silver 14″ Silver Wreath Frame
- Black Bakers Twine or String
- 3 Winter Scarves
- Wooden Snowflakes
- Chalk Paint
- Hot Glue
- Bling
- Dollar Tree Black Canvas
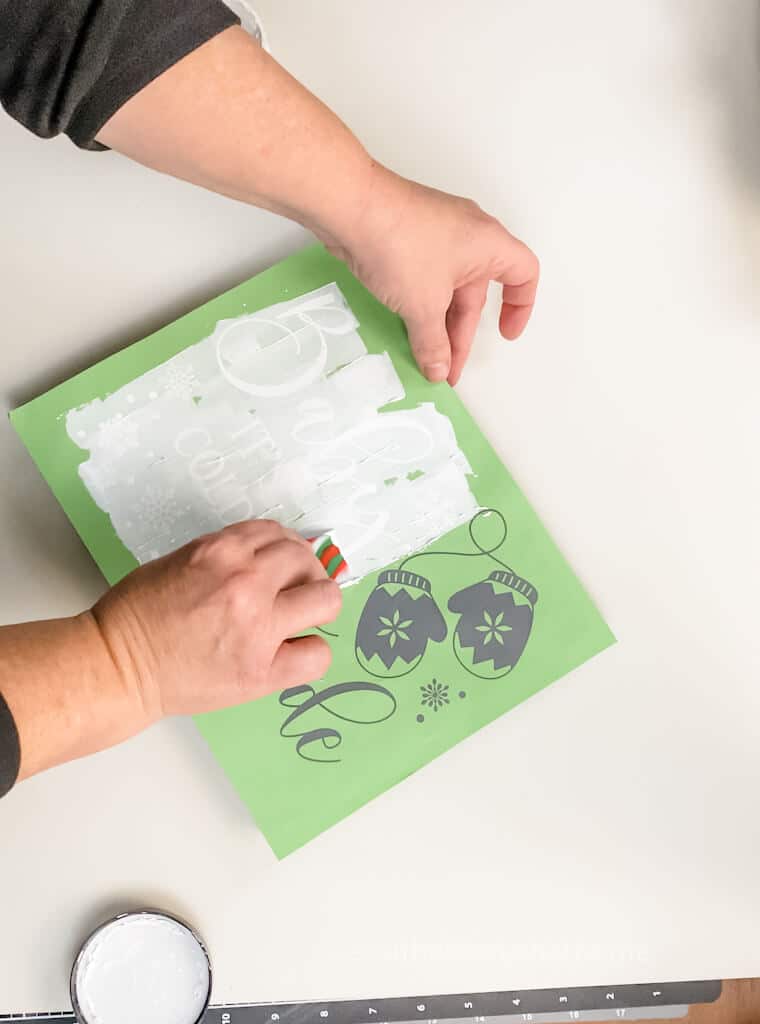
- Magnolia Baby It’s Cold Outside Stencil
- White Chalk Paste
How to Make a Winter Wreath
Now let’s get ready to create this wreath. You do not have to have any special talent. I promise you. This wreath comes together so easily. And I am so glad I learned how to do this so that I can do this with any scarves.
Watch a YouTube Video Tutorial
If you prefer to watch a video tutorial, you can see the step-by-step YouTube video below.
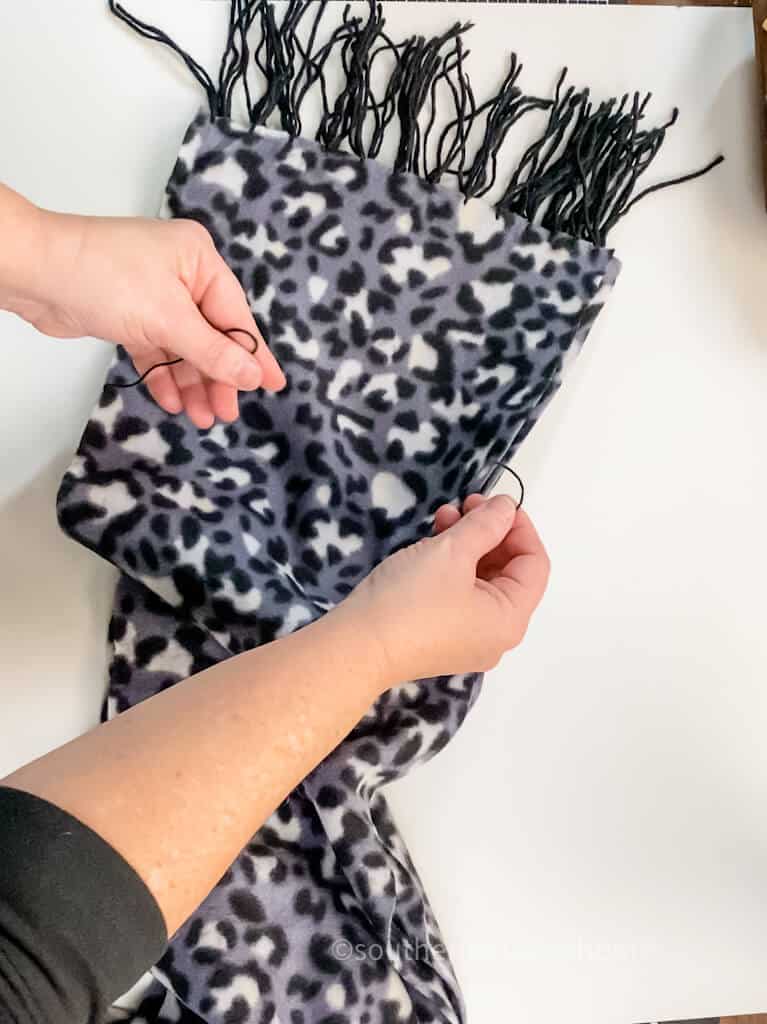
Step One
Simply lay the scarves on top of one another until they are flat and aligned at each end, or at least the top end. Take a little bit of string and tie it off at about six inches down on the stack of scarves. That’s going to serve as the starting point for our braid.
Step Two
Now separate all three scarves and just start your crisscross weaving like you are braiding your little girl’s hair. That’s all I could equate it to. And so one over the other, just like a regular braid. Nothing fancy, nothing difficult. Just go back and forth until you have an entire rope, basically braided of three scarves.
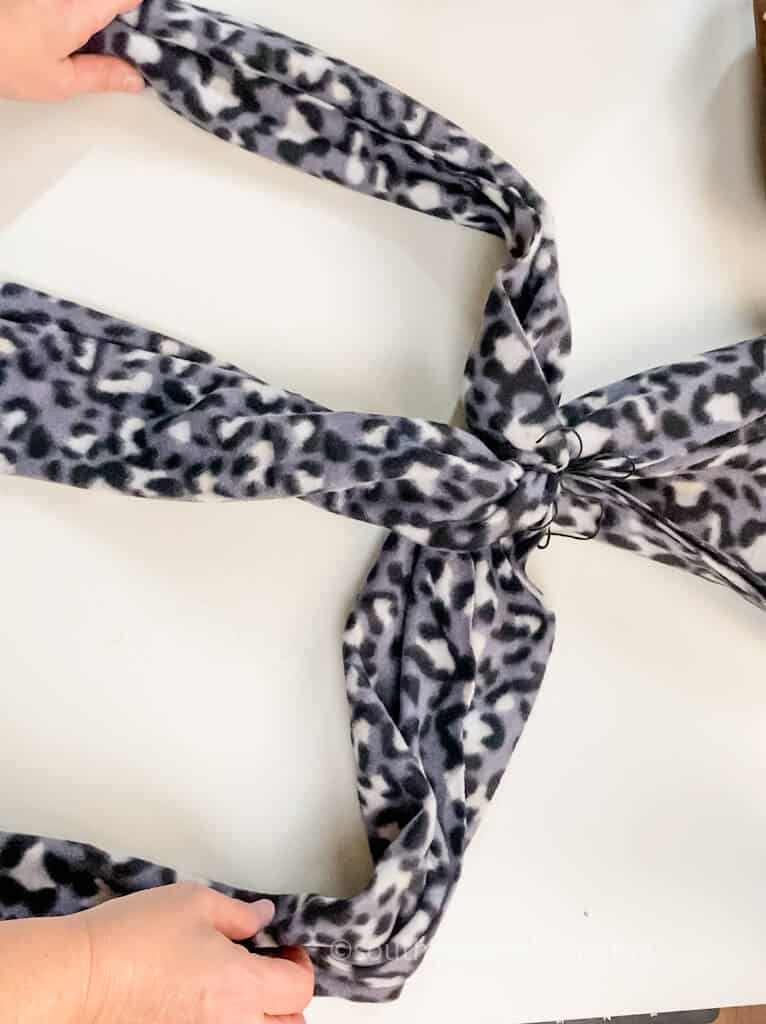
Step Three
Make sure to keep some loose space between the knots so that it’s not super tight and so that the braided scarf piece will go further once it’s laid down on the wreath form. Basically, just braid it, but keep the braid a little bit on the loose side.
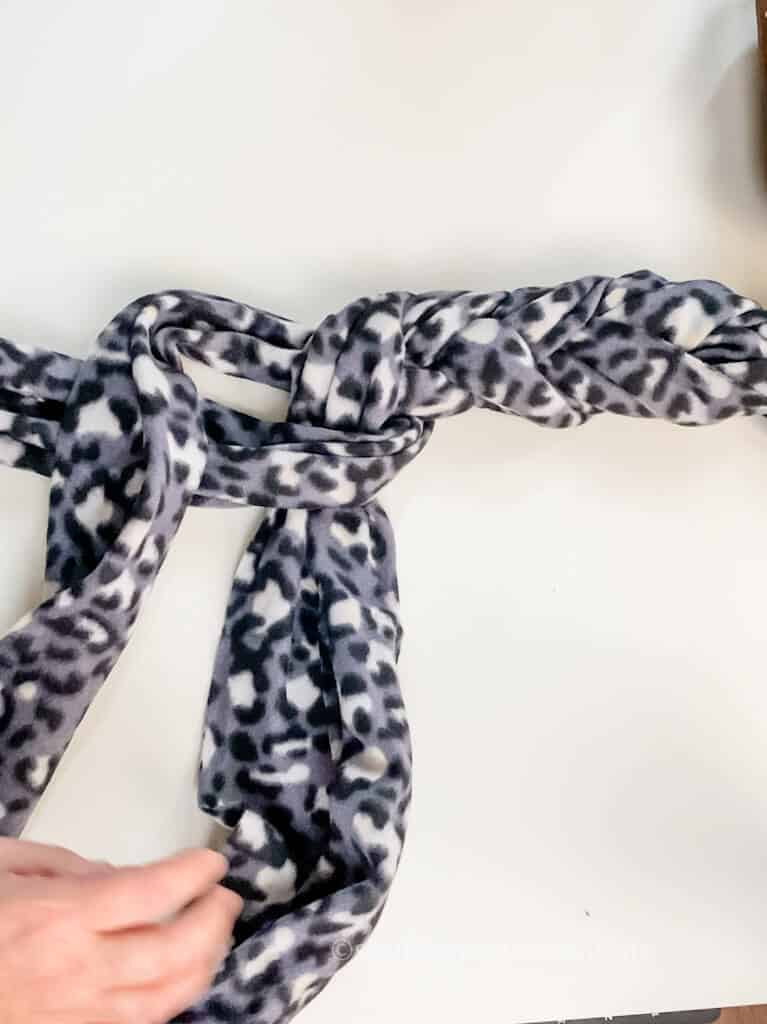
Step Four
My favorite thing is that this is super simple, and anyone, anyone can do this. Once you get to the end that is about the same distance as the beginning, grab more of the string and tie it off here at this end as well. Again, about six to ten inches from the bottom. You’ll want a little bit extra hanging off of the wreath.

Step Five
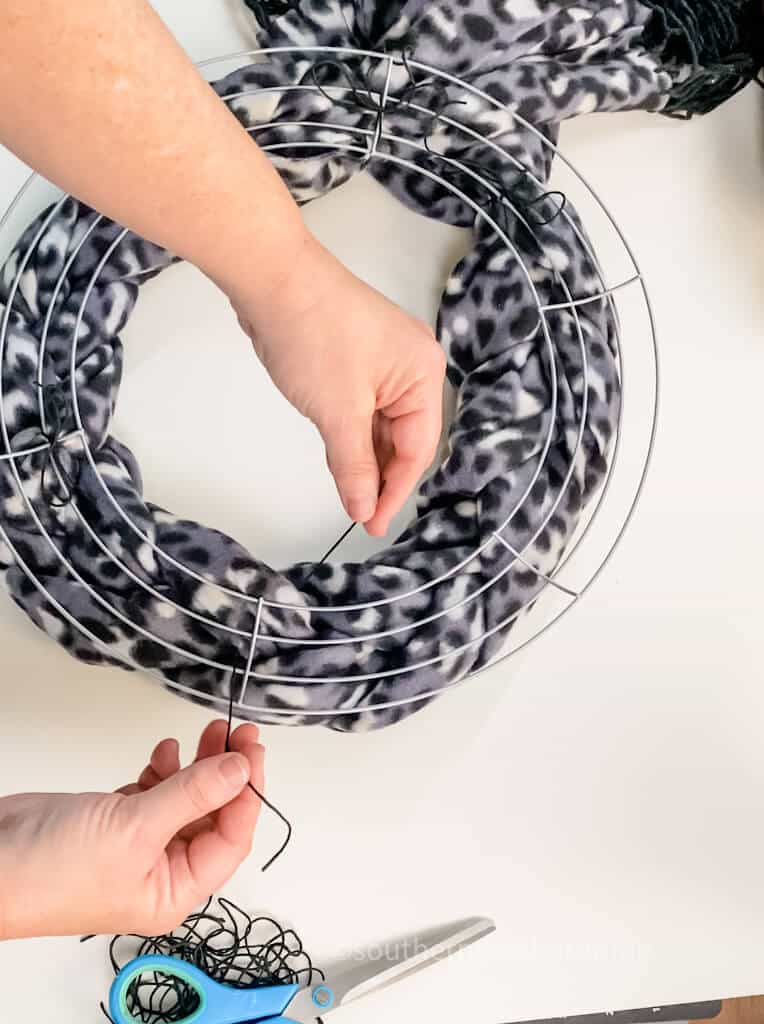
Position your braided scarf rope onto your wreath frame and using the black string tie it onto the wreath frame from the back. Using more pieces of string you’re going to take a section at a time and tie it to the back of the frame weaving through the scarf and then around each side of the bars on the back. That is going to secure it to the wreath frame.
Step Six
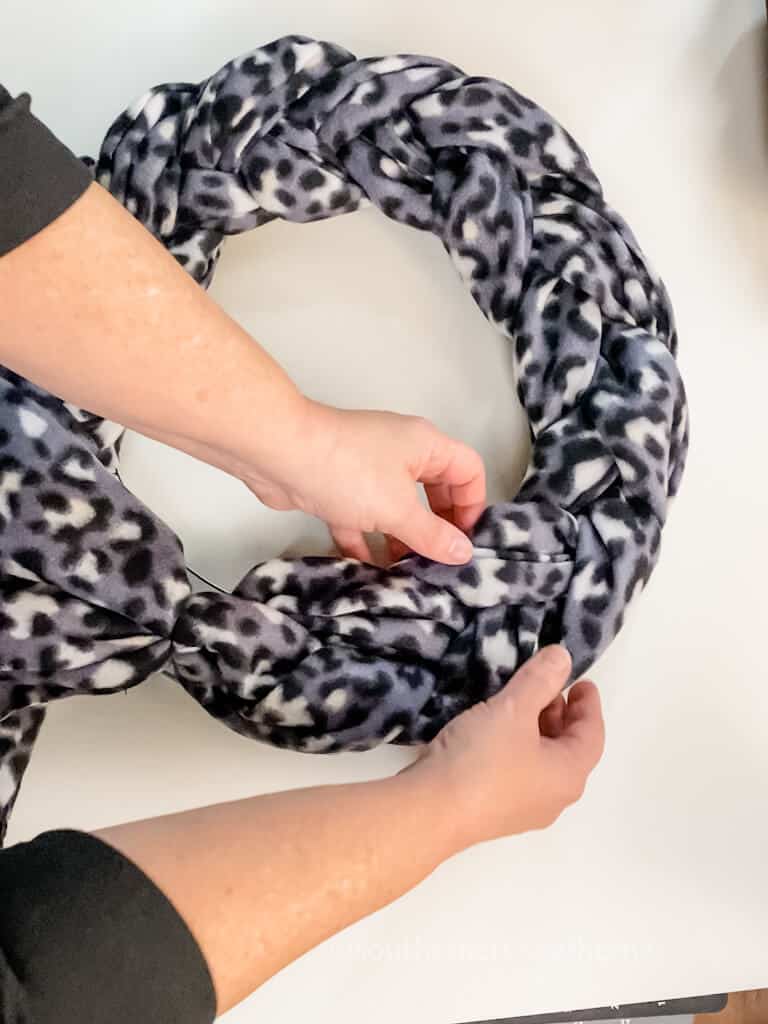
Now, once you flip it over, you can fluff it up, and it really helps it to fit the entire wreath frame.
Extra Winter Wreath Embellishment Options
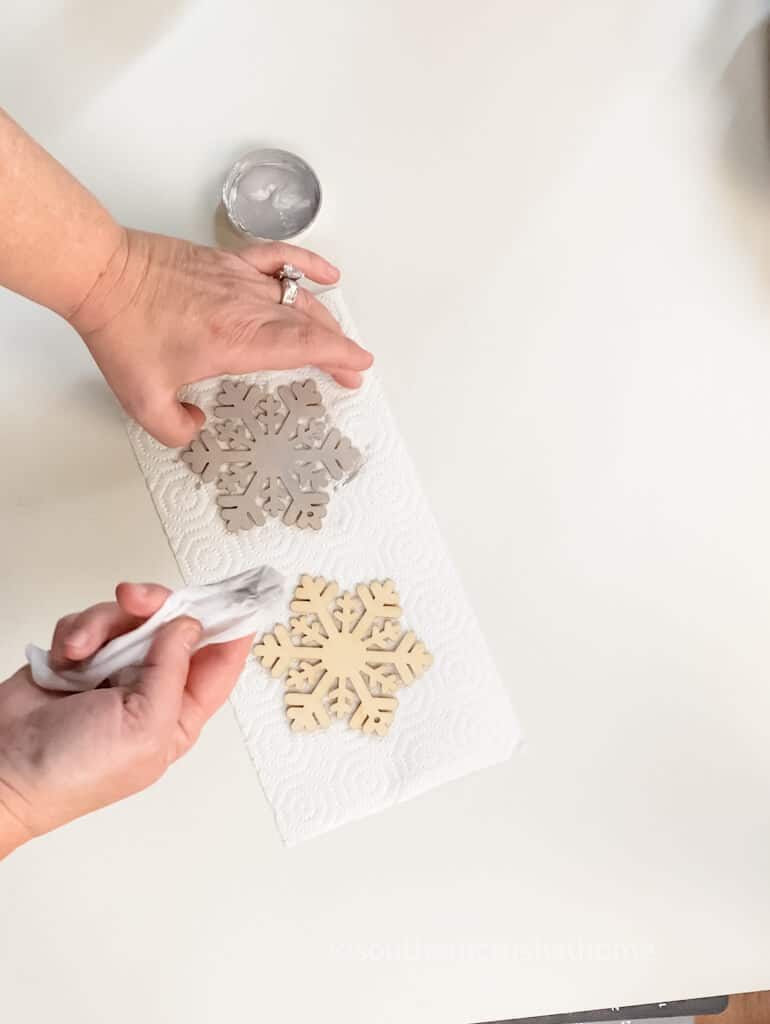
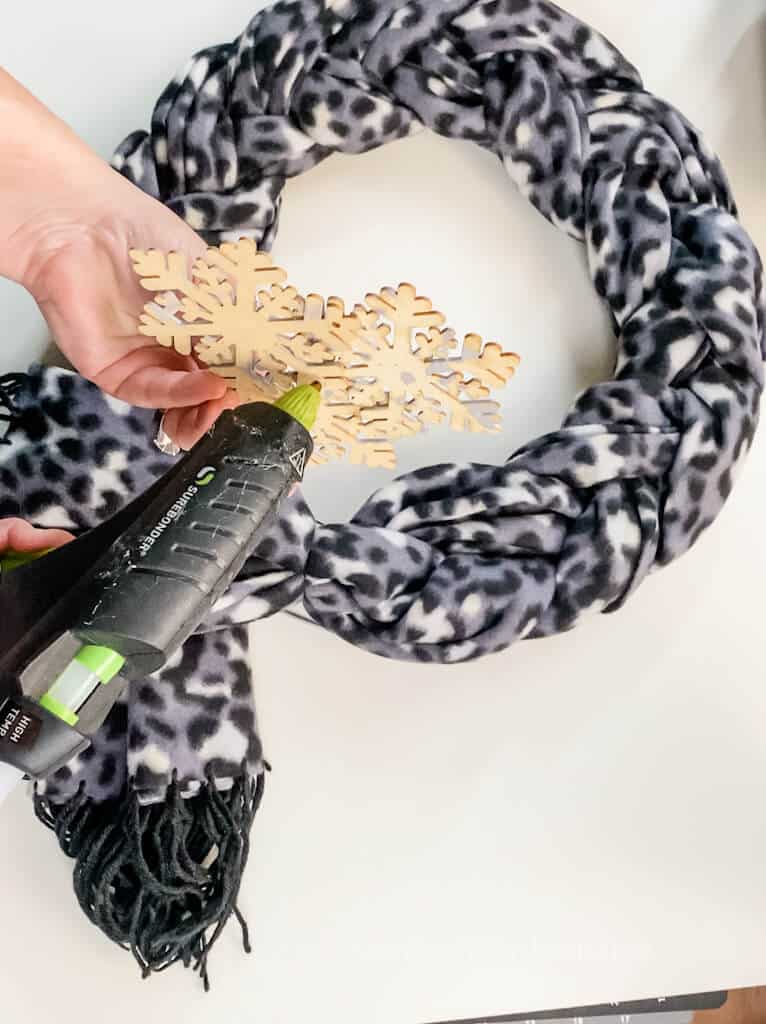
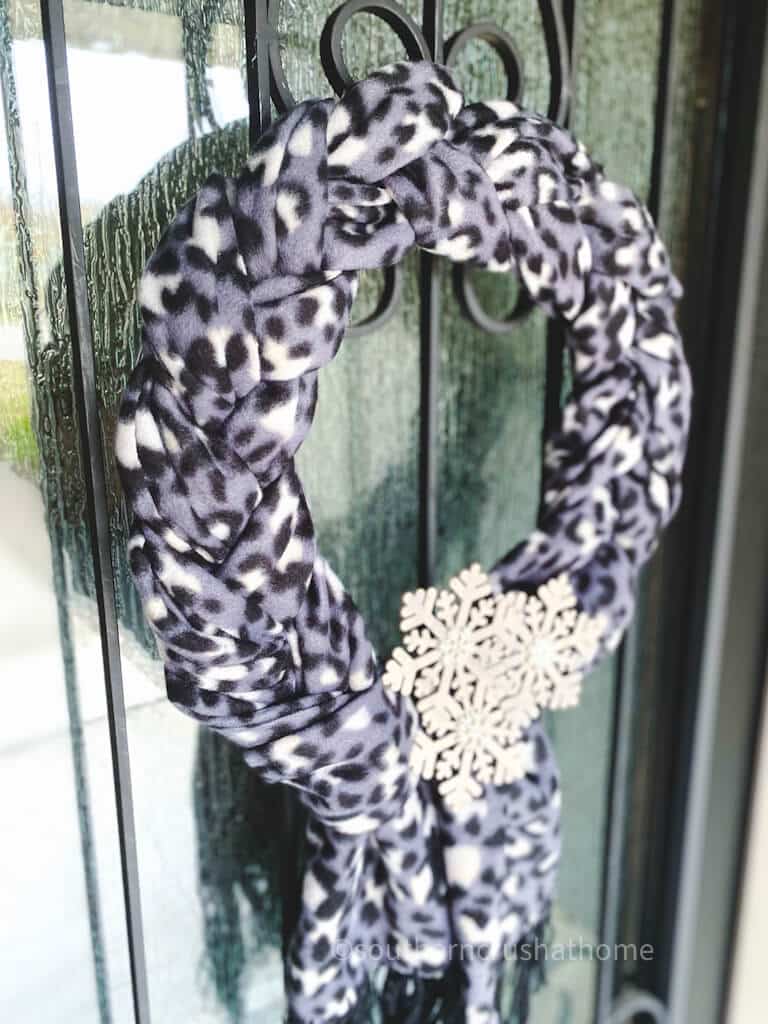
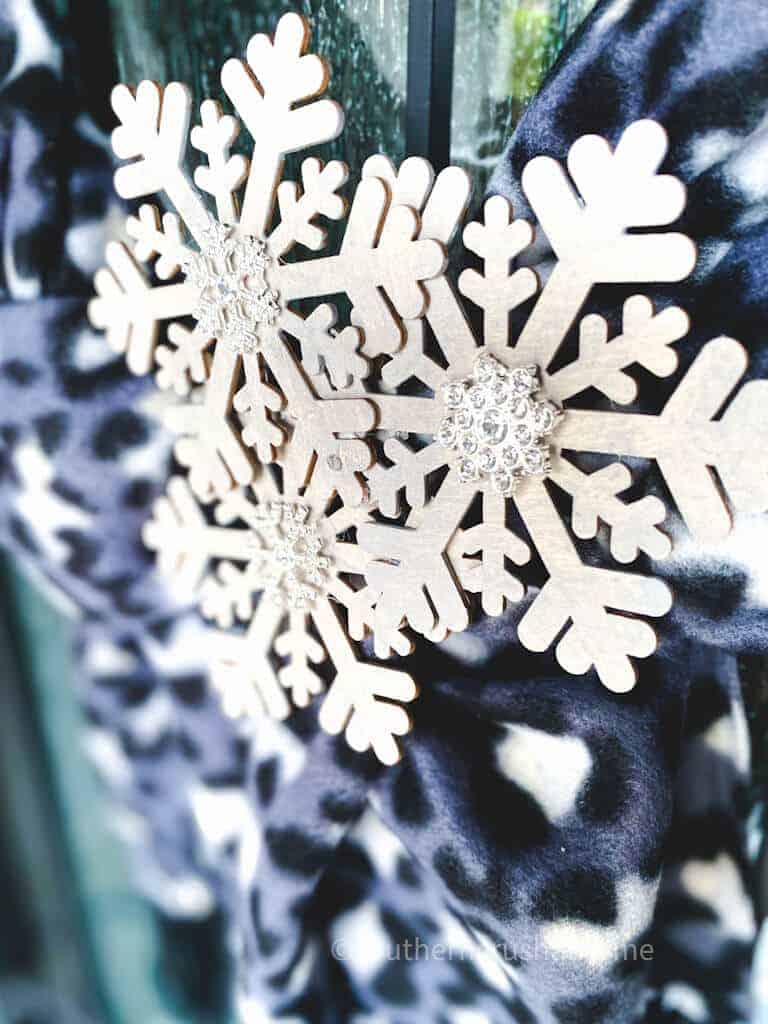
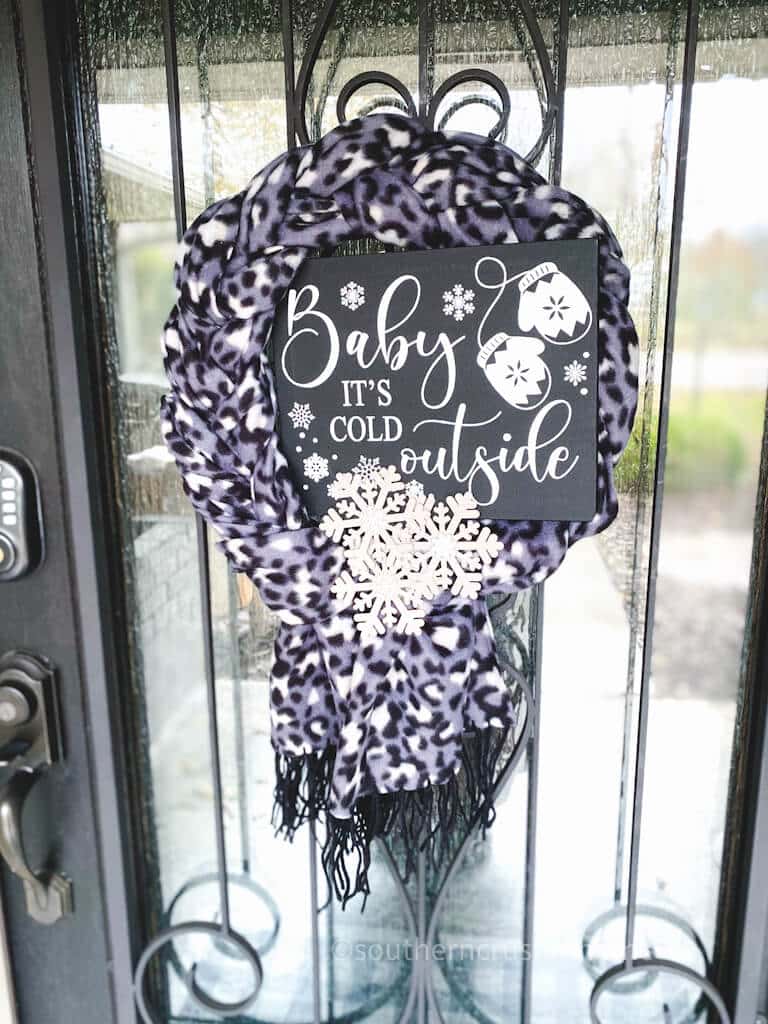
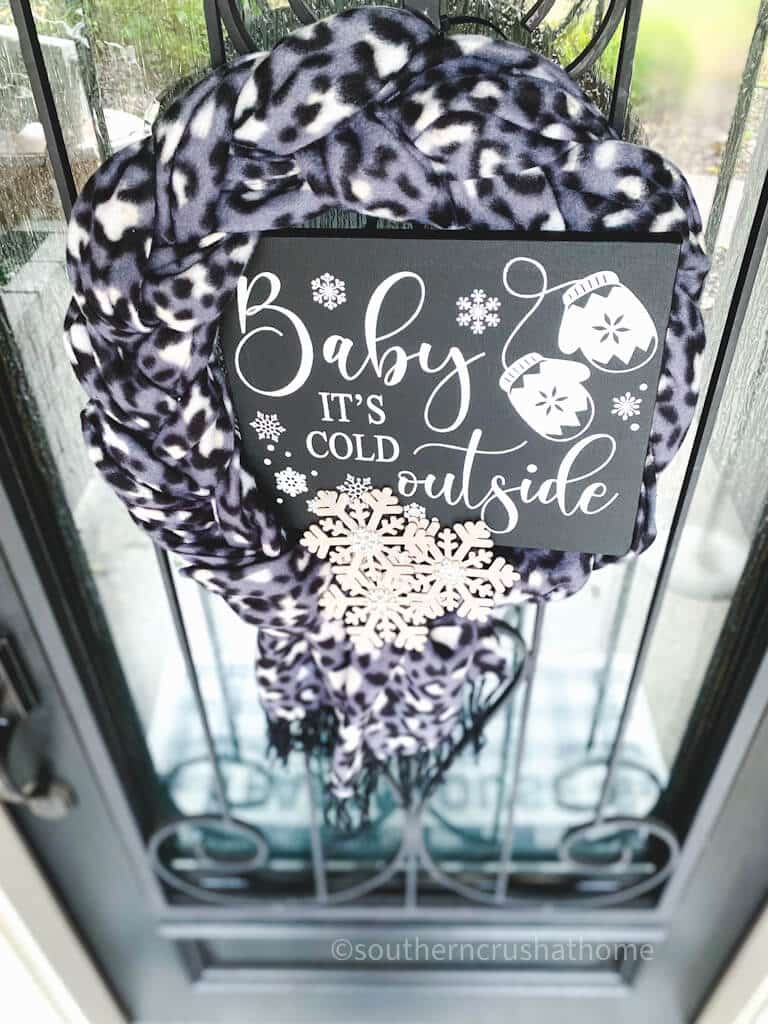
If you want to jazz it up a little bit, take these Dollar Tree wooden snowflakes and paint on some chalk paint using my baby wipe painting technique. Just dab a little baby wipe into some chalk paint and wipe it quickly over the snowflakes to kind of give them a little touch of color. Once they are dry, add a dot of hot glue and a snowflake bling embellishment to the center.
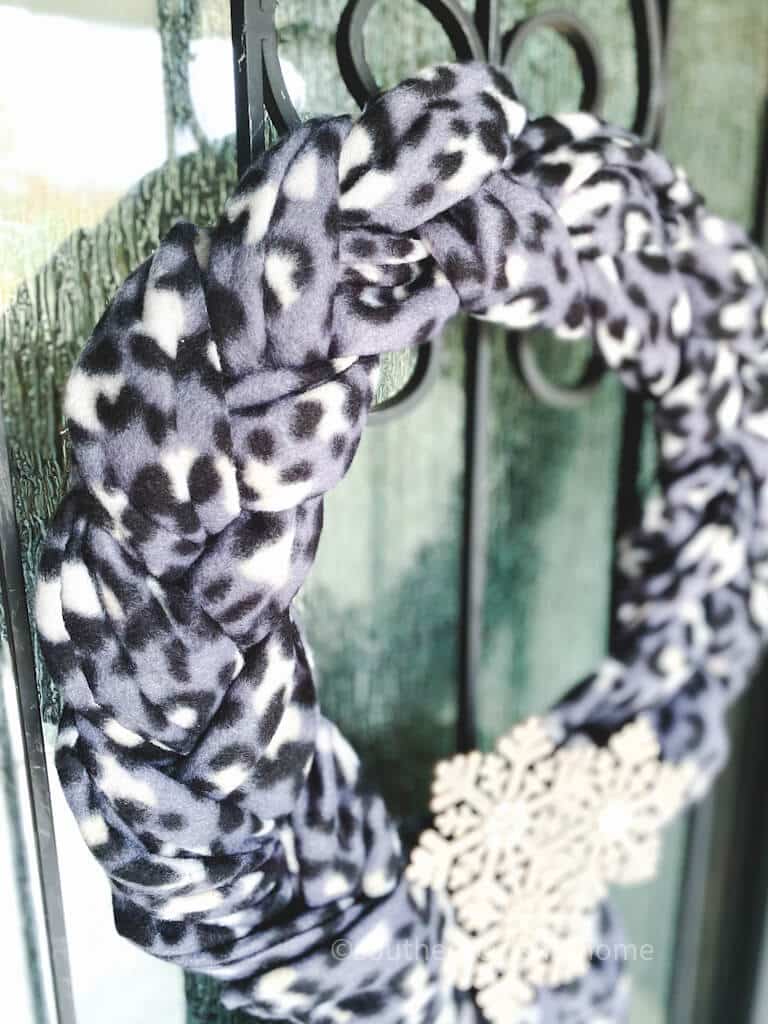
And I ended up doing three of these and gluing them together. And then I did glue them just ever so slightly to the side of the scarf wreath.
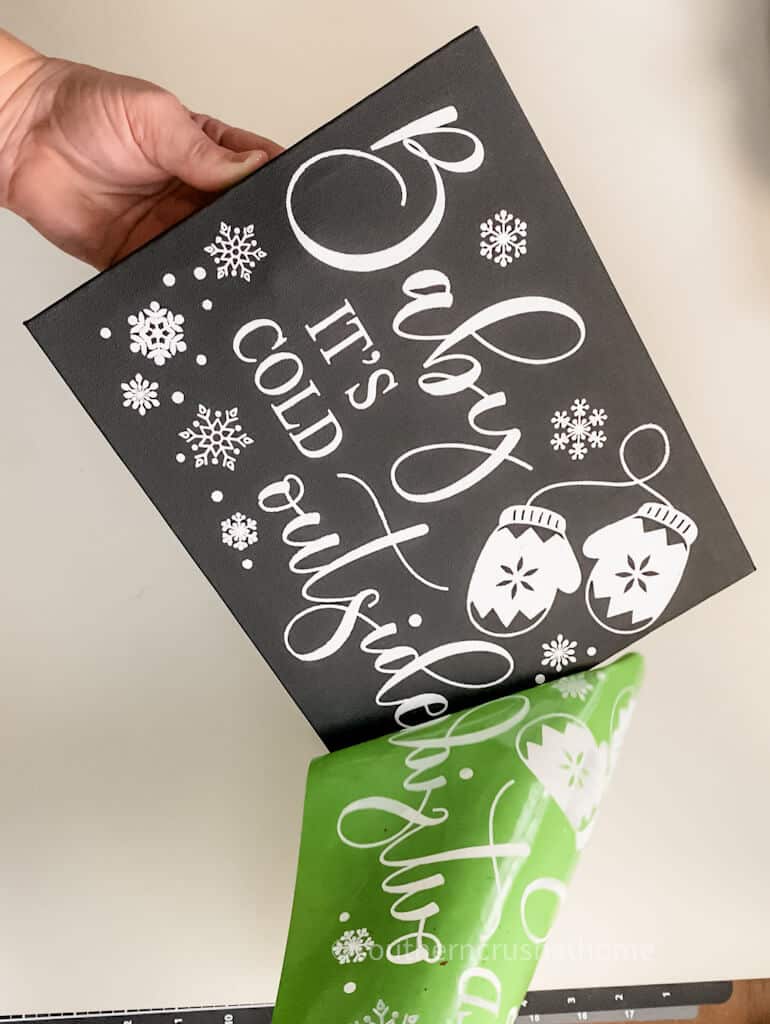
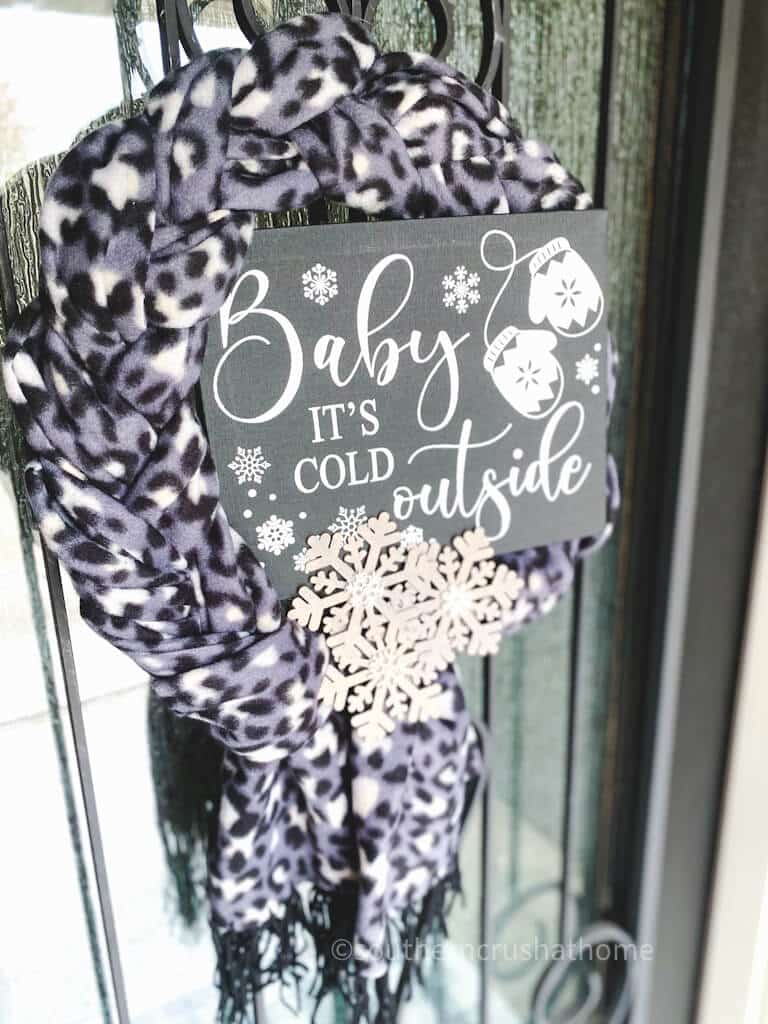
This last part is totally optional, but I love, love using these magnolia stencils in my projects. I took a crafter square dollar tree black canvas and a little bit of the white, brilliant white chalk paste with my squeegee.
Baby, it’s cold outside. Let me know if it’s cold where you are. I’m in Texas, and it’s not that cold here yet.
Instantly, I’m in love.
All right, so you can do the wreath like this. Option number one with no sign.
I love the look of those scarf braids. What do you think?
Oh, my gosh, you guys, I think it’s absolutely stunning on the front door. So this is more of the classic traditional.
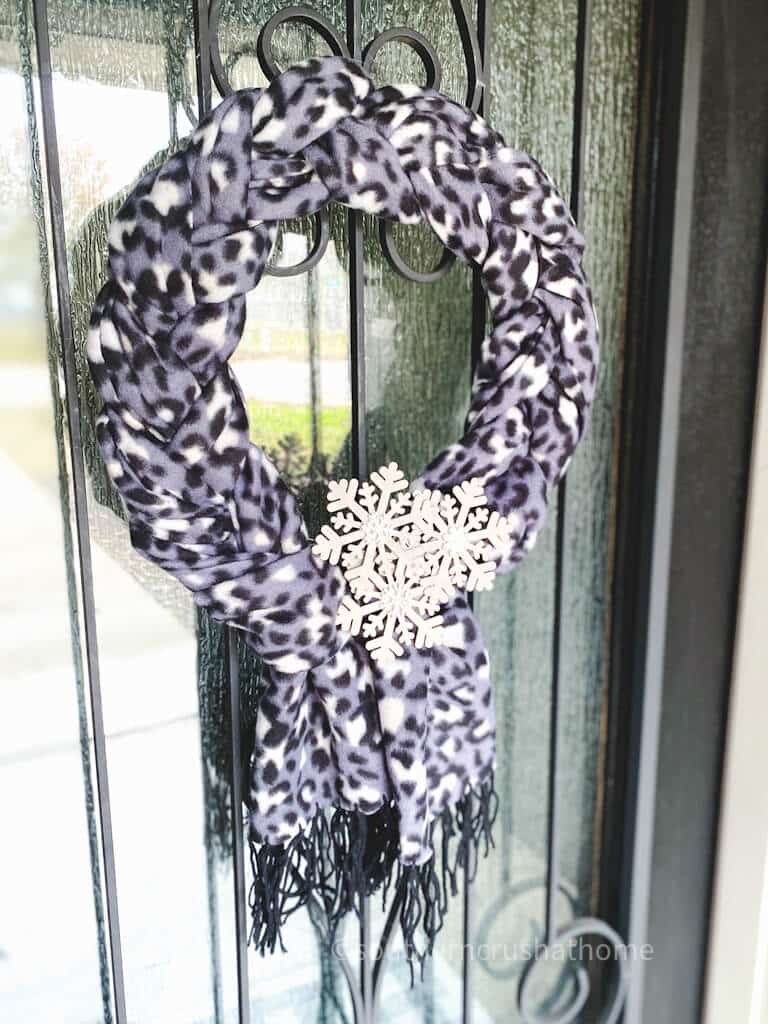
It’s got a braided look with those little bling snowflakes and the dangling scarf at the bottom.
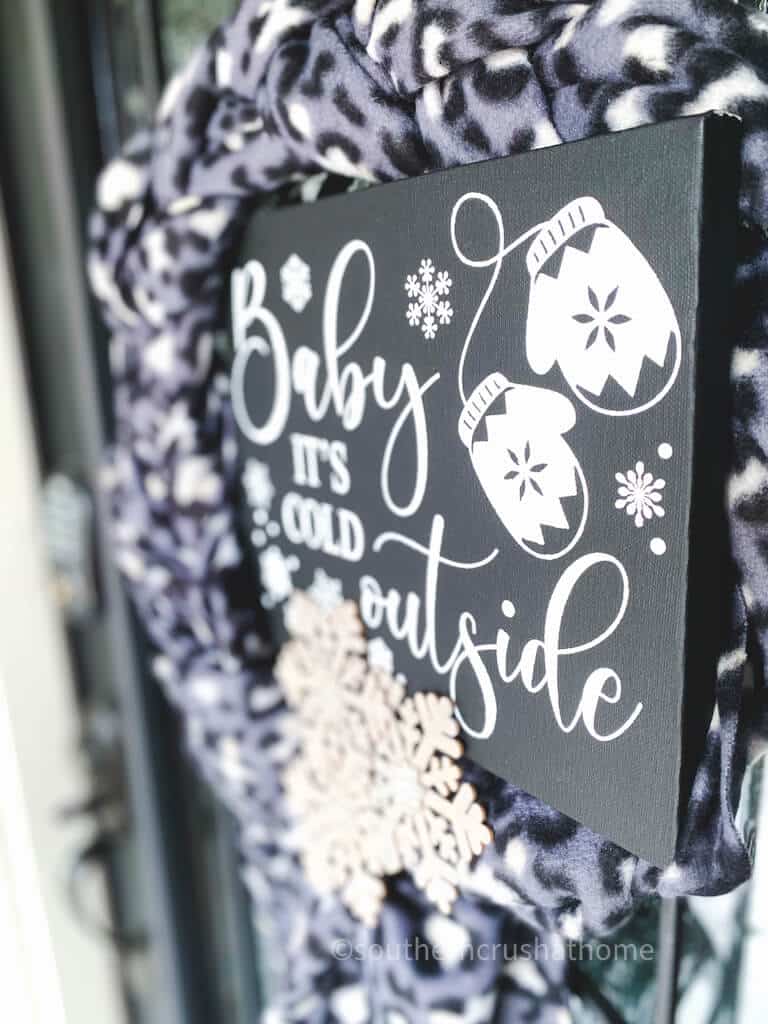
Or you can always alternately add the baby it’s cold outside sign, which I think adds a little extra to this wreath.
Imagine this greeting your hard-working delivery drivers all season long!
Either way, I think it’s cute.
Let me know in the comments below which version you like, with or without the sign. And I appreciate you so much, my friend, for being here. Merry Christmas.

How to Make a Dollar Tree Winter Wreath
Equipment
- scissors
Materials
- 1 14" Dollar Tree Wreath Frame
- 3 Winter Scarves
- string
Instructions
- Simply lay the scarves on top of one another until they are flat and aligned at each end, or at least the top end. Take a little bit of string and tie it off at about six inches down on the stack of scarves. That’s going to serve as the starting point for our braid.
- Now separate all three scarves and just start your crisscross weaving like you are braiding your little girl’s hair. That’s all I could equate it to. And so one over the other, just like a regular braid. Nothing fancy, nothing difficult. Just go back and forth until you have an entire rope, basically braided of three scarves.
- Make sure to keep some loose space between the knots so that it’s not super tight and so that the braided scarf piece will go further once it’s laid down on the wreath form. Basically, just braid it, but keep the braid a little bit on the loose side.
- My favorite thing is that this is super simple, and anyone, anyone can do this. Once you get to the end that is about the same distance as the beginning, grab more of the string and tie it off here at this end as well. Again, about six to ten inches from the bottom. You’ll want a little bit extra hanging off of the wreath.
- Position your braided scarf rope onto your wreath frame and using the black string tie it onto the wreath frame from the back. Using more pieces of string you’re going to take a section at a time and tie it to the back of the frame weaving through the scarf and then around each side of the bars on the back. That is going to secure it to the wreath frame.
- Now, once you flip it over, you can fluff it up, and it really helps it to fit the entire wreath frame.