Acrylic Pour Painting: Easy Step-by-Step Tutorial
Are you looking for a fun and relaxing new way to create beautiful works of art? Why not give acrylic pour painting a try? It’s an easy, no-fail process that is sure to get your creative juices flowing. It's literally my new favorite craft! All you need is some acrylic pour paint and a few simple steps.
Follow along below and I'll teach you how to get started making beautiful works of art with acrylic pour painting.
Be sure to PIN this one for later!
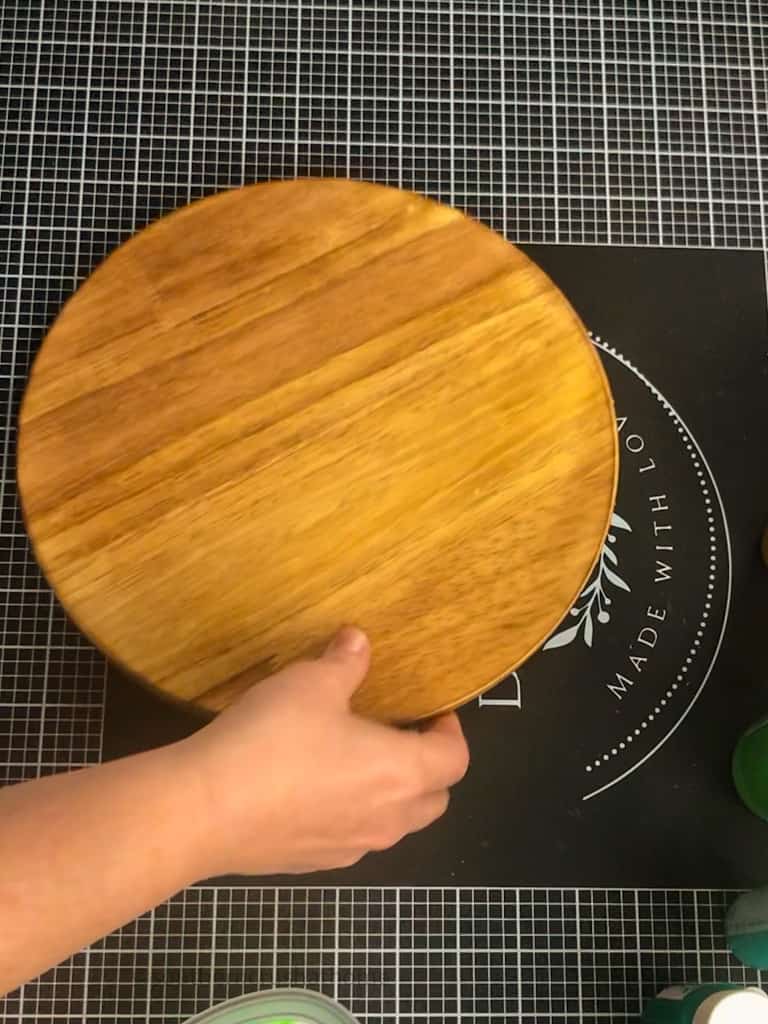
I also shared this process here on a Dollar Tree Pizza Pan in case you missed it!
This blog post contains affiliate links. The opinions are wholly my own from my own experience. I may earn a small commission from clicks through to the websites that end in a purchase.
Supplies Needed
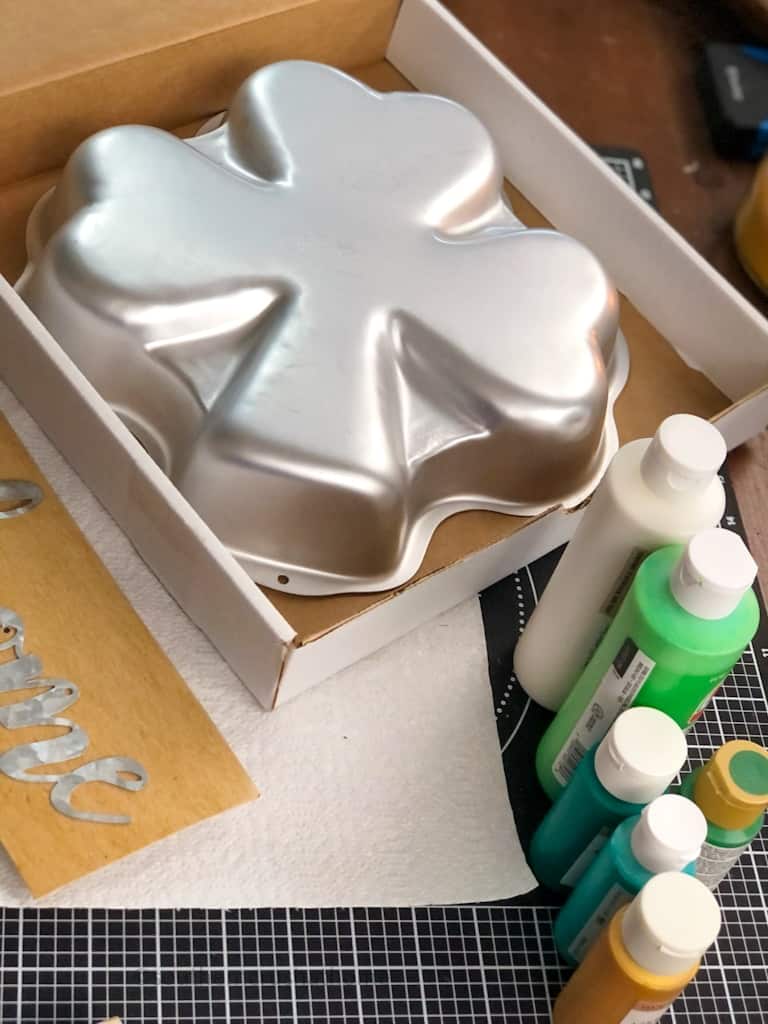
The first thing you need to do before you start painting is to gather your supplies and prep your project. You’ll need the following items:
- Acrylic paints in different colors (these can be ready-to-pour paints or you can add water or paint pouring medium to them first – see below)
- Pouring medium (this helps the paint flow smoothly)
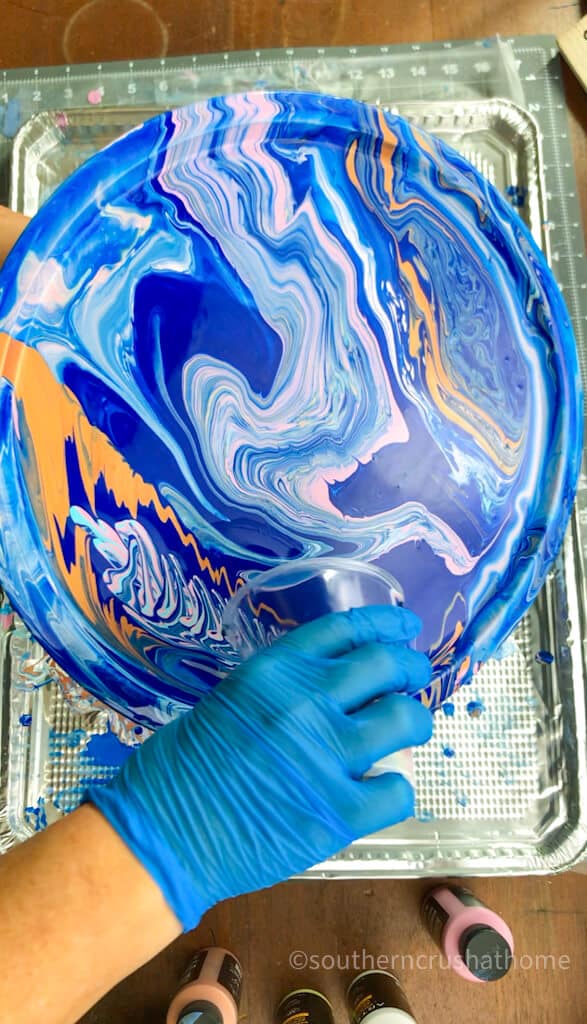
- Mixing cups or containers for each color of paint or all in one cup called “the dirty pour method” (which is what I'm demonstrating here)
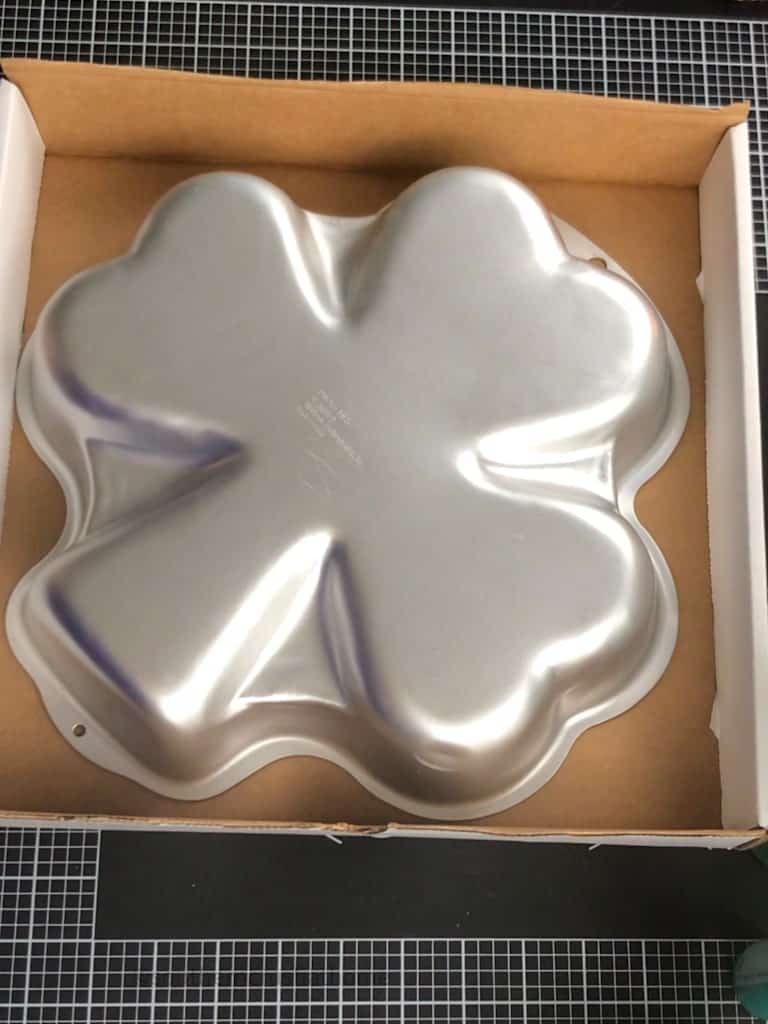
- A canvas or other surface to paint on (flat is best, but I'm demonstrating on an aluminum cake pan shamrock-shaped domed surface here)
- Cardboard box or container to catch all of the paint that is poured.
- Optional turntable to go underneath the project to spin and get all angles easily.
- Heat Tool
- Gloves
Step-by-Step Acrylic Pour Painting Instructions
Get Creative with Acrylic Pour Painting!
YouTube Step-by-Step Video Tutorial
Prep your project before you start by placing it inside a container to catch all of the drips and overflow paint like this cardboard box or a foil tray.
Optionally, you can add a fun turntable or lazy Susan underneath to make it easy to spin your project around as you work with pouring the paint.
Step One Mix Paints
Now that you have all of your supplies and your project space is prepped, it’s time to mix up your paints! If you are working with regular acrylic paint, start by pouring each color into its own separate container. Then add the same amount of pouring medium into each container and mix it together with the acrylic paint. You should continue mixing until the mixture has a thin, syrup-like consistency—it should be thin enough that it will easily flow off of a spoon when held upside down over your canvas.
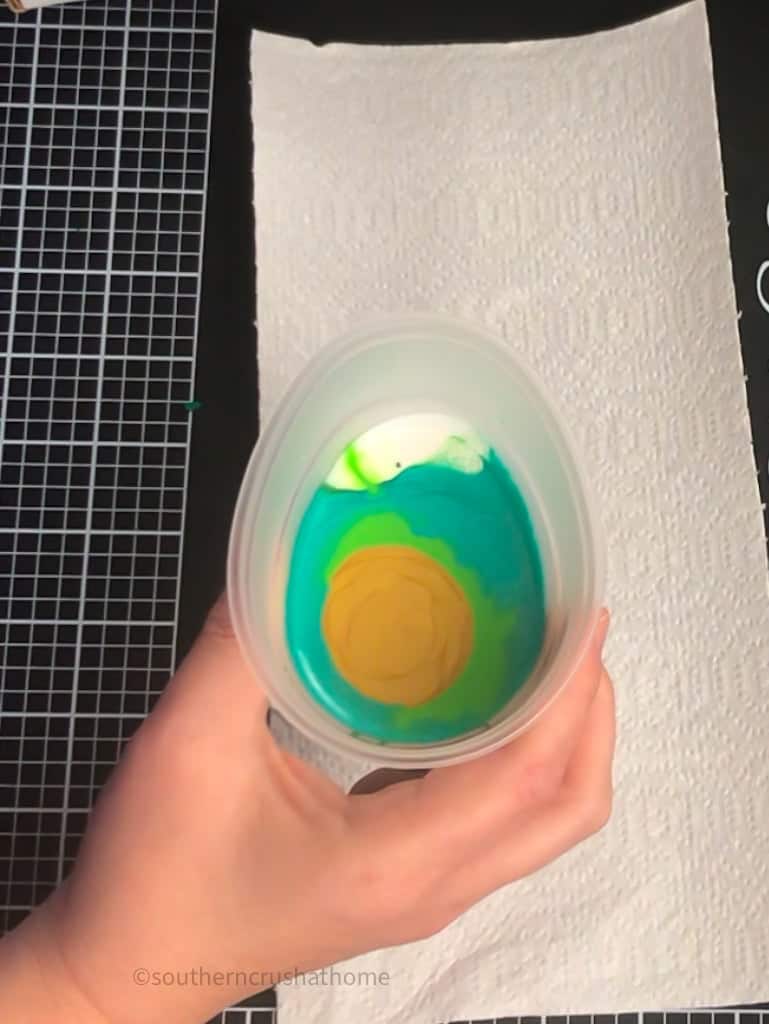
If you are working with ready-to-pour paints, you can simply add them each into one cup if you'd like to do the “dirty pour” method I'm demonstrating in this tutorial.
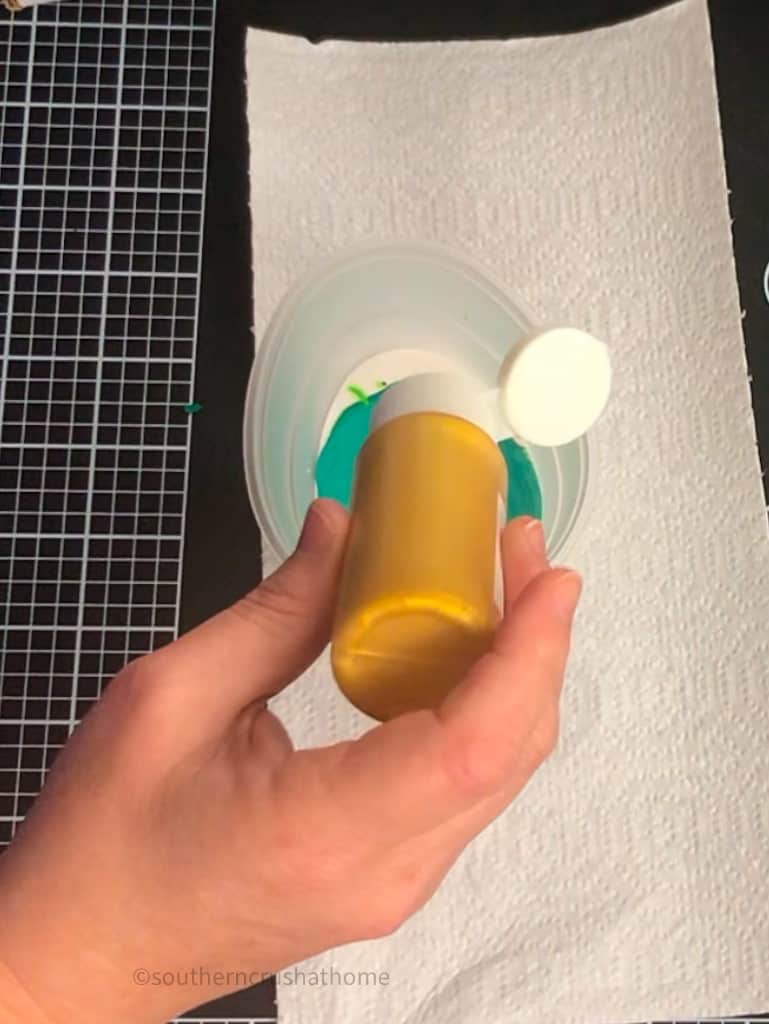
Once your paints are mixed properly, you can start creating your masterpiece!
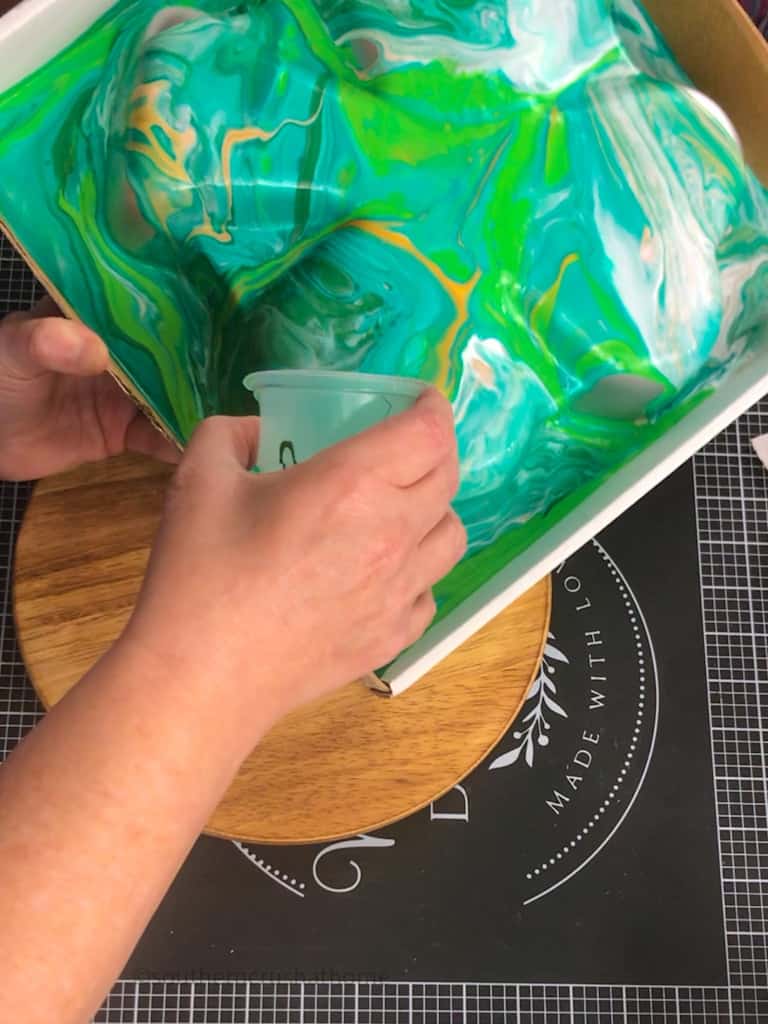
Step Two Pour Paints
Now comes the fun part—creating your artwork! Begin by pouring small amounts of the colored mixture onto the canvas in any pattern or design that you like.
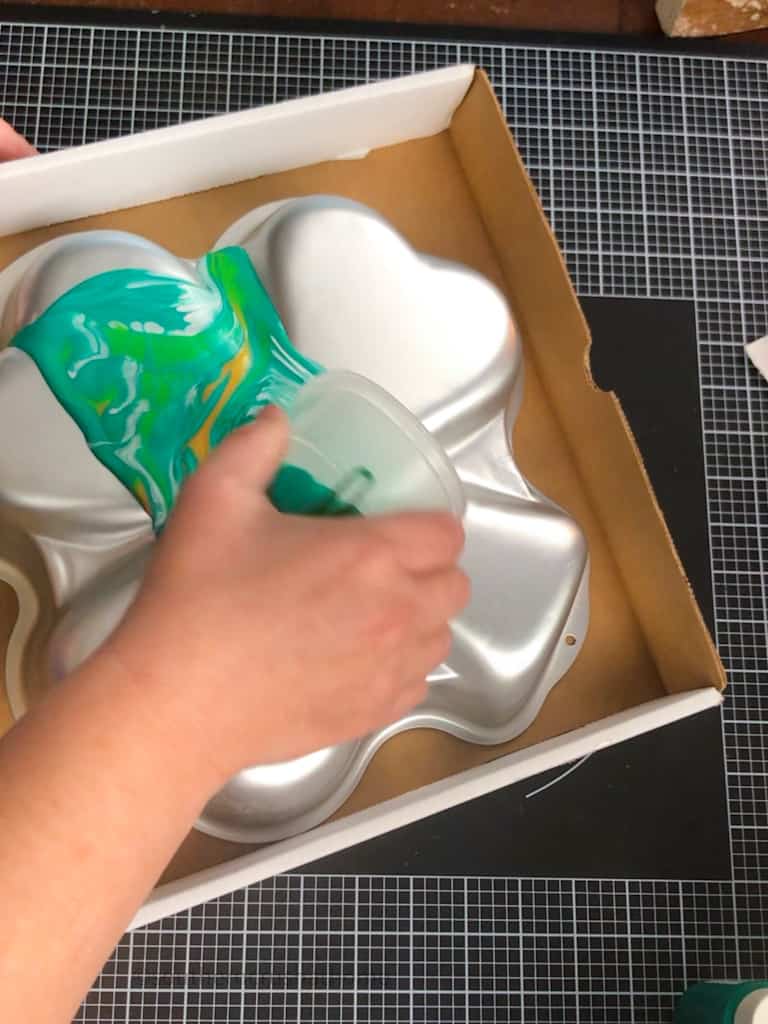
Feel free to experiment with different patterns and designs as well as different amounts of each color.
Once all of the colors are poured onto the canvas, use a heat tool set on low heat to blow across the surface until all of the colors begin to blend together in swirls and patterns.
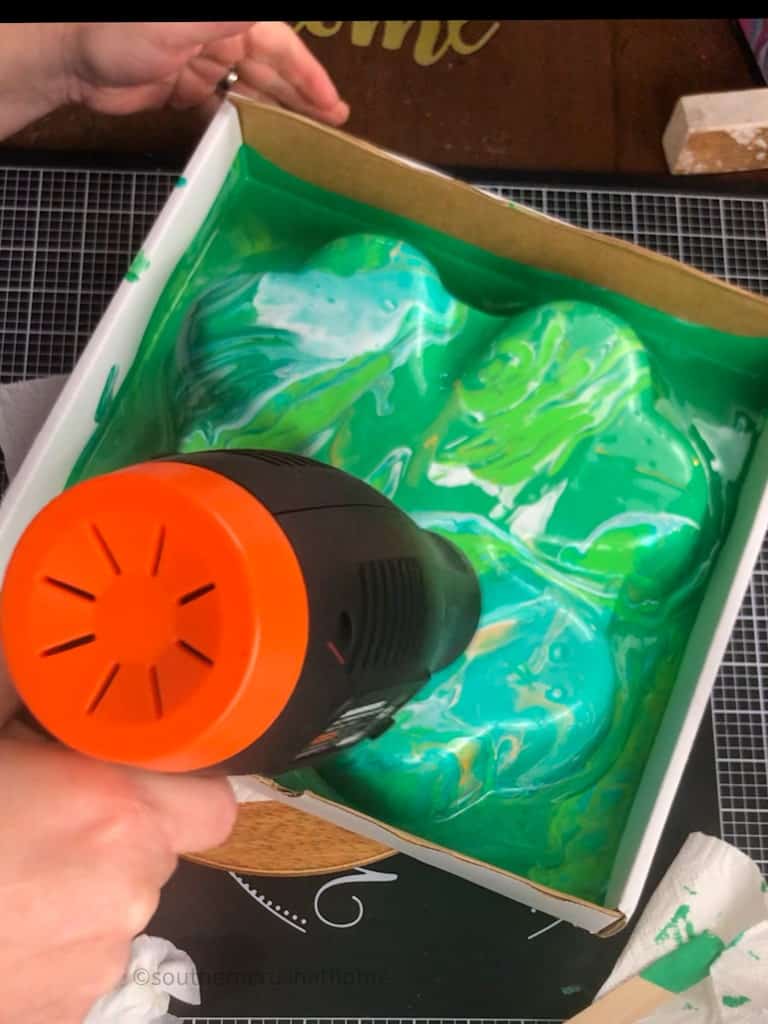
Depending on how much movement you want in your painting, this could take anywhere from one minute to five minutes. When finished blowing across the surface, set aside for 12 hours so that it can dry completely before adding any additional details or embellishments.
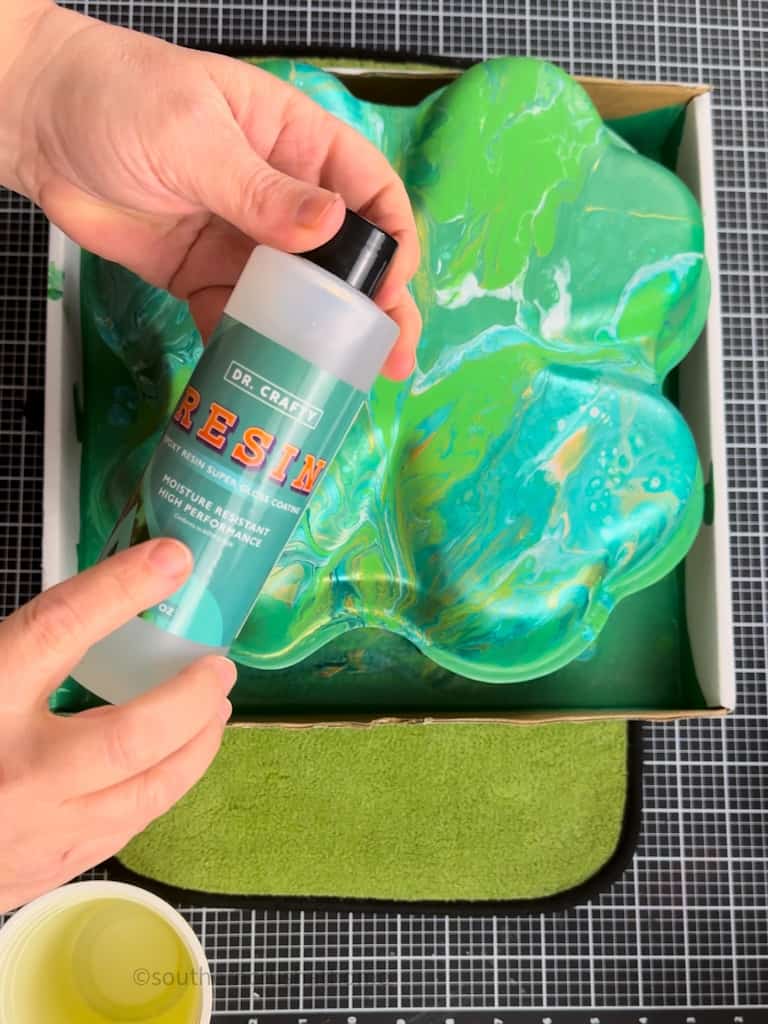
Step Three Optional Resin Epoxy Top Coat
Once your piece is completely dry, you can create a shiny, protective topcoat for it by pouring epoxy or resin over the top.
Mix your resin and the hardener and stir well.
Pour evenly over your surface. Use a craft stick to spread or simply use your gloved hands to smooth over the entire surface.
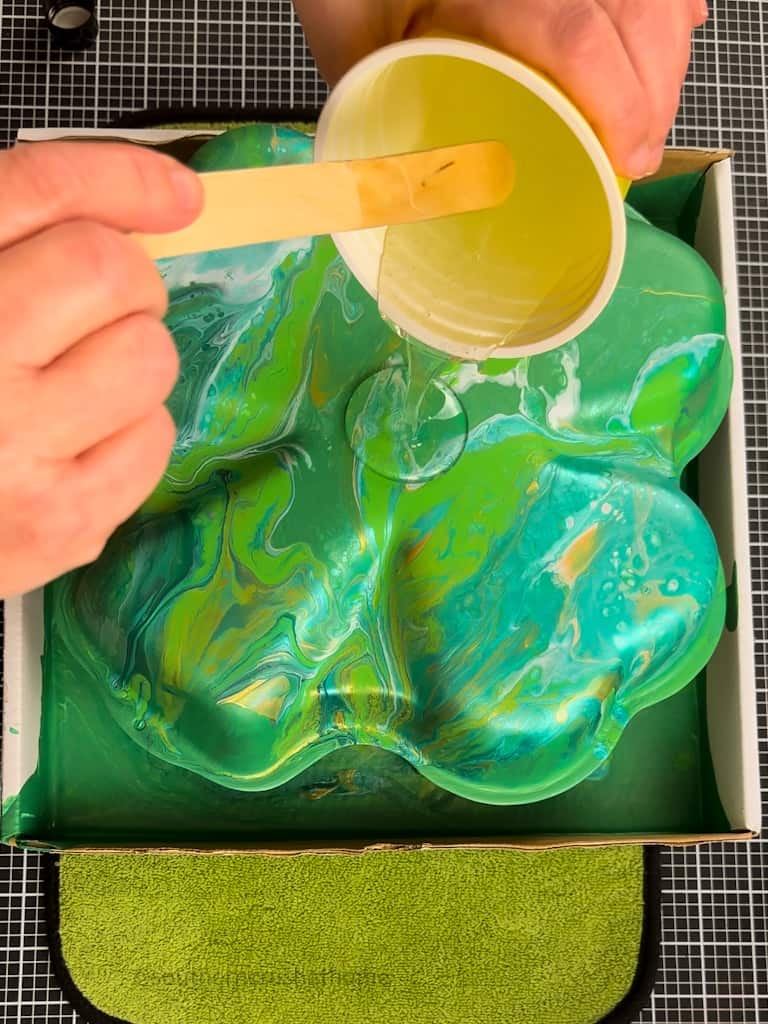
Hit it with the heat tool again to pop any bubbles and to move it around.
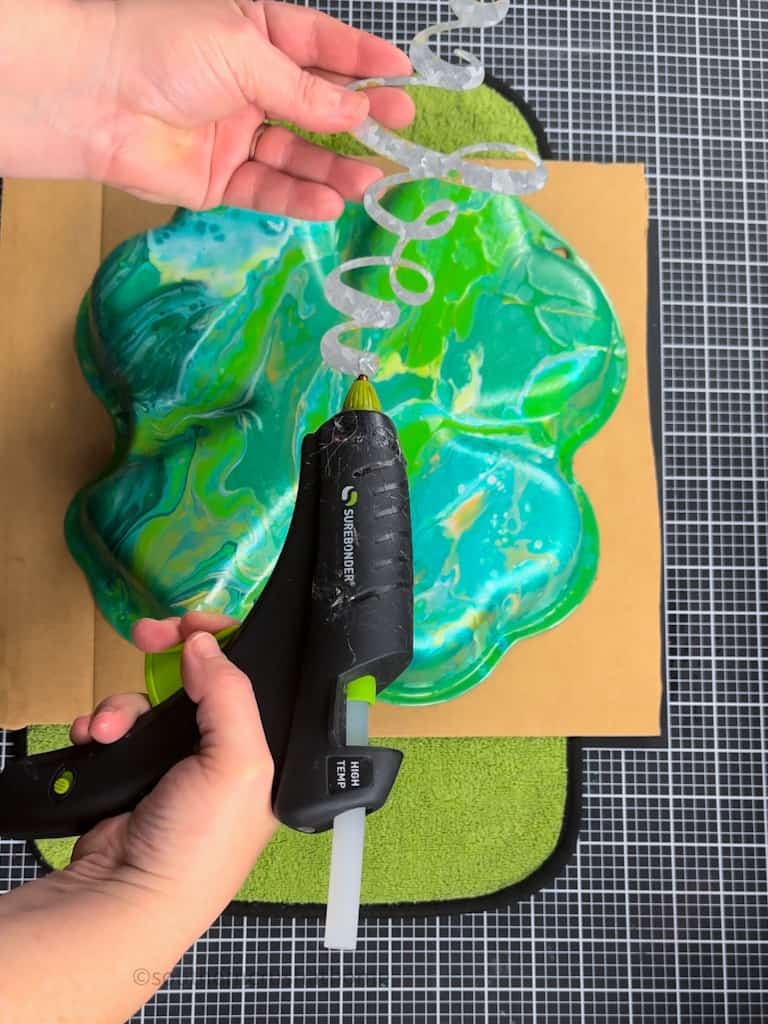
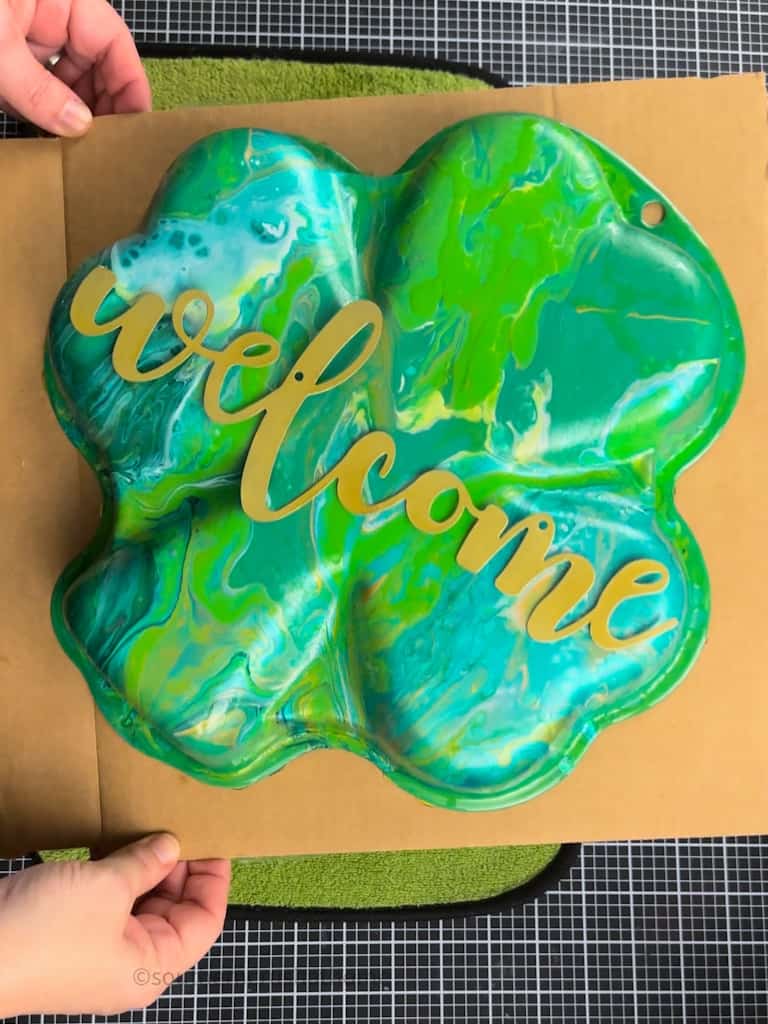
Step Four Embellish Your Paint Pour Project
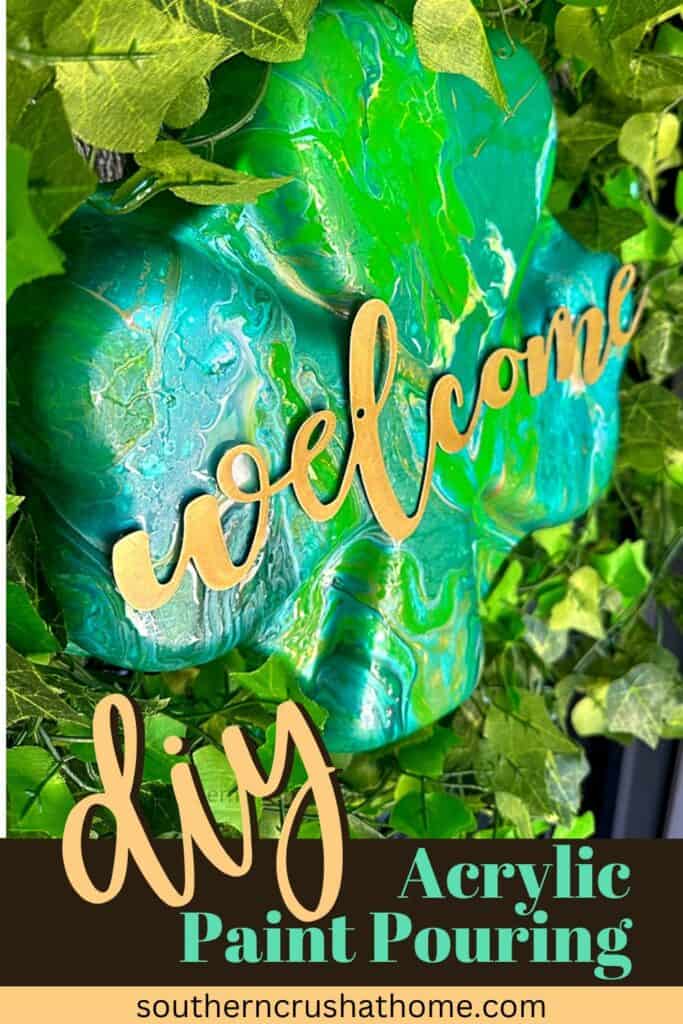
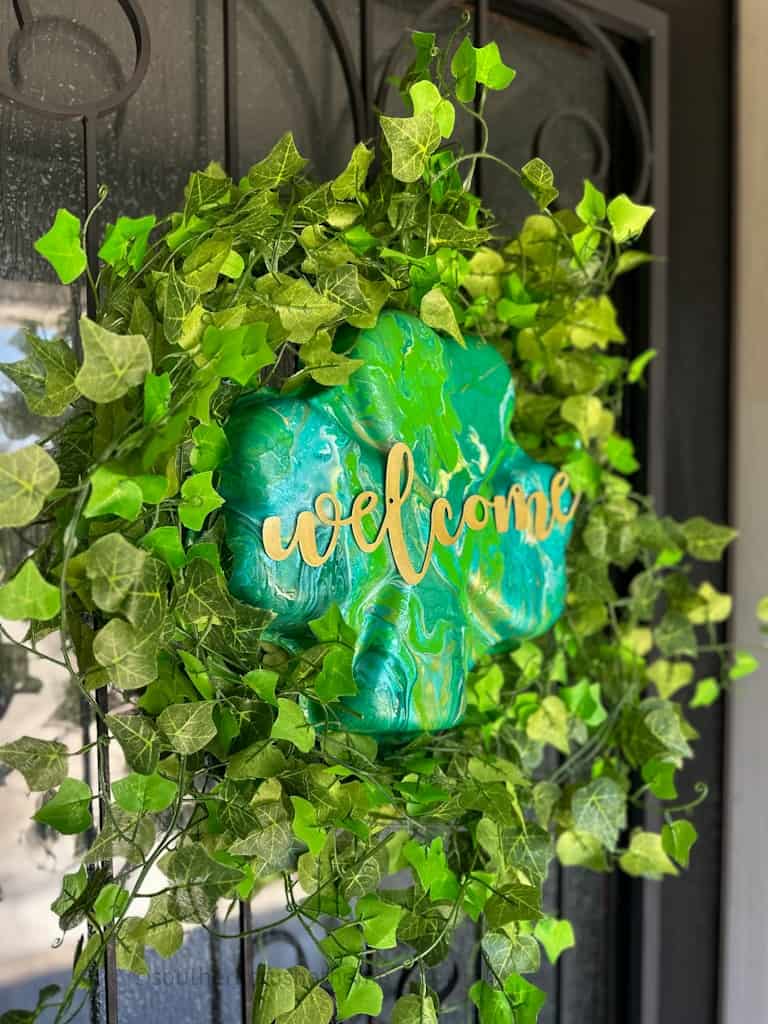
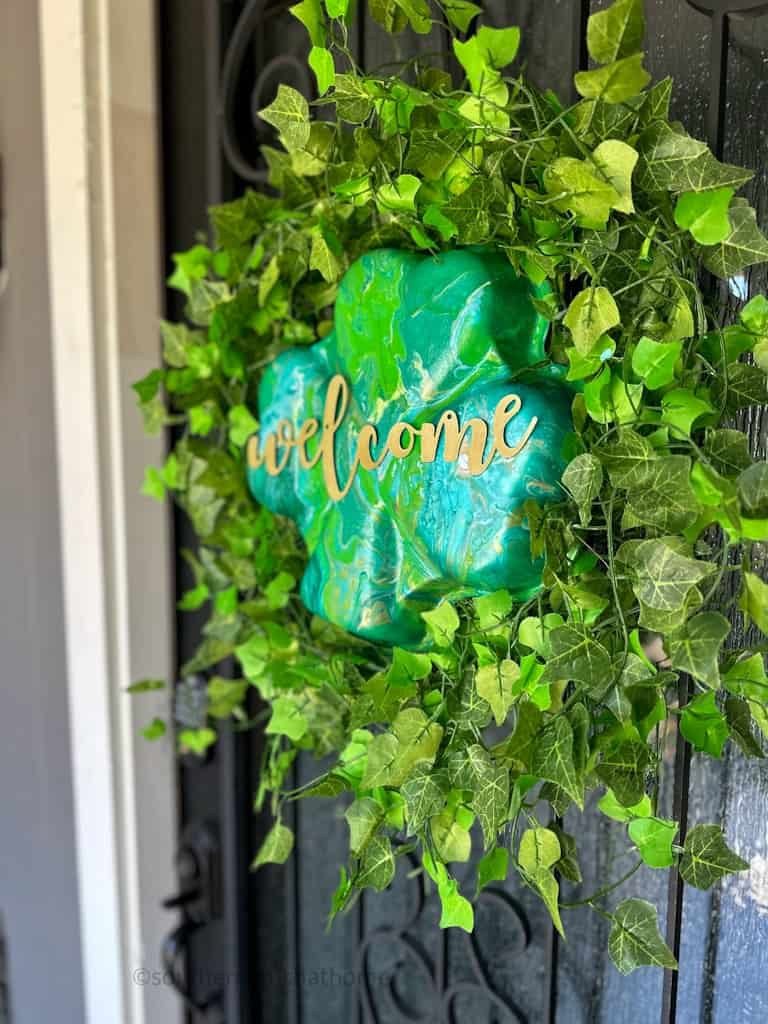
This is the fun part! Wait, I already said that… lol! This whole project is so much fun! I took a Dollar Tree galvanized metal script word “welcome” and spray painted it gold. Then I added it to my piece using hot glue.
It really made the gold in the acrylic paint colors pop!
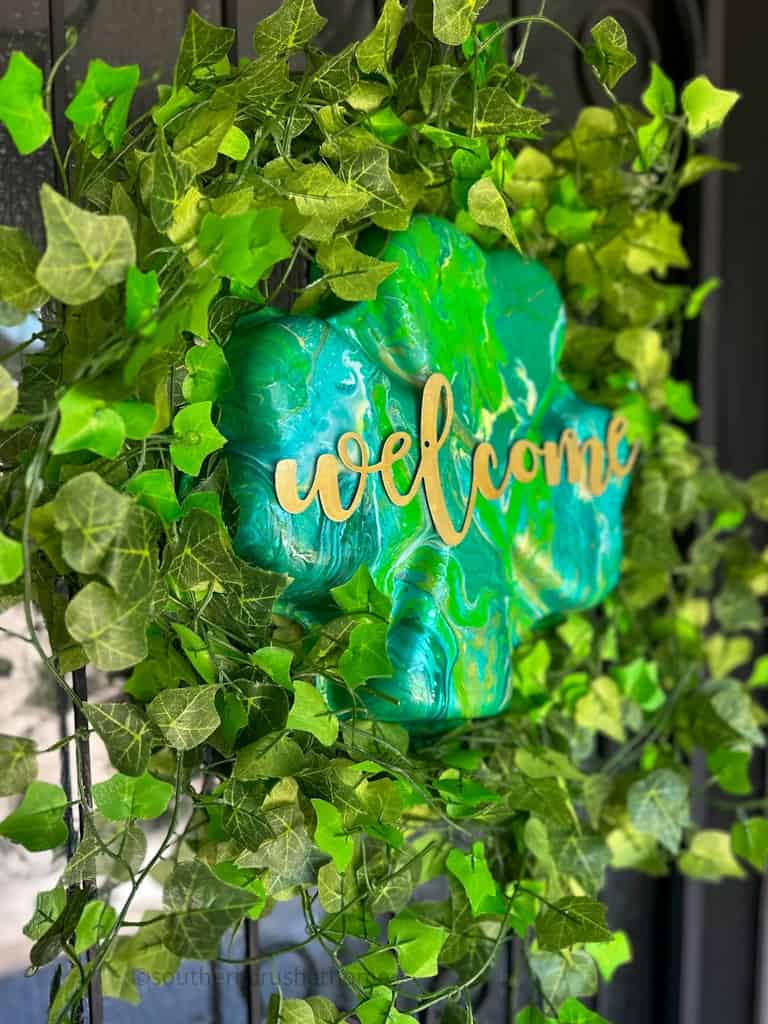
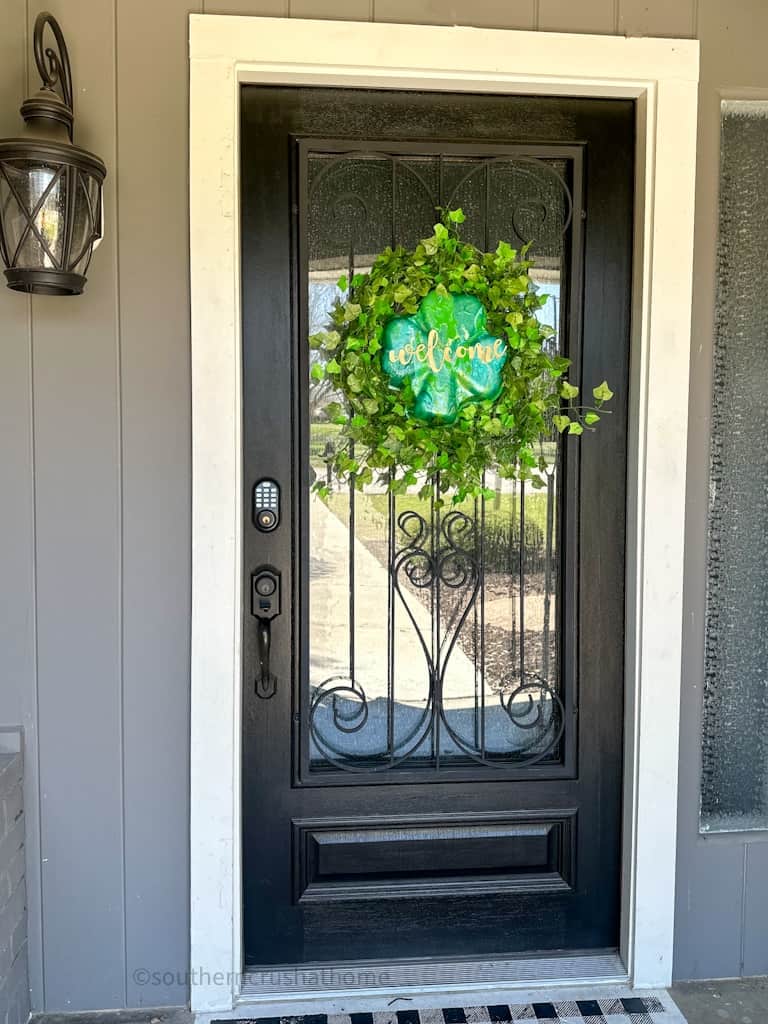
Ultimately, I added this shamrock cakepan to the inside of a wreath! Using a dollar tree wreath form, I added a bit of faux ivy greenery and zip-tied the cake pan to the center.
What do you think of it on my front door? Will you try this fun acrylic paint pouring for yourself?
The possibilities are endless! Think of all the fun things you can use this paint technique on. Did you see this other project I did? It turned out just as beautiful and I promise, you can do it too!
Acrylic pour painting is an easy and fun way to express yourself through art without having any previous experience or knowledge about painting techniques or styles. All it takes is some basic supplies, mixing up some colorful paint mixtures, and letting your creativity lead you as you create unique works of art!
So if you’re feeling inspired and ready for a new crafting adventure then why not give acrylic pour painting a try? With just these few simple steps you can make stunning artwork that will look great hanging up in any room in your home!

Acrylic Pour Painting: Easy Step-by-Step Tutorial
Equipment
- Turntable or lazy susan
- heat gun
- Mixing cups or containers for each color of paint or all in one cup called "the dirty pour method"
Materials
- Acrylic paints in different colors these can be ready-to-pour paints or you can add water or paint pouring medium to them first – see below
- Pouring medium this helps the paint flow smoothly
- A canvas or other surface to paint on flat is best, but I'm demonstrating on an aluminum cake pan shamrock-shaped domed surface here
- Cardboard box or container to catch all of the paint that is poured.
- Gloves
Instructions
Step One Mix Paints
- Now that you have all of your supplies and your project space is prepped, it’s time to mix up your paints! If you are working with regular acrylic paint, start by pouring each color into its own separate container. Then add the same amount of pouring medium into each container and mix it together with the acrylic paint. You should continue mixing until the mixture has a thin, syrup-like consistency—it should be thin enough that it will easily flow off of a spoon when held upside down over your canvas.
- If you are working with ready-to-pour paints, you can simply add them each into one cup if you'd like to do the “dirty pour” method I'm demonstrating in this tutorial.
Step Two Pour Paints
- Now comes the fun part—creating your artwork! Begin by pouring small amounts of the colored mixture onto the canvas in any pattern or design that you like. Feel free to experiment with different patterns and designs as well as different amounts of each color.
- Once all of the colors are poured onto the canvas, use a heat tool set on low heat to blow across the surface until all of the colors begin to blend together in swirls and patterns.
- Depending on how much movement you want in your painting, this could take anywhere from one minute to five minutes. When finished blowing across the surface, set aside for 12 hours so that it can dry completely before adding any additional details or embellishments.
Step Three Optional Resin Epoxy Top Coat
- Once your piece is completely dry, you can create a shiny, protective topcoat for it by pouring epoxy or resin over the top.
- Mix your resin and the hardener and stir well.
- Pour evenly over your surface. Use a craft stick to spread or simply use your gloved hands to smooth over the entire surface.
- Hit it with the heat tool again to pop any bubbles and to move it around.
Step Four Embellish Your Paint Pour Project
- This is the fun part! Wait, I already said that… lol! This whole project is so much fun! I took a Dollar Tree galvanized metal script word “welcome” and spray painted it gold. Then I added it to my piece using hot glue.