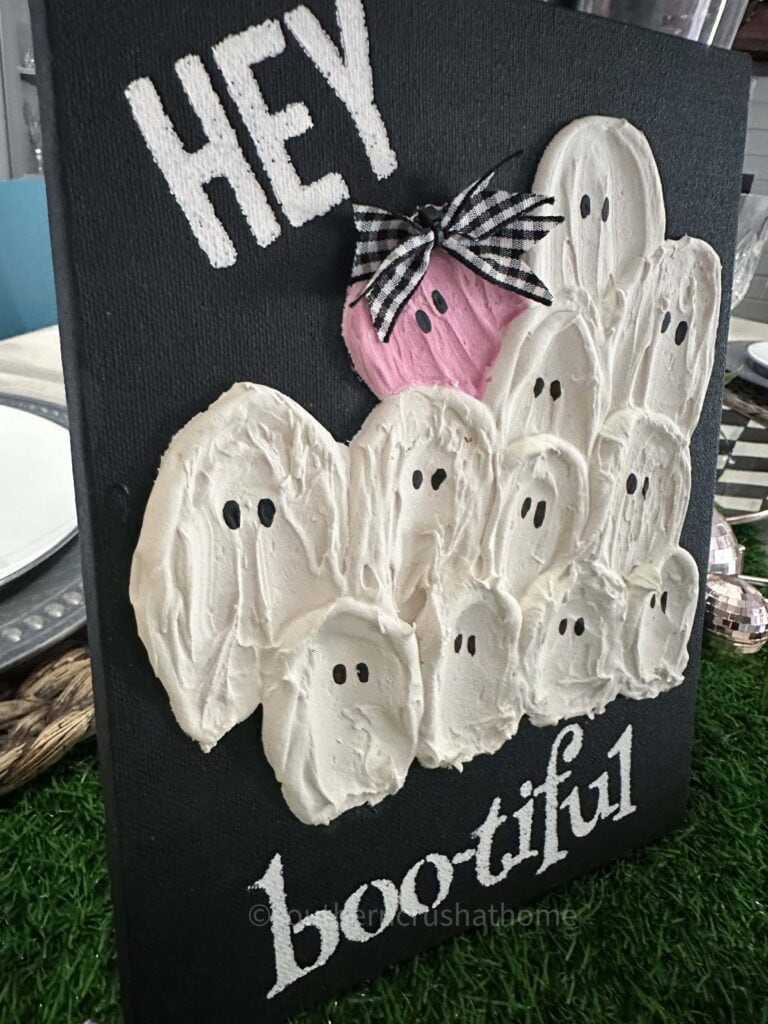
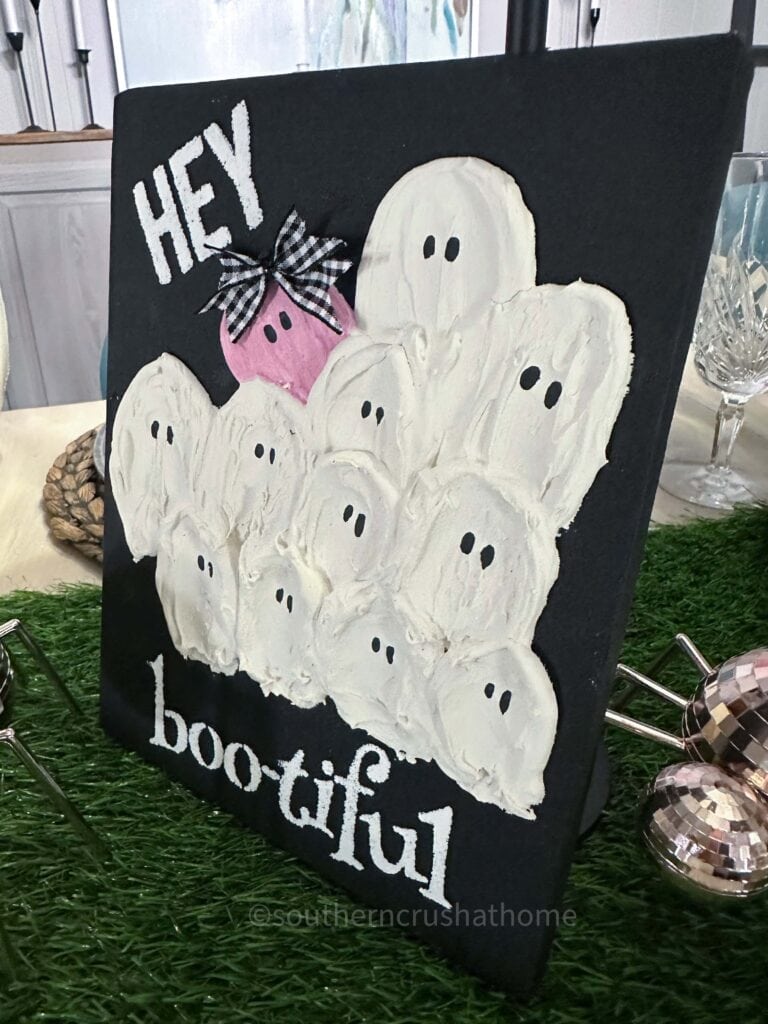
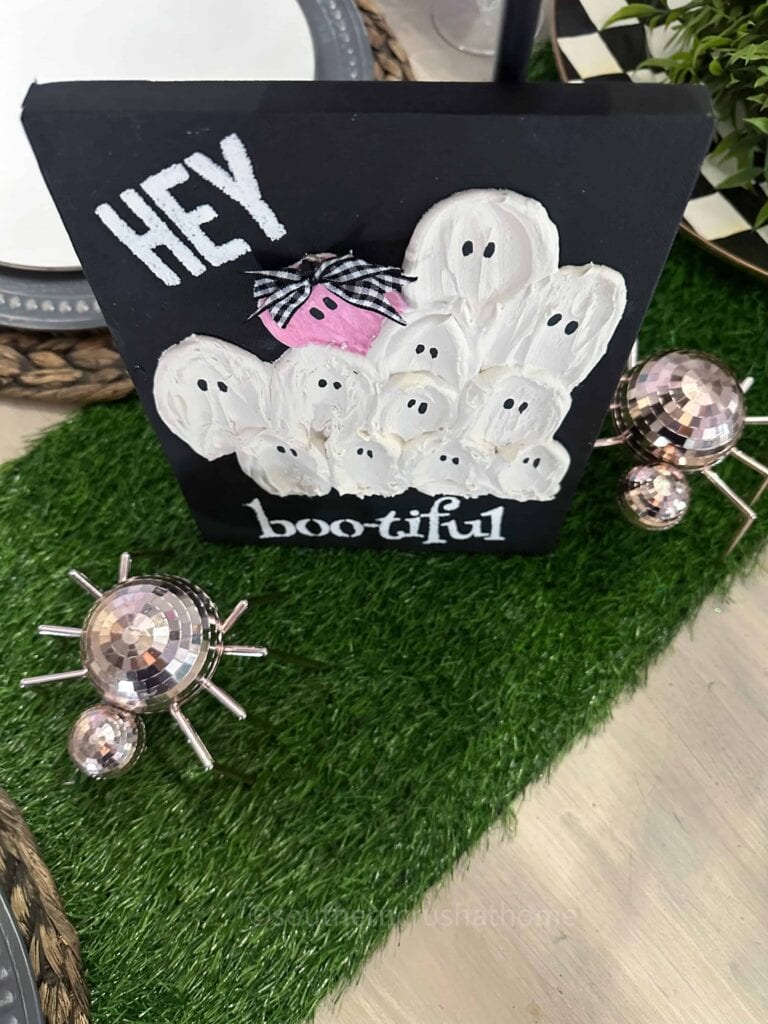
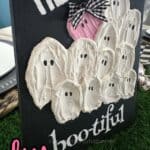
Easy Spackle Art Ghost Painting
Hey hey my friend, if you’re anything like me, you love a good seasonal craft that’s equal parts cute and easy. This one nails them both!
Want to see how easy it is to make your own? Let’s G-O!
PIN this for later!
If you’re looking for a simple, affordable, and totally adorable Halloween craft, this Easy Spackle Art Ghost Painting is the perfect project to try.
Using a few supplies from Dollar Tree and some pink DAP spackle, you can create a one-of-a-kind piece of Halloween decor that’s just as cute as it is spooky.
This blog post contains affiliate links. The opinions are wholly my own from my own experience. I may earn a small commission from clicks through to the websites that end in a purchase.
Supplies You’ll Need
- Black canvas from Dollar Tree
- Pink DAP spackle
- Spoon for applying spackle
- Heat tool (or allow to dry overnight)
- Pink acrylic paint
- Black acrylic paint
- Artist brush
- Optional ribbon for a zip tie bow
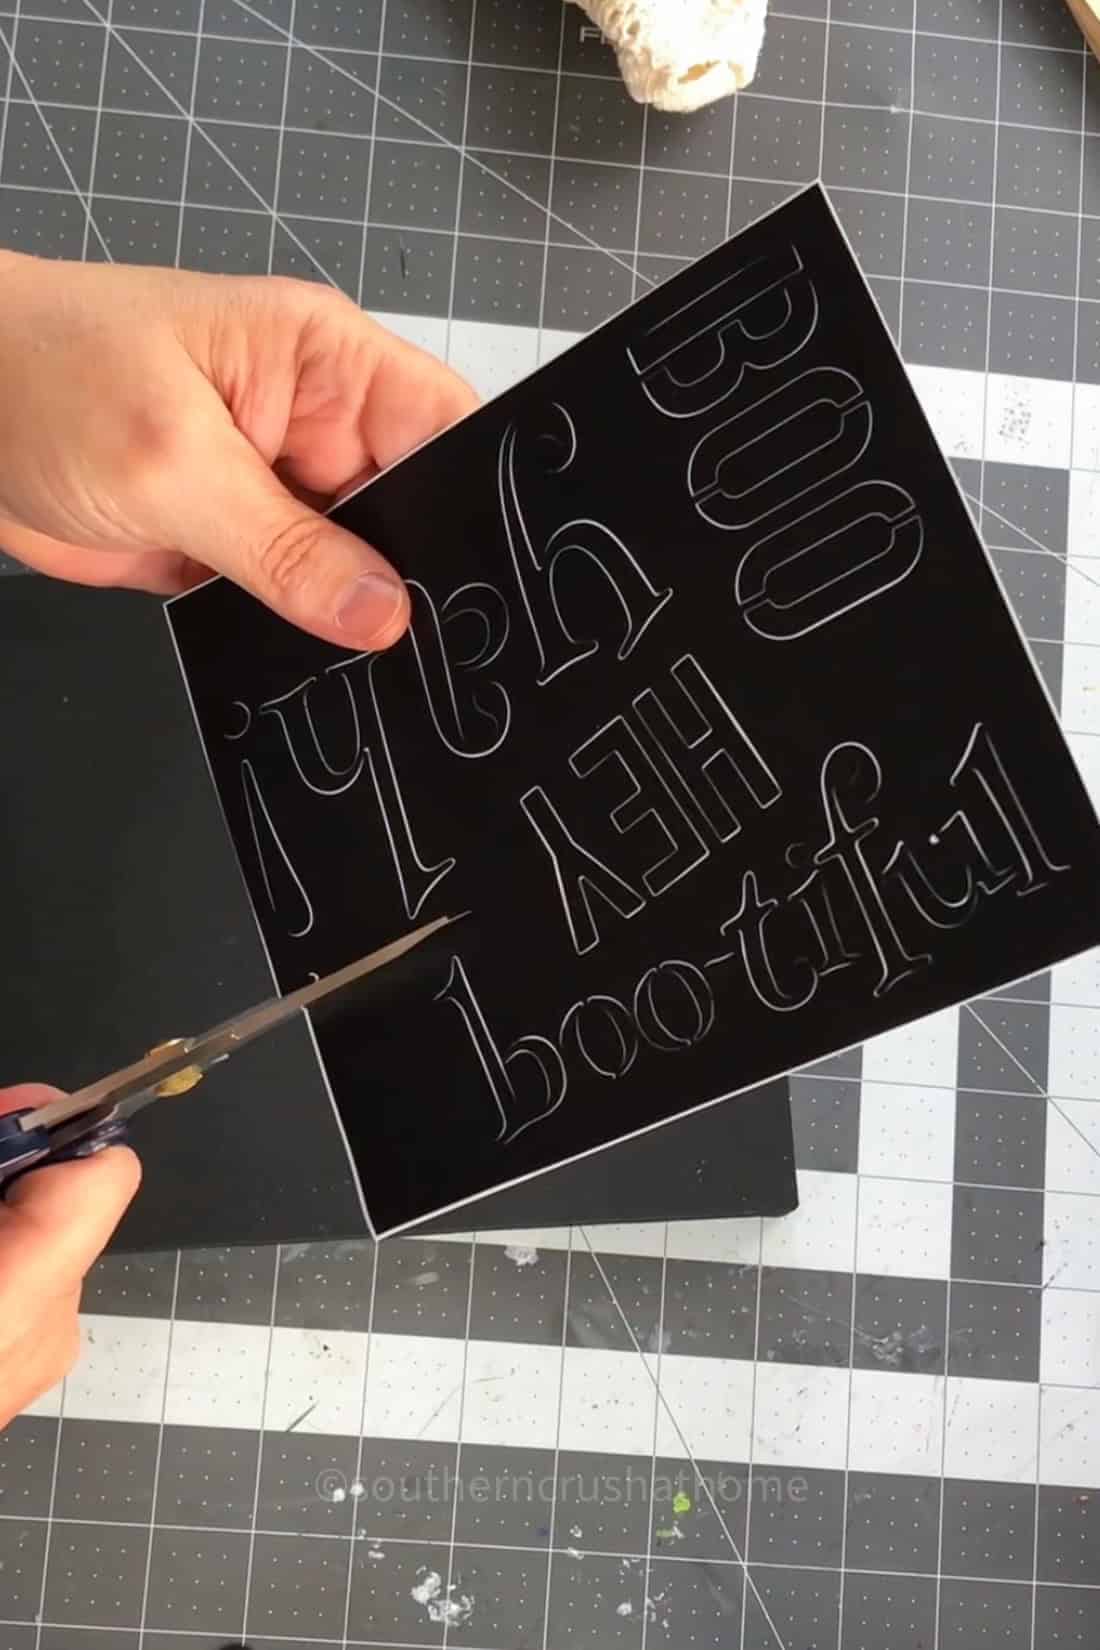
- Stencils from Dollar Tree
- White acrylic paint
- Spouncer for stenciling
How to Make the Spackle Art Ghost Painting
Start with your black canvas as the base. The dark background really makes the spackle ghosts pop once they’re dry.
YouTube Tutorial
Step 1: Add Your Stencil
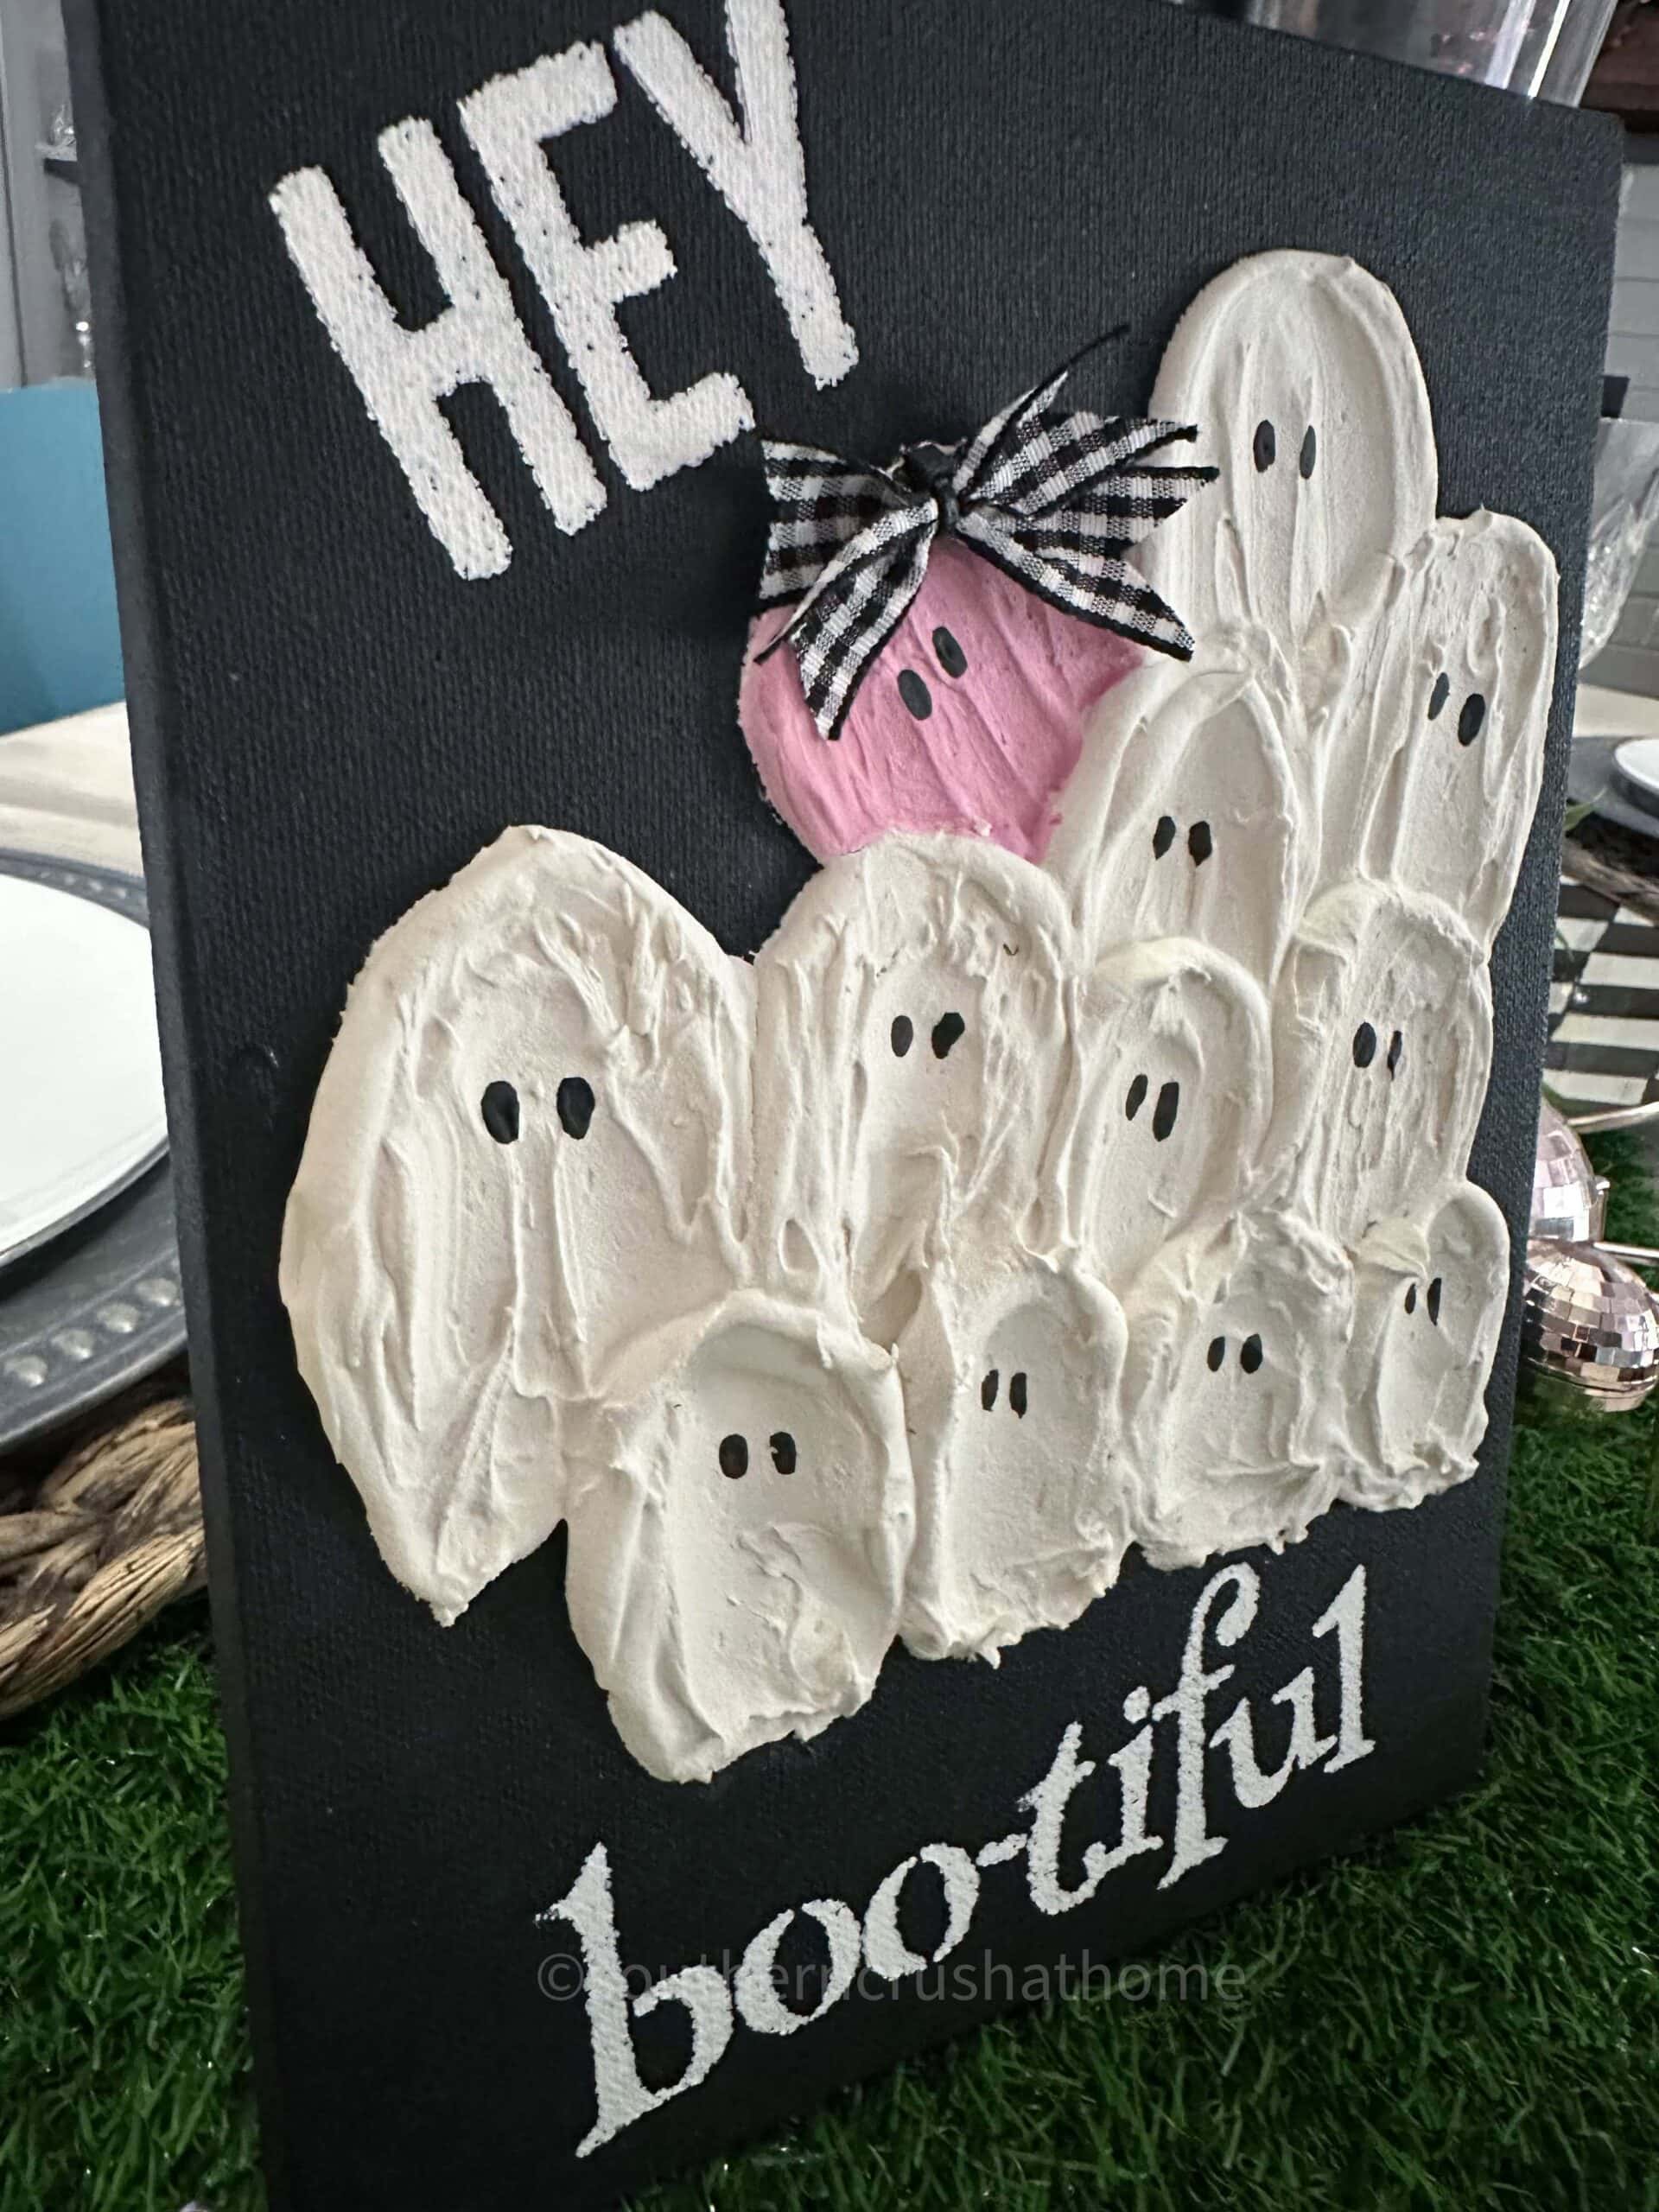
Position your Dollar Tree stencil where you want your wording to go. A fun option is the phrase “hey boo-tiful.”
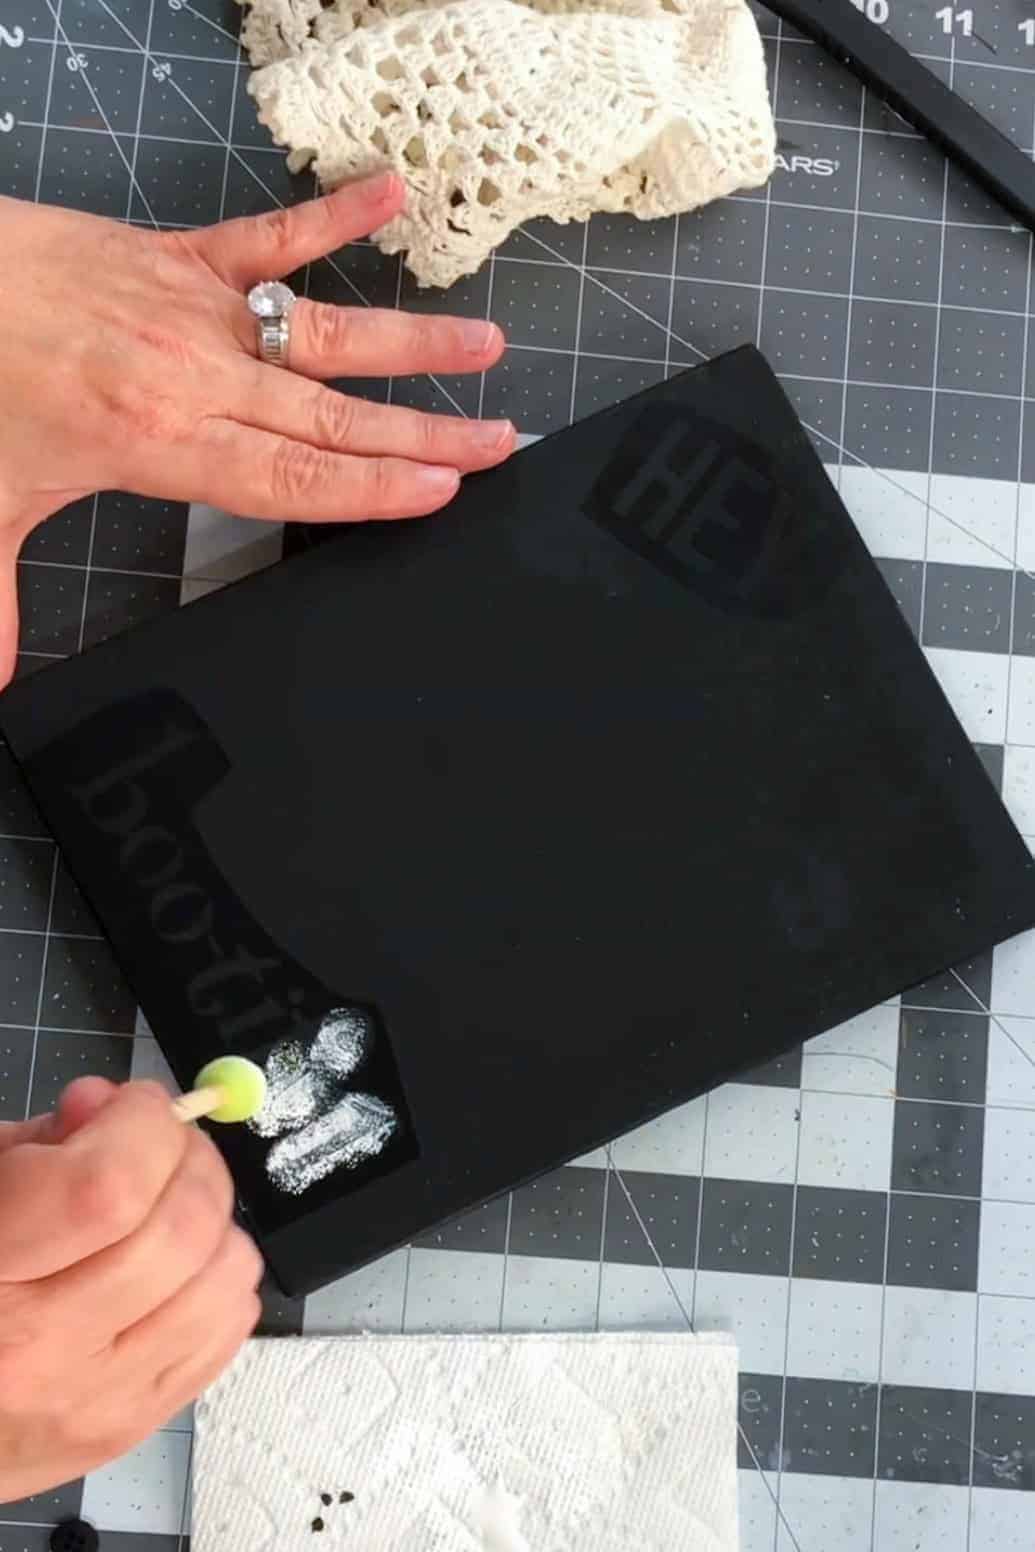
Use your spouncer and white acrylic paint to fill in the stencil. Tap gently for the best coverage and crisp edges. Let the stencil dry before moving on to the next step.
Step 2: Create the Spackle Ghosts
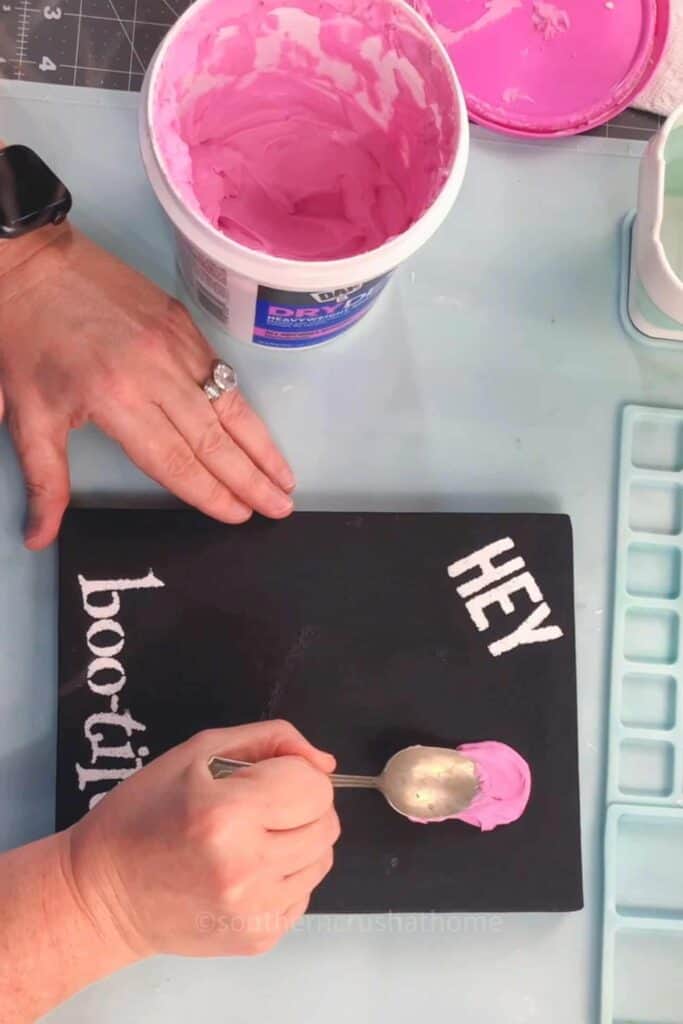
Grab your pink DAP spackle and your spoon. Use the back of the spoon to scoop and smear on small mounds of spackle to form your ghost shapes.
Start by creating a row of ghosts near the top of the canvas, then work your way down, overlapping and layering as you go.
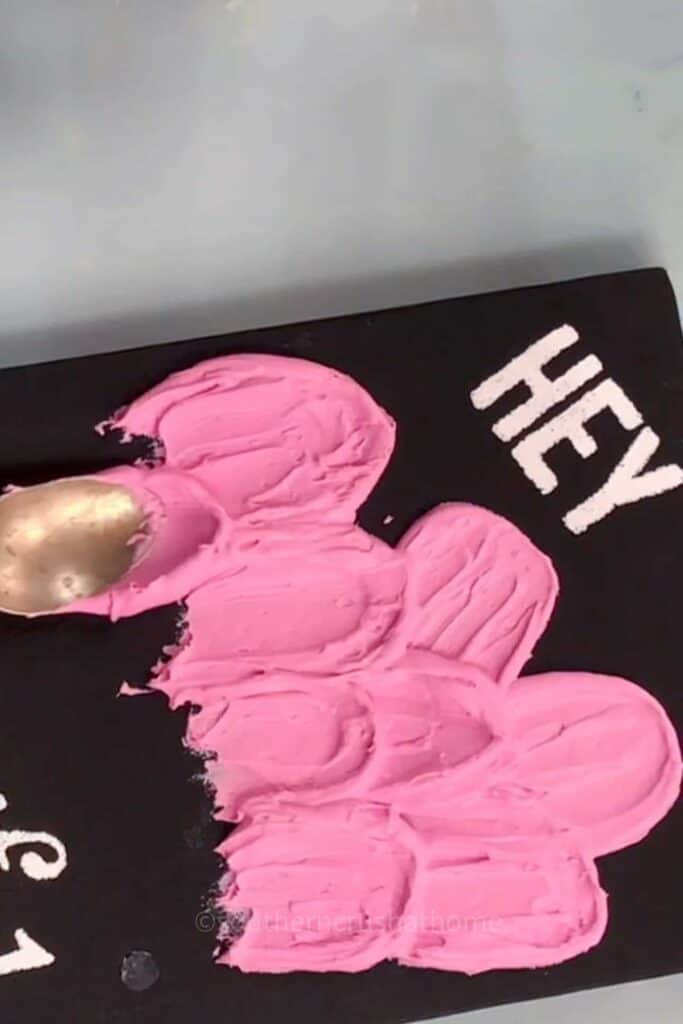
This gives your ghosts some playful dimension and makes the artwork feel full and textured.
Step 3: Dry the Spackle
You can use a heat tool to speed up the drying process, or simply let your spackle ghosts dry overnight or for several hours.
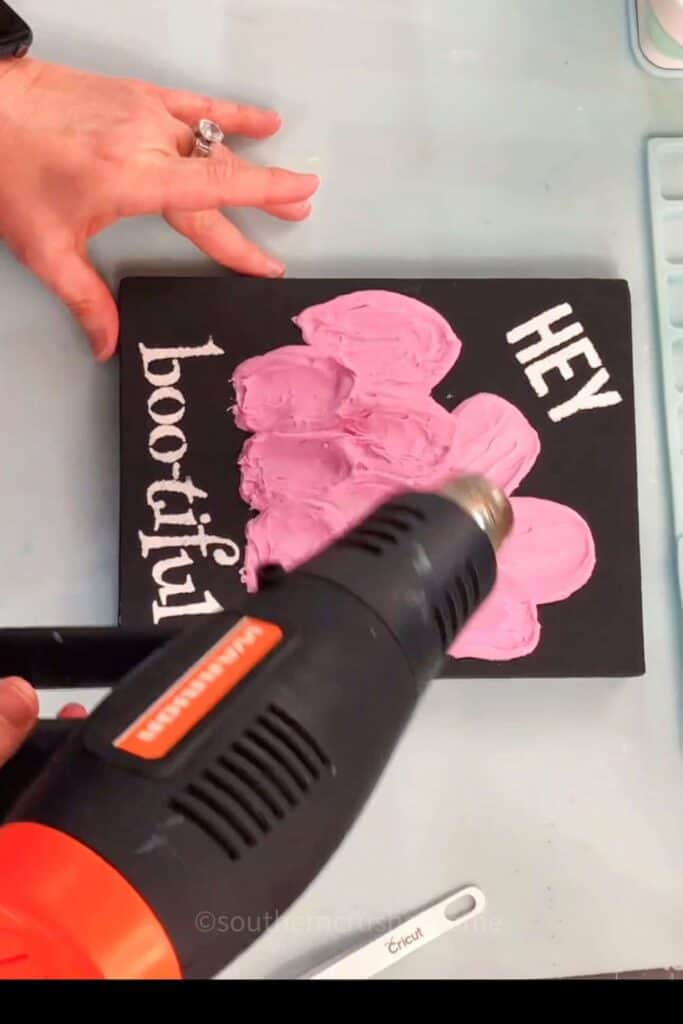
You’ll know they’re ready when the spackle turns from pink to white.
Step 4: Add a Pop of Color
Once the spackle is dry, use your pink acrylic paint to color one of the ghosts for a fun accent.
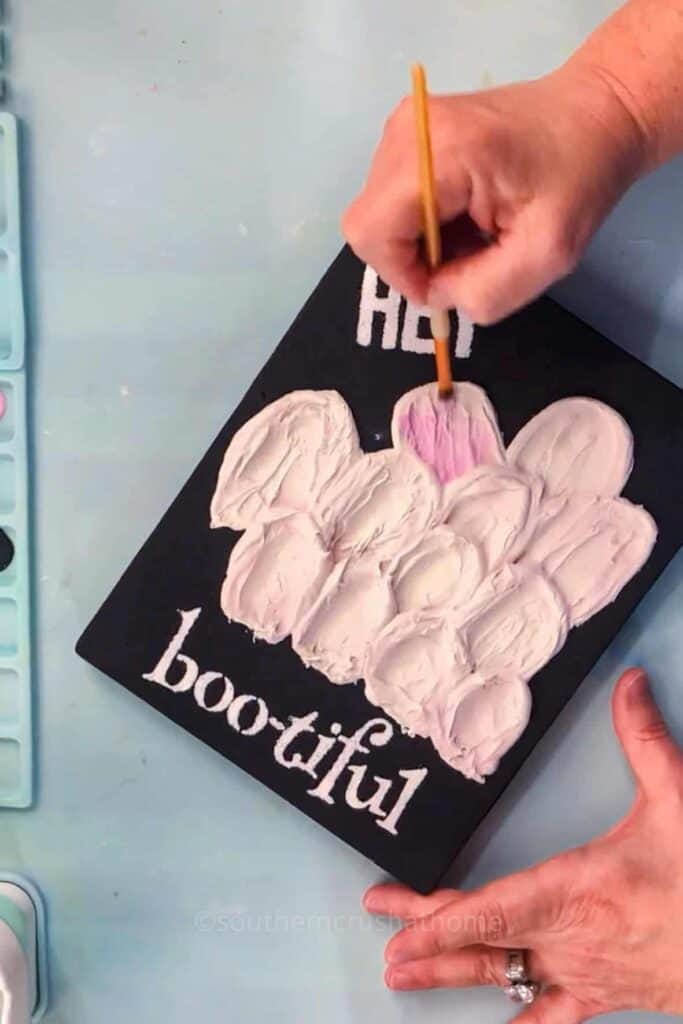
You can keep the others white for contrast or go bold with multiple shades for an ombre effect. This is where you can really let your creativity shine.
Step 5: Paint the Eyes
Dip your artist brush into black acrylic paint and add two small eyes to each ghost.
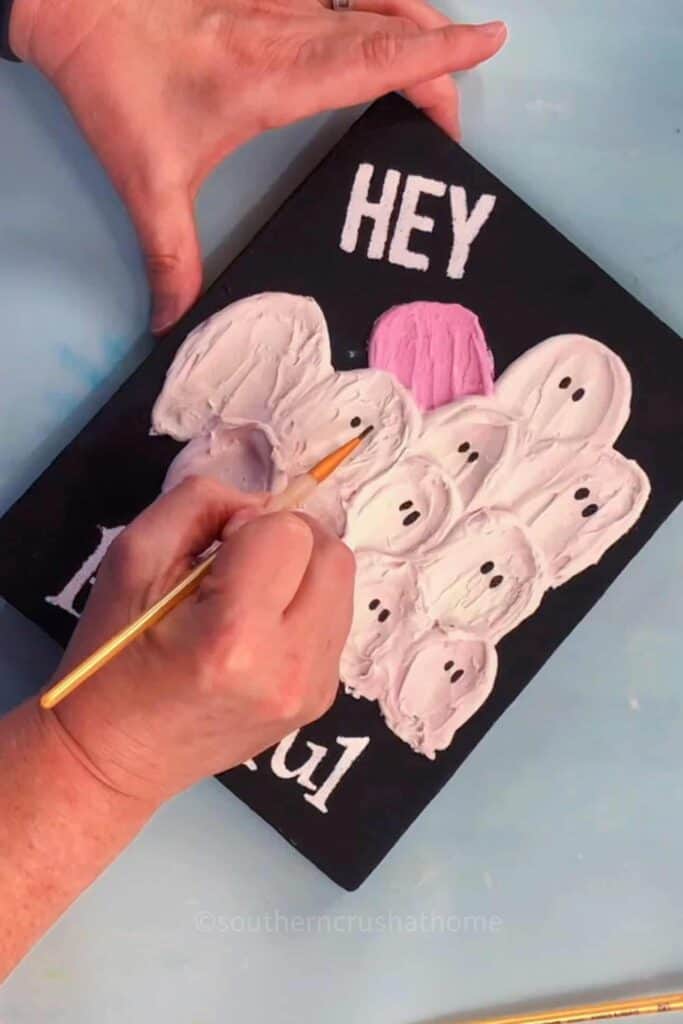
Simple dots work perfectly for a classic look, or try oval shapes for a little personality.
Step 6: Add Finishing Touches
If you’re adding a bow, tie a zip tie bow from your favorite ribbon and glue it to the pink ghost. It’s a small detail that adds so much charm.
You could even add mini bows to each ghost if you want to give them individual character.
Creative Ideas and Display Tips
This spackle ghost painting looks amazing displayed on a mantle, propped on a shelf, or even hung on the wall as part of a spooky Halloween vignette. It pairs beautifully with candles, faux pumpkins, or a few strands of fairy lights for that cozy seasonal glow.
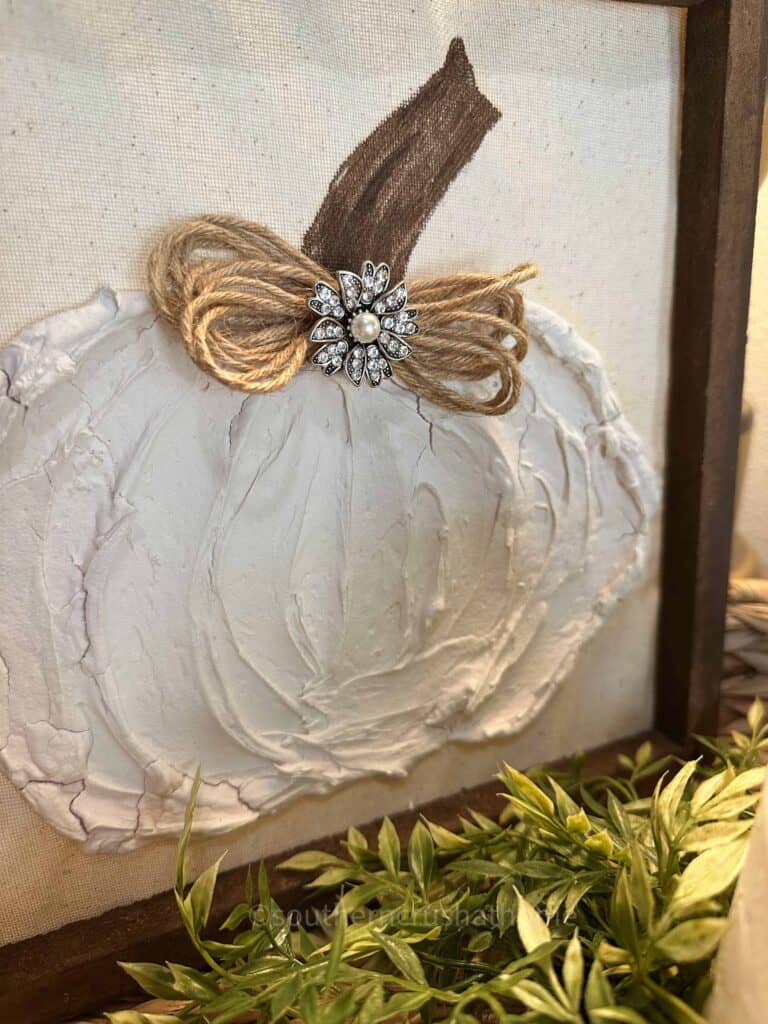
If you loved this craft, be sure to check out my spackle pumpkin framed art for another fun way to use spackle in your decor. Both projects are simple, inexpensive, and create a high-end look that’s perfect for fall.
You can experiment with different colors of spackle or acrylic paint, mix in metallic accents, or even try layering different ghost shapes for a unique, textured piece every time.
Whether you go all pink and girly or classic white and black, your Easy Spackle Art Ghost Canvas is sure to stand out as one of your favorite Halloween decorations this year.
Easy Spackle Art Ghost Painting
Materials
- Black canvas from Dollar Tree
- Pink DAP spackle
- Spoon for applying spackle
- Heat tool or allow to dry overnight
- Pink acrylic paint
- Black acrylic paint
- Artist brush
- Optional ribbon for a zip tie bow
- Stencils from Dollar Tree
- White acrylic paint
- Spouncer for stenciling
Instructions
Step 1: Add Your Stencil
- Position your Dollar Tree stencil where you want your wording to go. A fun option is the phrase “hey boo-tiful.” Use your spouncer and white acrylic paint to fill in the stencil. Tap gently for the best coverage and crisp edges. Let the stencil dry before moving on to the next step.
Step 2: Create the Spackle Ghosts
- Grab your pink DAP spackle and your spoon. Use the back of the spoon to scoop and smear on small mounds of spackle to form your ghost shapes. Start by creating a row of ghosts near the top of the canvas, then work your way down, overlapping and layering as you go. This gives your ghosts some playful dimension and makes the artwork feel full and textured.
Step 3: Dry the Spackle
- You can use a heat tool to speed up the drying process, or simply let your spackle ghosts dry overnight or for several hours. You’ll know they’re ready when the spackle turns from pink to white.
Step 4: Add a Pop of Color
- Once the spackle is dry, use your pink acrylic paint to color one of the ghosts for a fun accent. You can keep the others white for contrast or go bold with multiple shades for an ombre effect. This is where you can really let your creativity shine.
Step 5: Paint the Eyes
- Dip your artist brush into black acrylic paint and add two small eyes to each ghost. Simple dots work perfectly for a classic look, or try oval shapes for a little personality.
Step 6: Add Finishing Touches
- If you’re adding a bow, tie a zip tie bow from your favorite ribbon and glue it to the pink ghost. It’s a small detail that adds so much charm. You could even add mini bows to each ghost if you want to give them individual character.