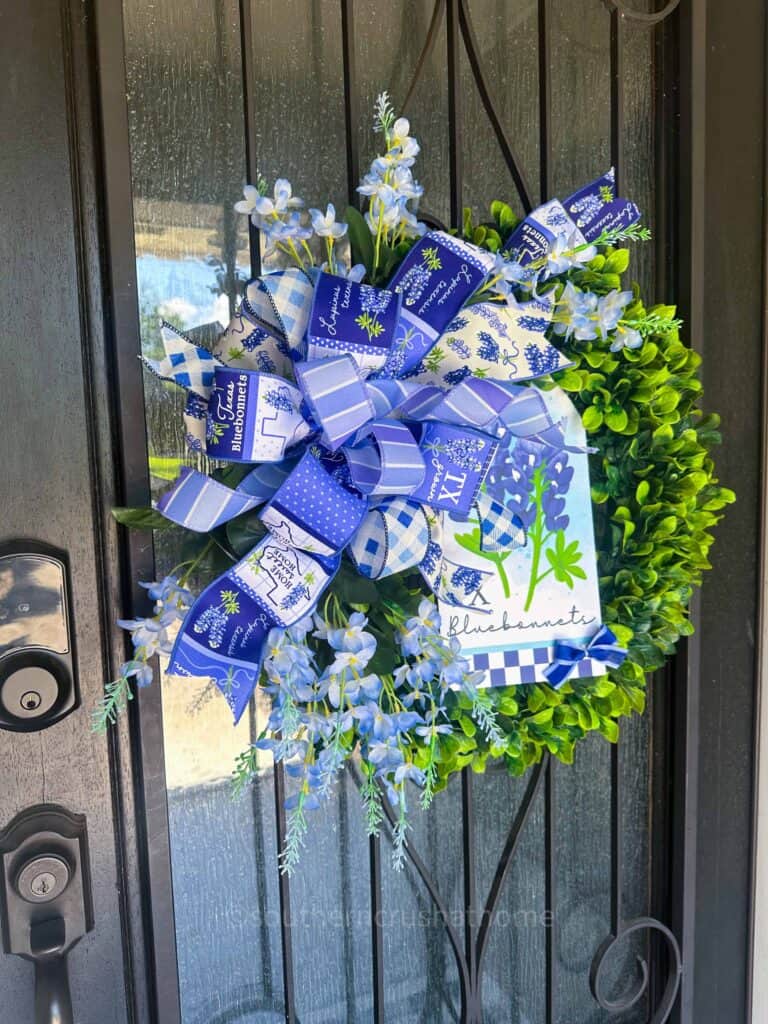
Texas Bluebonnets Wreath with a Texas Sized Bow to Match
If you're a fan of Texas bluebonnets and all things springtime in the Lone Star State, this Texas Bluebonnets Wreath with a Texas-sized bow to match is a project you're going to love!

PIN this for later!
This wreath is super easy to make, especially if you use an EZ Bow Maker to help craft the perfect full bow. The color palette and layered textures make it a standout on any door or wall, and it’s a great way to bring a bit of the Texas bluebonnet trail right to your front porch.
This blog post contains affiliate links. The opinions are wholly my own from my own experience. I may earn a small commission from clicks through to the websites that end in a purchase.
Texas Bluebonnets Wreath
It celebrates the beauty of bluebonnet season with the soft shades of blue, periwinkle, and white that we all associate with wildflower trails and roadside blooms here in Texas.
Let me show you how simple this wreath is to put together.
Supplies You’ll Need
- Boxwood wreath (realistic faux preferred)
- EZ Bow Maker
- 4 different wired ribbons (mix designs and widths)I got my Bluebonnet Ribbon HERE
- Zip ties
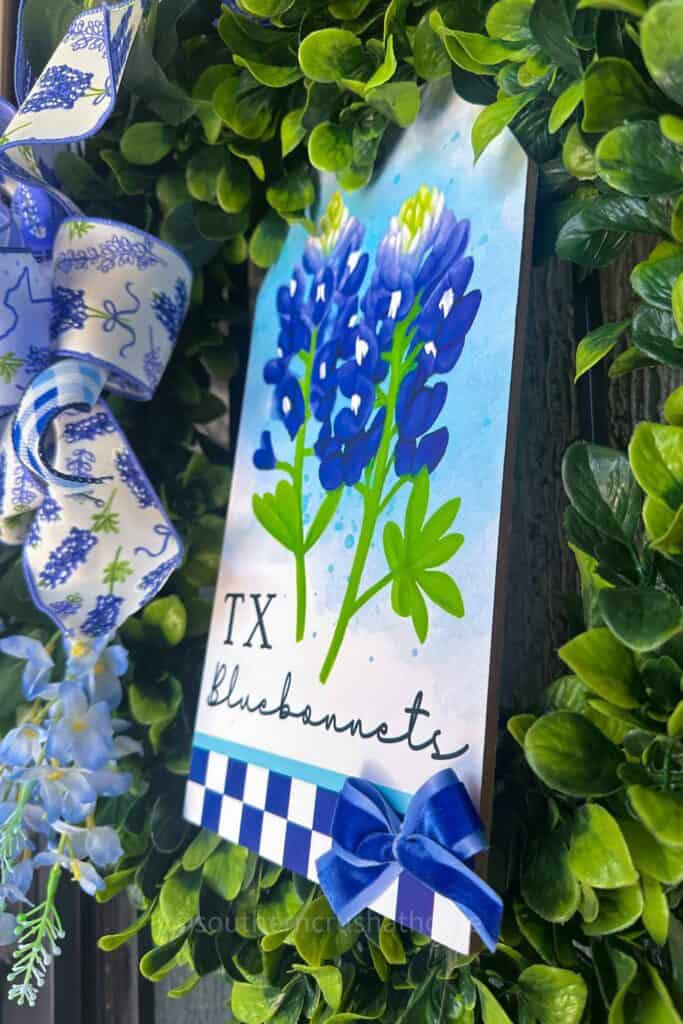
- Texas bluebonnet wooden tag sign
- Artificial blue flower stems (Texas bluebonnets if you can find them)
- Scissors or wire cutters
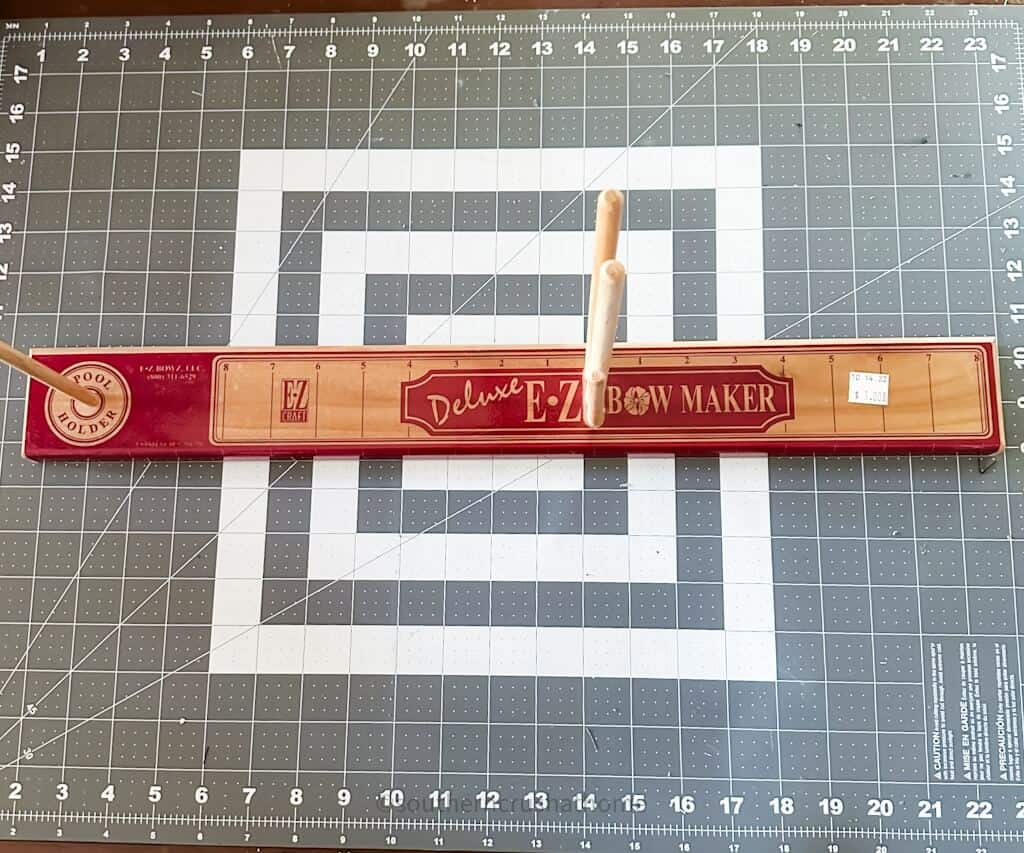
A Note on the EZ Bow Maker
If you're new to the EZ Bow Maker, I recommend checking out my full post here for step-by-step instructions on how to use it. It takes the guesswork out of bow-making and really helps get a beautiful, professional look with ease.
Step-by-Step Instructions
Step 1: Make Your Bow
Using your EZ Bow Maker, start with the widest ribbon first—I used a 4-inch white-based ribbon with blue and periwinkle tones. This forms the base of your bow.
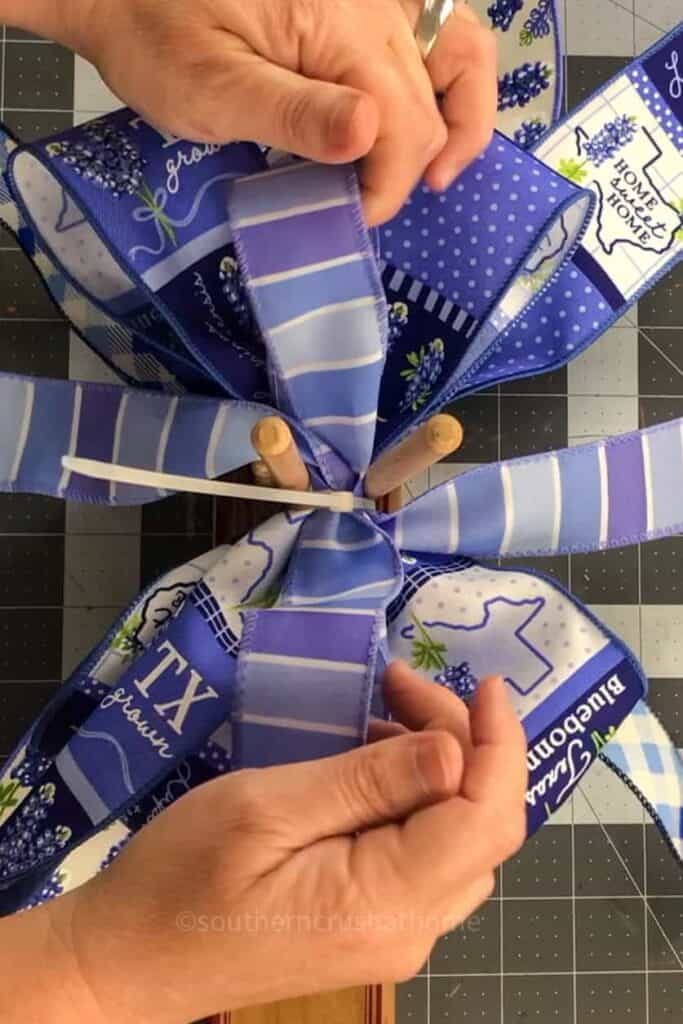
Make four loops (two on each side), then add your next ribbon on top with slightly smaller loops.
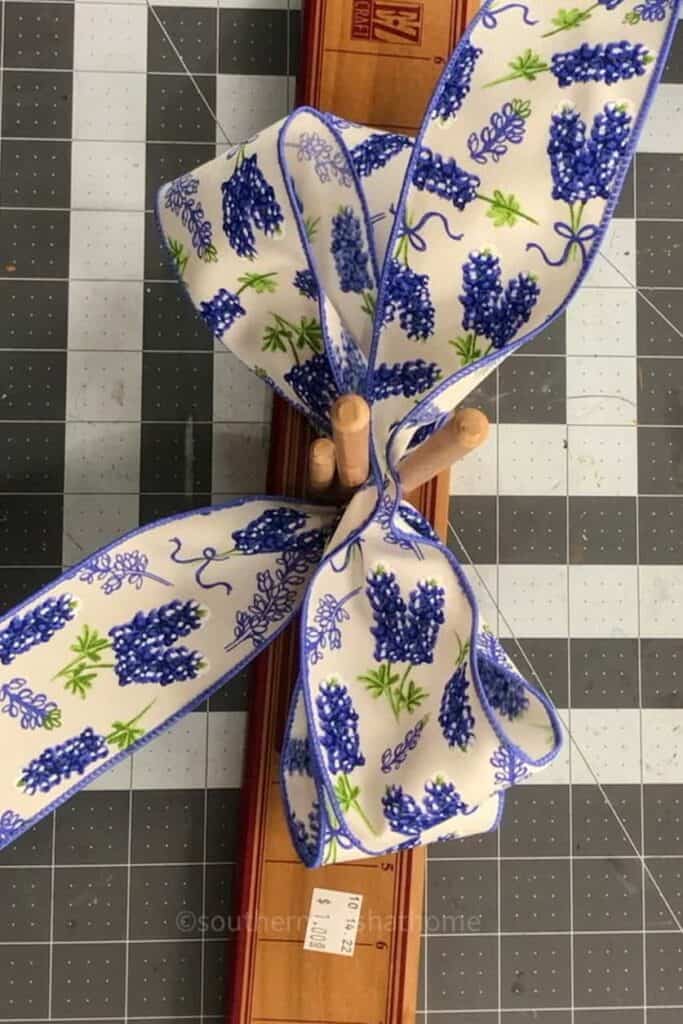
Repeat with your third and fourth ribbon, layering each one in to add color and fullness.


Step 2: Secure the Bow
Once your loops are all stacked and aligned, secure the bow at the center with a zip tie. Tighten it fully so nothing shifts out of place.
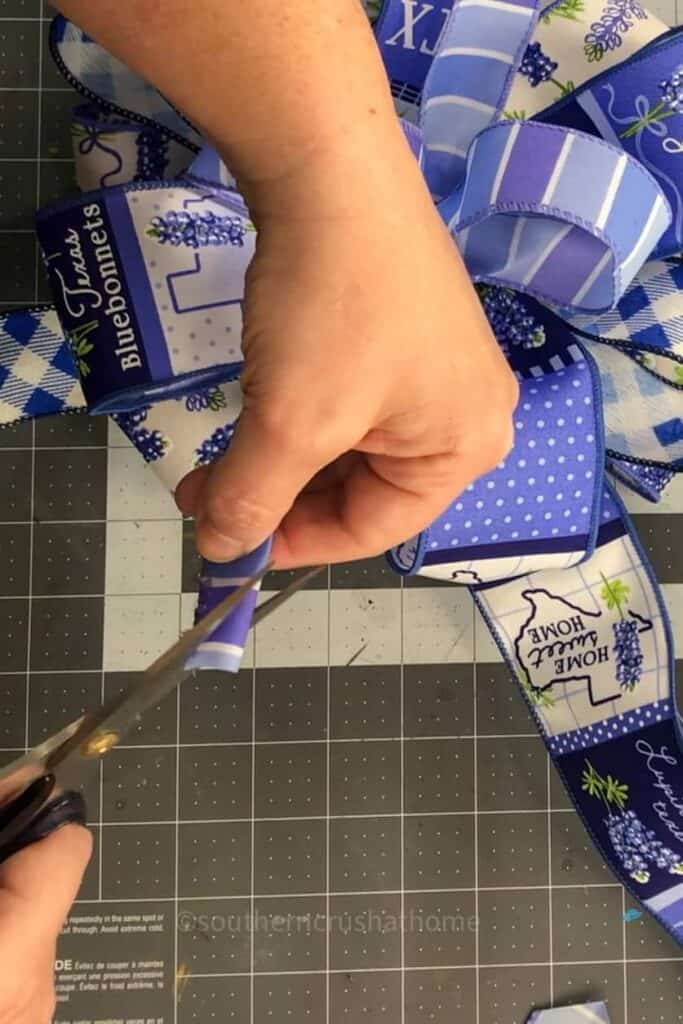
Trim the tails of each ribbon to your desired length and cut ends on a slant or into dovetails for a finished look.
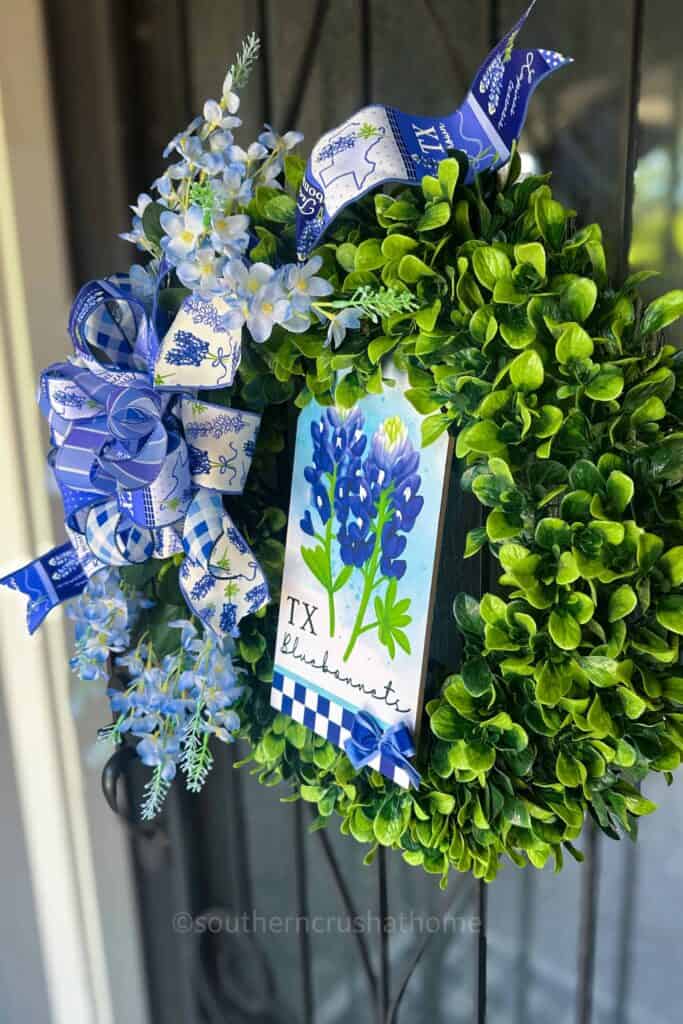
Step 3: Fluff and Attach the Bow
Take a minute to fluff out your bow so each ribbon shows nicely. Then use another zip tie to attach it to the bottom or side of your boxwood wreath, wherever it balances best visually.
Step 4: Add the Sign
Attach your Texas bluebonnet wooden tag sign just above or beside the bow. I used another zip tie to secure it right to the wreath frame. You can also use floral wire if your sign has holes or loops for hanging.
Step 5: Tuck in Bluebonnets
Now for the finishing touch—tuck in a few artificial Texas bluebonnet stems just underneath and around your bow. You can glue them in place or use floral wire if you want to easily swap them out later.
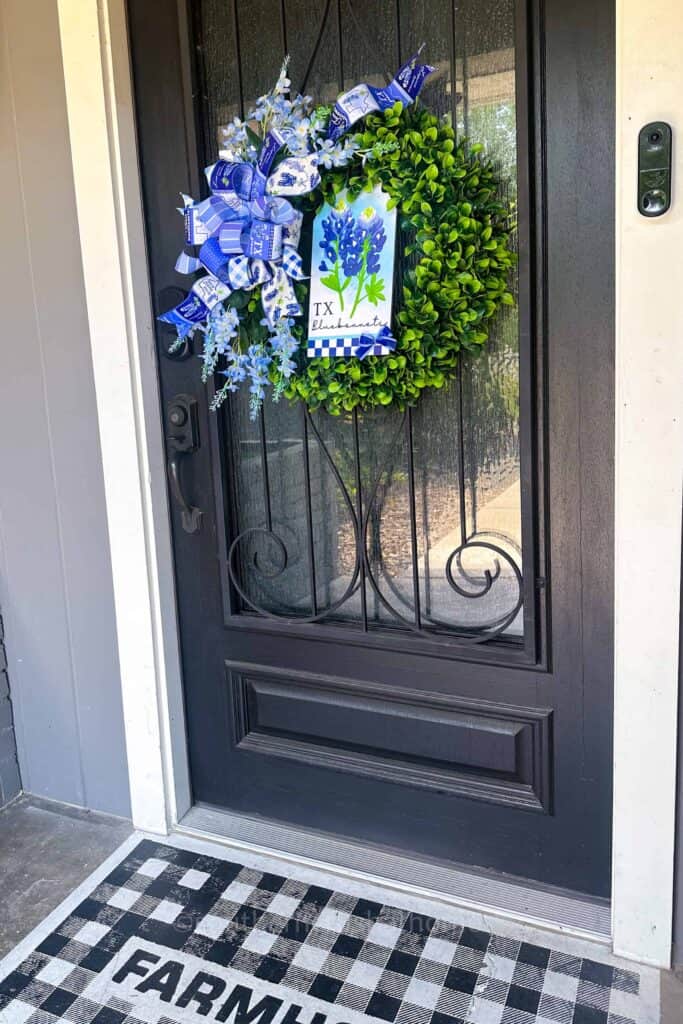
Step 6: Display Your Wreath
Hang your Texas bluebonnet wreath on your front door, porch wall, or anywhere you want to bring a little bit of springtime in Texas to life.
Where to Display Your Bluebonnet Wreath
This wreath isn’t just for your front door! Here are a few more display ideas:
- Above a mantel as part of a spring vignette
- On an interior wall with other seasonal decor
- As a centerpiece by laying it flat with a hurricane candle in the middle
- Gifted to a friend or family member who loves Texas wildflowers
- Displayed at a spring baby shower, brunch, or garden party

A Little Bit About Texas Bluebonnets
The bluebonnet is the official state flower of Texas, known for its bright blue petals and signature white tip. Every spring, these wildflowers blanket fields and highways, especially along the Texas Bluebonnet Trail, a stretch of scenic country roads that attract photographers, families, and wildflower lovers from all over.
The bluebonnet season typically peaks in late March through April, depending on the weather. You’ll find folks pulling over to the side of the road for photos, picnics, and just to soak in the sight—but always be careful and watch out for rattlesnakes, especially in tall grass and along fences. (Yes, it’s a real thing here in Texas.)
Creating this Texas bluebonnets wreath is a great way to celebrate the season without having to wait for blooms—or dodge snakes! It captures that familiar spring beauty in a way you can enjoy indoors or out, and it makes such a lovely nod to Texas pride.
This wreath was so easy to make, and I just love how the soft periwinkle ribbon plays off the bold bluebonnets. Whether you’re from Texas, love wildflowers, or just want something seasonal and beautiful, this project is a great way to welcome spring.
If you make one, I’d love to see how it turns out. Tag me or share it so we can all enjoy a little piece of bluebonnet season together.

Texas Bluebonnets Wreath
Materials
- Boxwood wreath realistic faux preferred
- EZ Bow Maker
- 4 different wired ribbons mix 1.5-inch and 4-inch widths for texture
- Zip ties
- Texas bluebonnet wooden tag sign
- Artificial blue flower stems Texas bluebonnets if you can find them
- Scissors or wire cutters
Instructions
Step 1: Make Your Bow
- Using your EZ Bow Maker, start with the widest ribbon first—I used a 4-inch white-based ribbon with blue and periwinkle tones. This forms the base of your bow.
- Make four loops (two on each side), then add your next ribbon on top with slightly smaller loops.
- Repeat with your third and fourth ribbon, layering each one in to add color and fullness.
Step 2: Secure the Bow
- Once your loops are all stacked and aligned, secure the bow at the center with a zip tie. Tighten it fully so nothing shifts out of place.
- Trim the tails of each ribbon to your desired length and cut ends on a slant or into dovetails for a finished look.
Step 3: Fluff and Attach the Bow
- Take a minute to fluff out your bow so each ribbon shows nicely. Then use another zip tie to attach it to the bottom or side of your boxwood wreath, wherever it balances best visually.
Step 4: Add the Sign
- Attach your Texas bluebonnet wooden tag sign just above or beside the bow. I used another zip tie to secure it right to the wreath frame. You can also use floral wire if your sign has holes or loops for hanging.
Step 5: Tuck in Bluebonnets
- Now for the finishing touch—tuck in a few artificial Texas bluebonnet stems just underneath and around your bow. You can glue them in place or use floral wire if you want to easily swap them out later.
Step 6: Display Your Wreath
- Hang your Texas bluebonnet wreath on your front door, porch wall, or anywhere you want to bring a little bit of springtime in Texas to life.