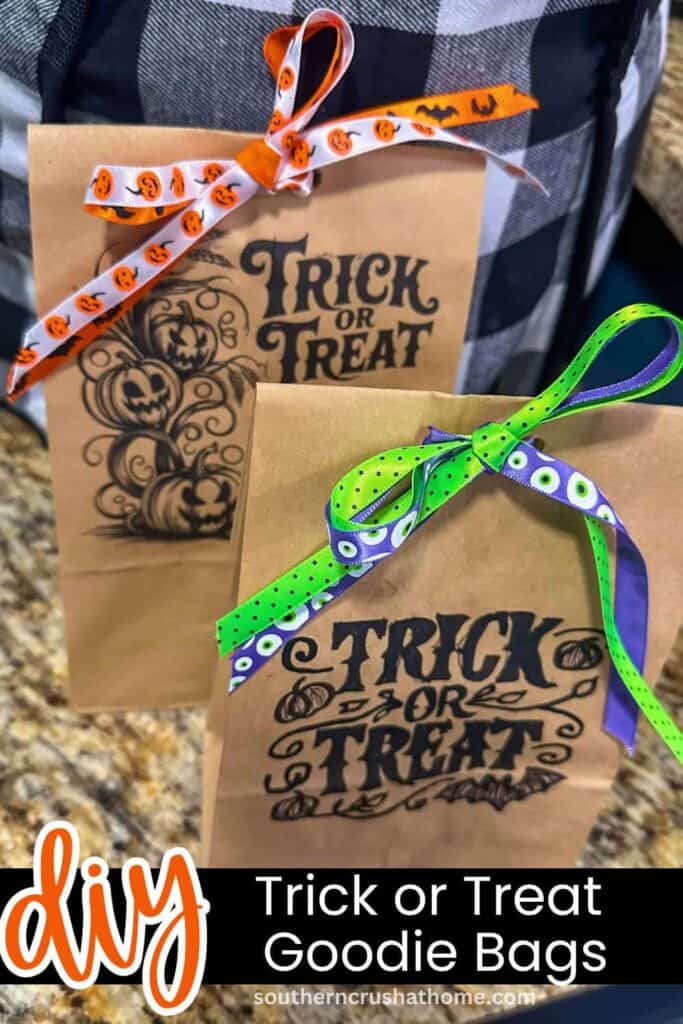
Easy DIY Trick or Treat Goodie Bags for Kids!
You won’t believe what I scooped out of my pool yesterday…
a small, furry rodent–
so creepy and oddly cute!
It’s that time of year and I prefer to do Halloween from a cute angle more than a creepy one. How about you?
This year I made my own Trick-or-Treat Goodie Bags—and friend, they turned out…
so stinkin’ cute!
Perfect for classroom parties, neighborhood kiddos, or just for my own family night at home, they’re simple, fun, and totally budget-friendly.
You don’t need fancy supplies or a long shopping list. Everything came straight from Dollar Tree—or from my stash of leftover craft goodies (you know, the ones we all keep “just in case”).
PIN this for later!
So if you’re in the mood to add a little handmade magic to your Halloween this year without spending a ton or stressing out, come see how easy these were to make.
You’re going to love this one, my friend.
This blog post contains affiliate links. The opinions are wholly my own from my own experience. I may earn a small commission from clicks through to the websites that end in a purchase.
A Simple Craft with a Personal Touch
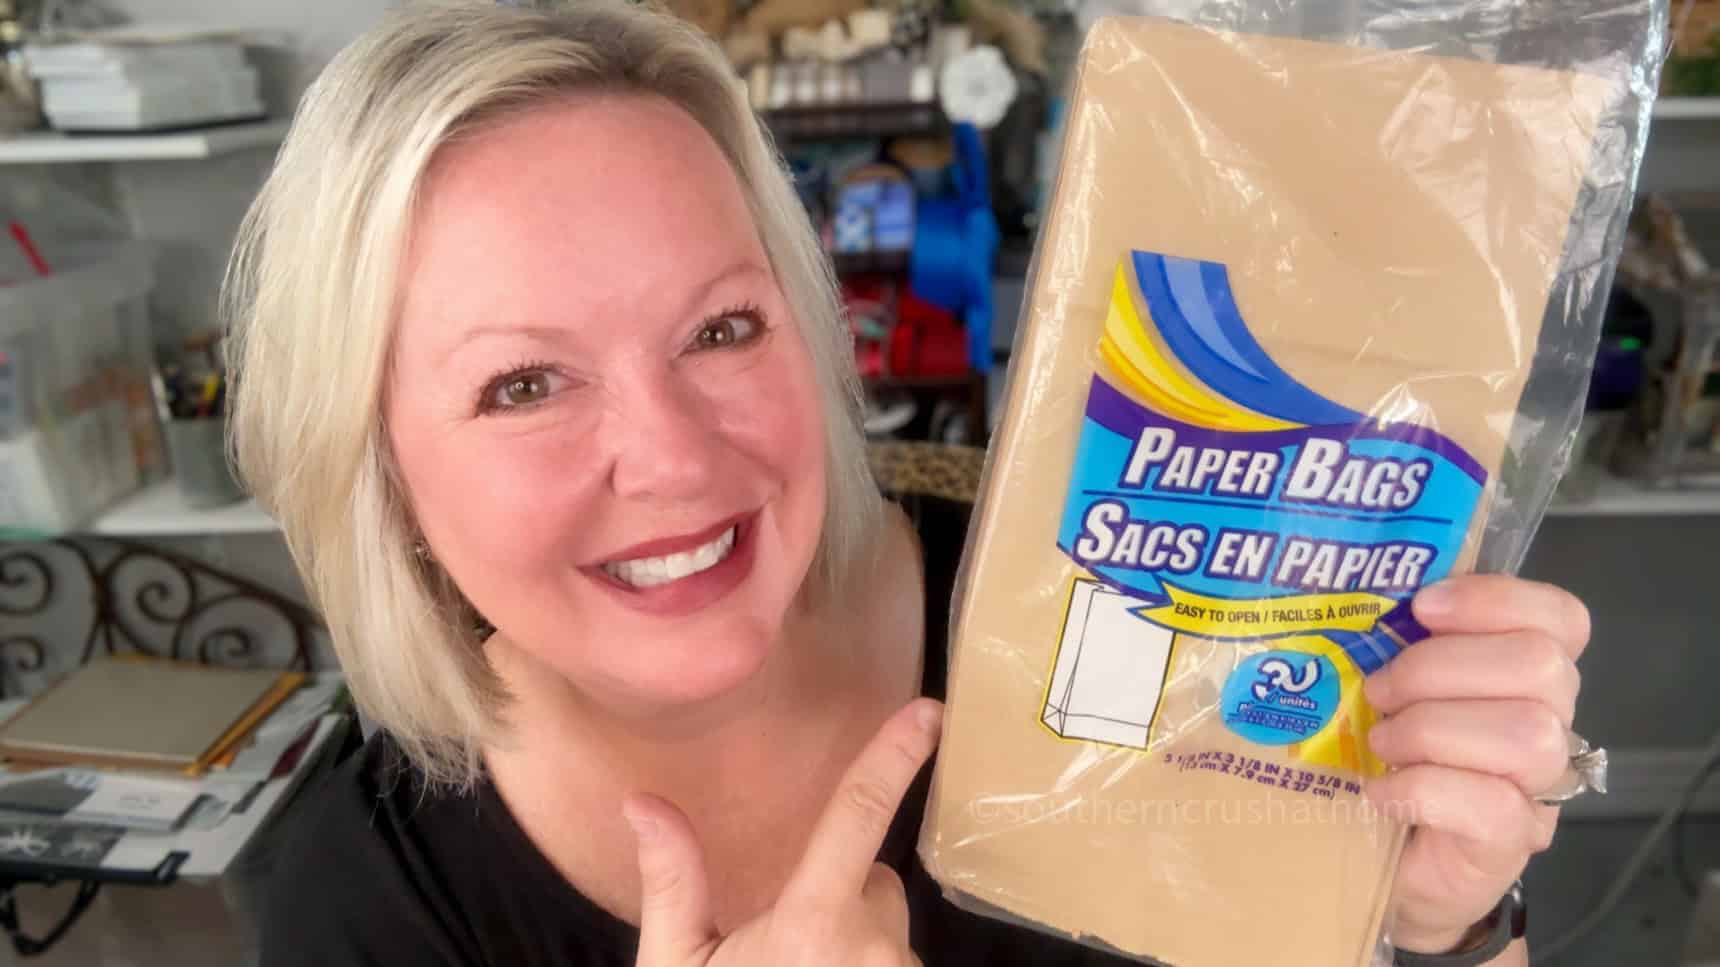
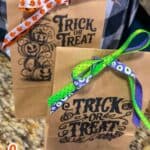
There’s just something special about a handmade touch, even for candy bags! These DIY paper goodie bags start with simple brown paper lunch sacks or small paper treat bags.
You can personalize each one with a spooky or cute Halloween design and even add your child’s name for a personal twist.
YouTube LIVE Video Tutorial
Supplies You’ll Need
- Brown paper lunch sacks or treat bags (Dollar Tree or grocery store)
- Carbon paper (for tracing designs)
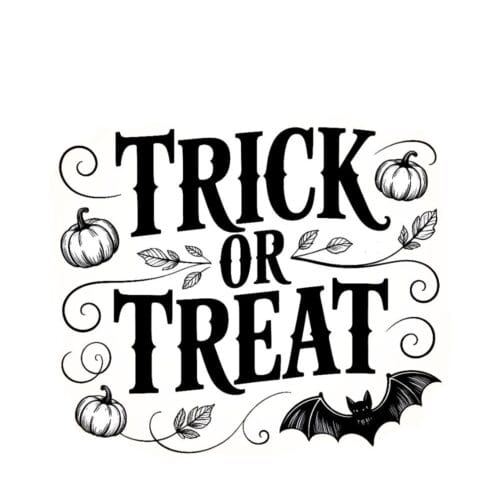
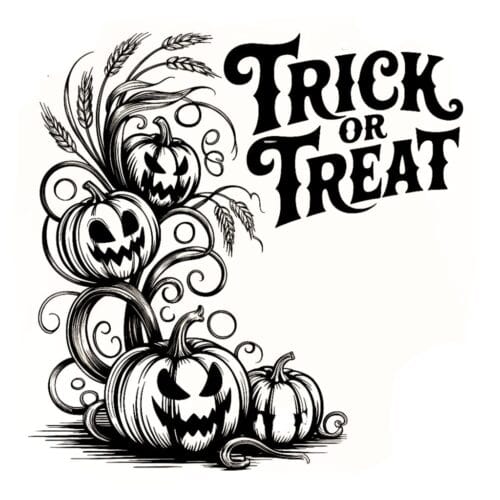
- Printable Halloween designs or traceables
- Washi tape
- Embossing tool or stylus
- Posca pen or paint marker (black or white looks best!)
- Hole punch
- Cute ribbon or twine of your choice
- Transparent tape (for printing method option)
Step-by-Step Instructions
Prepare Your Bags
Start with clean, flat paper bags. If you’re printing directly onto the lunch sacks, lightly tape the top and bottom edges of the bag to a sheet of printer paper using transparent tape.
This helps the bag feed evenly through your printer without jamming.
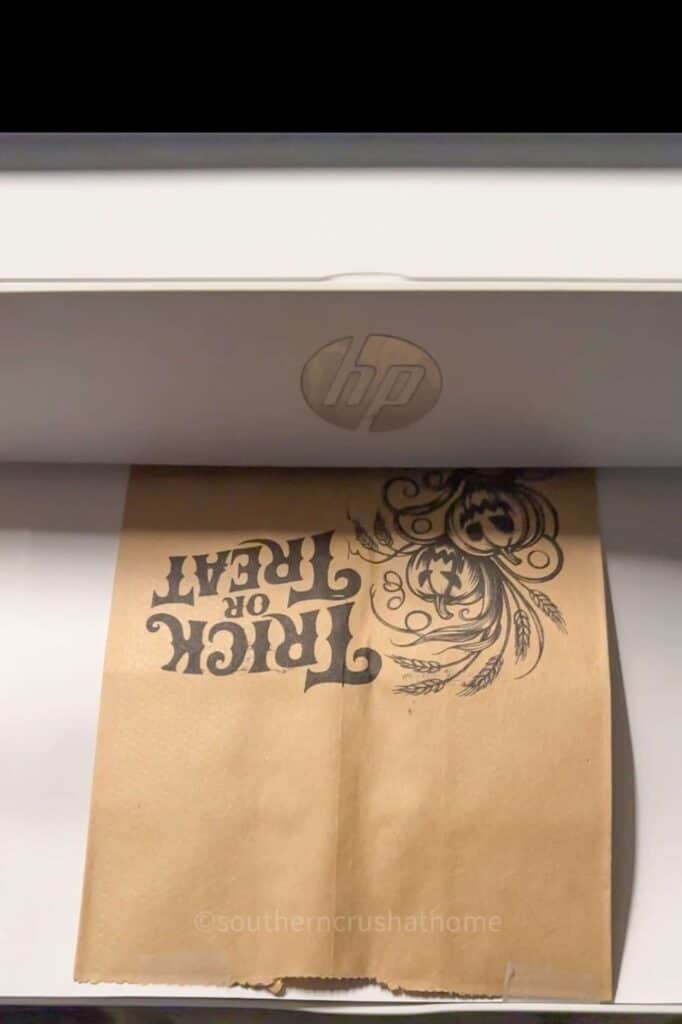
Print your Halloween design straight onto the bag for a super easy method.
Or Try the Traceable Method
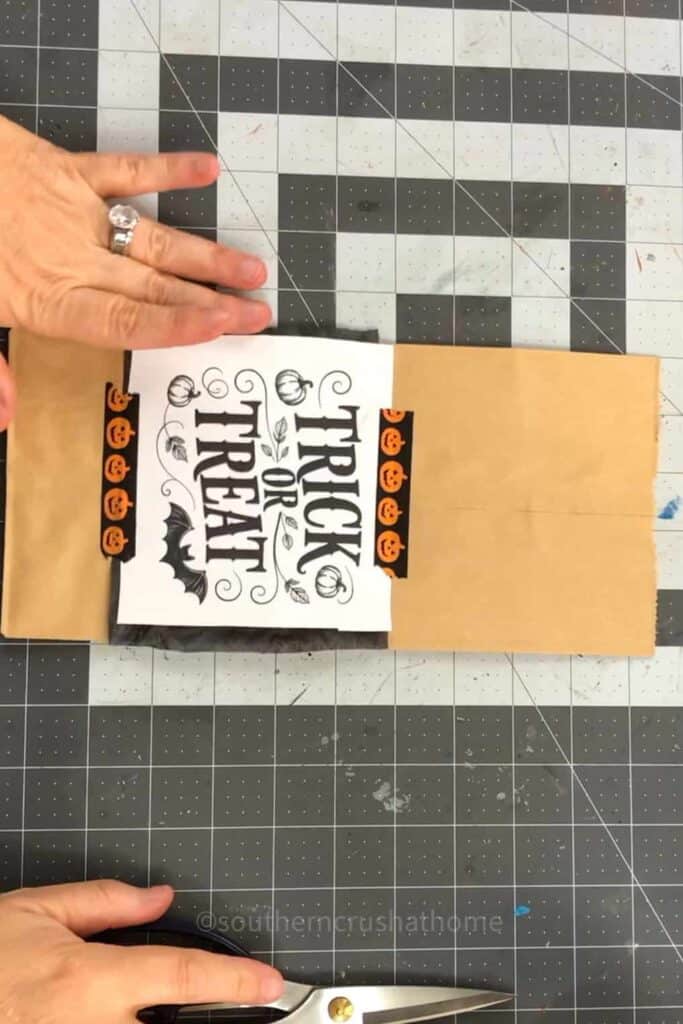
If you prefer a fun, crafty approach, print your Halloween design on regular paper. Place a sheet of carbon paper on top of the lunch sack, then position your printed design on top of that.
Use washi tape to hold both sheets in place so they don’t shift while you trace.
Grab your embossing tool and carefully outline the design.
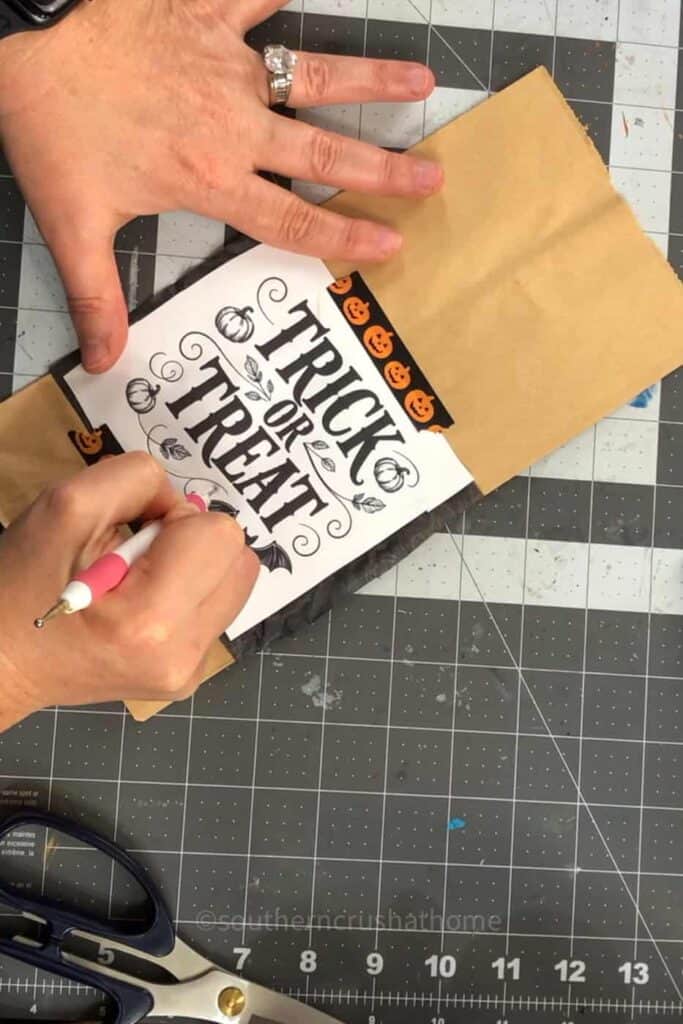
Once finished, remove the paper layers and you’ll see a faint trace of your image on the bag.
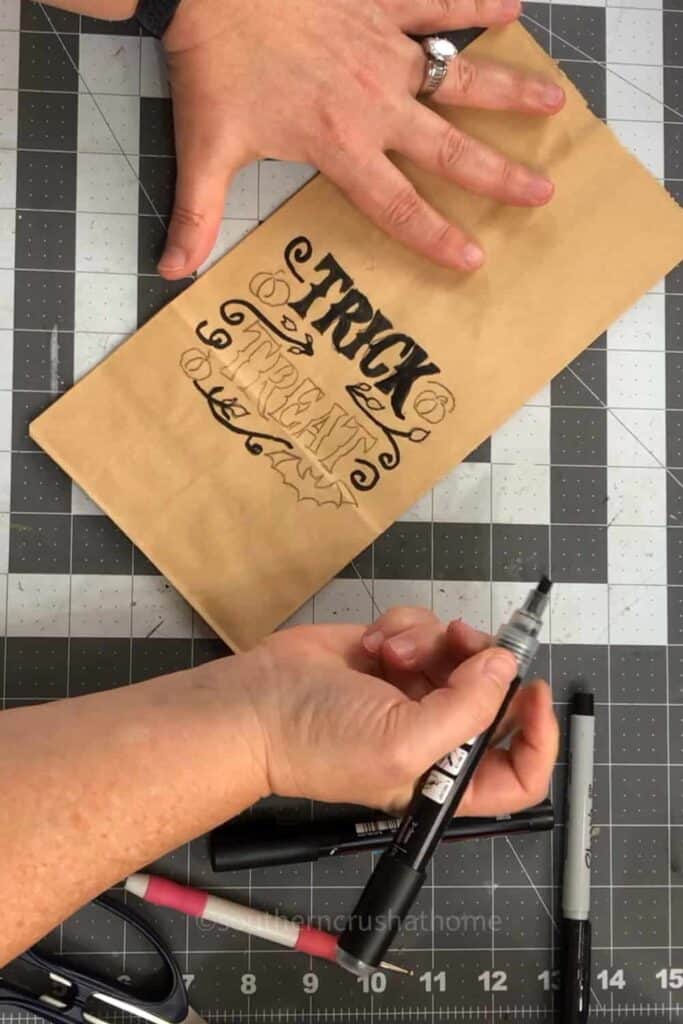
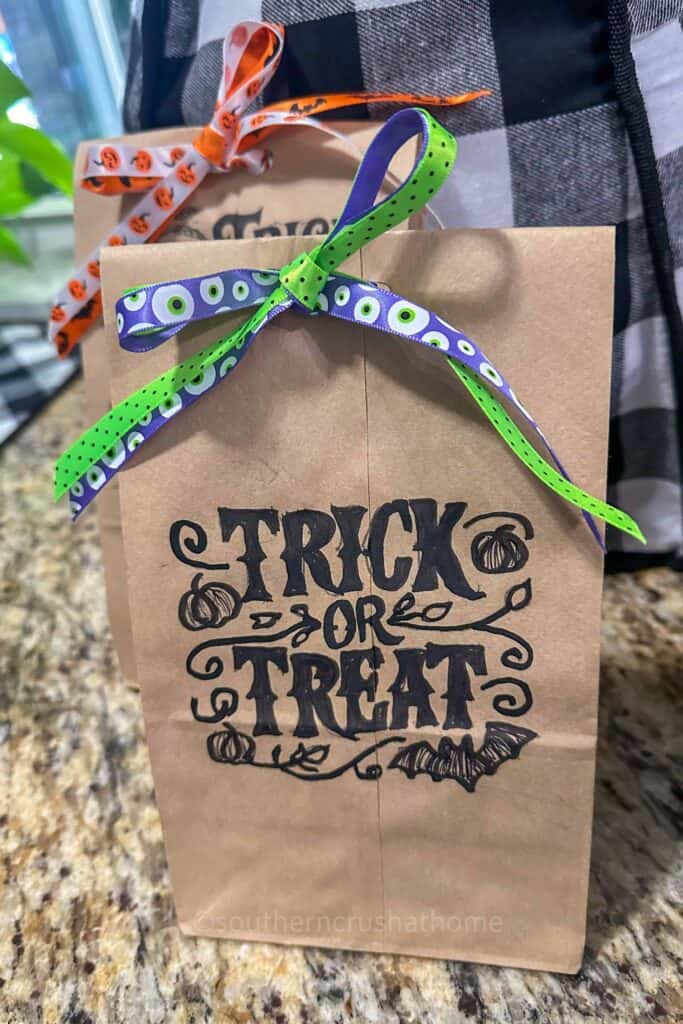
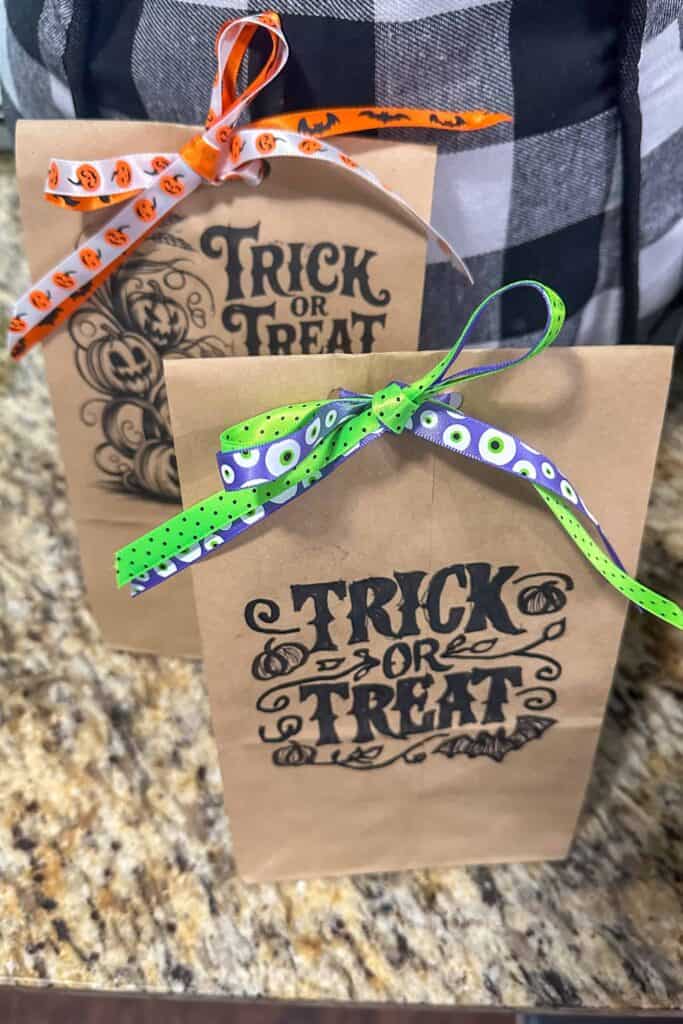
Fill in your design with a Posca pen for crisp, vibrant details — think ghosts, pumpkins, bats, or your child’s name in fun lettering!
Add the Finishing Touches
Once your design is complete and dry, fill each bag with treats or trinkets (ideas below!).
Fold the top flap of the bag over once, then use a hole punch to punch two holes through the folded area.
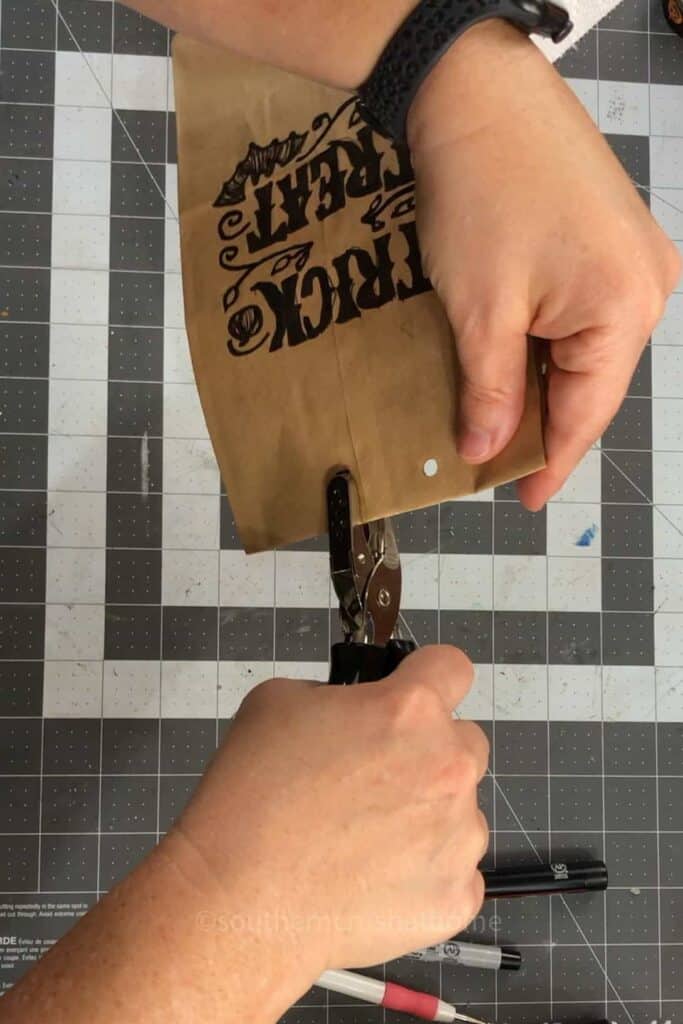
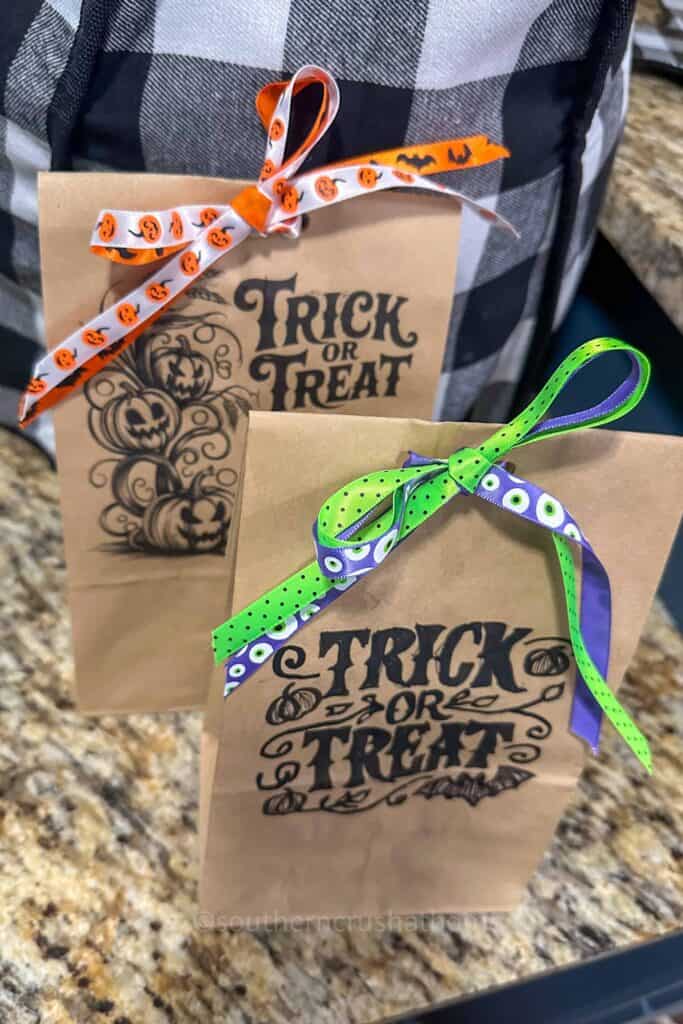
Thread your ribbon through the holes and tie a cute bow to close the bag.
Treat Ideas for Your Goodie Bags
You can fill these adorable bags with all sorts of festive goodies! Here are a few fun ideas:
- Mini candy bars or chocolate eyeballs
- Halloween-themed stickers or erasers
- Glow sticks or temporary tattoos
- Mini bubbles or Play-Doh tubs
- Plastic spiders or rings
- Small bags of popcorn or pretzels
- Homemade cookies or Rice Krispie treats wrapped in cellophane
For non-candy alternatives, consider adding items like pencils, bookmarks, or even a sweet note from “The Boo Crew!”
Fun Ways to Use Your DIY Goodie Bags
These personalized paper sacks aren’t just for trick-or-treat night! Here are a few creative ways to use them:
- Classroom Treats: Label each bag with a classmate’s name for easy handouts.
- Halloween Party Favors: Fill them with small toys or treats to send home with guests.
- Neighborhood Boo Bags: Drop them off on neighbors’ porches as a surprise gift!
- Movie Night Snacks: Use them to hold popcorn, caramel corn, or candy mix during a spooky movie marathon.
A Cute, Custom Halloween Touch
These DIY Trick-or-Treat Goodie Bags are such an easy way to make Halloween feel special without spending a fortune.
Whether you print, trace, or freehand your designs, each bag becomes a mini masterpiece your kids will love handing out.
Plus, with names added, everyone gets their own personalized surprise — no mix-ups, just sweet memories!
So grab your supplies, cue up your favorite Halloween playlist, and get crafting. You’ll have a batch of adorable goodie bags ready to fill in no time!
Easy DIY Trick or Treat Goodie Bags for Kids!
Materials
- Brown paper lunch sacks or treat bags Dollar Tree or grocery store
- Carbon paper for tracing designs
- Printable Halloween designs or traceables
- Washi tape
- Embossing tool or stylus
- Posca pen or paint marker black or white looks best!
- Hole punch
- Cute ribbon or twine of your choice
- Transparent tape for printing method option
Instructions
Prepare Your Bags
- Start with clean, flat paper bags. If you’re printing directly onto the lunch sacks, lightly tape the top and bottom edges of the bag to a sheet of printer paper using transparent tape. This helps the bag feed evenly through your printer without jamming. Print your Halloween design straight onto the bag for a super easy method.
Or Try the Traceable Method
- If you prefer a hands-on approach, print your Halloween design on regular paper. Place a sheet of carbon paper on top of the lunch sack, then position your printed design on top of that. Use washi tape to hold both sheets in place so they don’t shift while you trace.
- Grab your embossing tool and carefully outline the design. Once finished, remove the paper layers and you’ll see a faint trace of your image on the bag. Fill in your design with a Posca pen for crisp, vibrant details — think ghosts, pumpkins, bats, or your child’s name in fun lettering!
Add the Finishing Touches
- Once your design is complete and dry, fill each bag with treats or trinkets (ideas below!). Fold the top flap of the bag over once, then use a hole punch to punch two holes through the folded area. Thread your ribbon through the holes and tie a cute bow to close the bag.