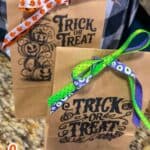
Easy DIY Trick or Treat Goodie Bags for Kids!
There’s just something special about a handmade touch, even for candy bags! These DIY paper goodie bags start with simple brown paper lunch sacks or small paper treat bags.
Materials
- Brown paper lunch sacks or treat bags Dollar Tree or grocery store
- Carbon paper for tracing designs
- Printable Halloween designs or traceables
- Washi tape
- Embossing tool or stylus
- Posca pen or paint marker black or white looks best!
- Hole punch
- Cute ribbon or twine of your choice
- Transparent tape for printing method option
Instructions
Prepare Your Bags
- Start with clean, flat paper bags. If you’re printing directly onto the lunch sacks, lightly tape the top and bottom edges of the bag to a sheet of printer paper using transparent tape. This helps the bag feed evenly through your printer without jamming. Print your Halloween design straight onto the bag for a super easy method.
Or Try the Traceable Method
- If you prefer a hands-on approach, print your Halloween design on regular paper. Place a sheet of carbon paper on top of the lunch sack, then position your printed design on top of that. Use washi tape to hold both sheets in place so they don’t shift while you trace.
- Grab your embossing tool and carefully outline the design. Once finished, remove the paper layers and you’ll see a faint trace of your image on the bag. Fill in your design with a Posca pen for crisp, vibrant details — think ghosts, pumpkins, bats, or your child’s name in fun lettering!
Add the Finishing Touches
- Once your design is complete and dry, fill each bag with treats or trinkets (ideas below!). Fold the top flap of the bag over once, then use a hole punch to punch two holes through the folded area. Thread your ribbon through the holes and tie a cute bow to close the bag.