

Unexpected Christmas Tree Decorating Hacks for a Designer Look on a Budget
I am so excited to invite you inside and share my Christmas tree with you this year. And let me just say, this might be one of my favorite trees I’ve ever decorated!
You know how much I love making something beautiful without spending a small fortune. Well, this year’s Christmas tree is proof that you don’t need a designer budget to create a designer look.
In fact, I want to share some of my favorite holiday finds that also help create a designer look for your home this year below!
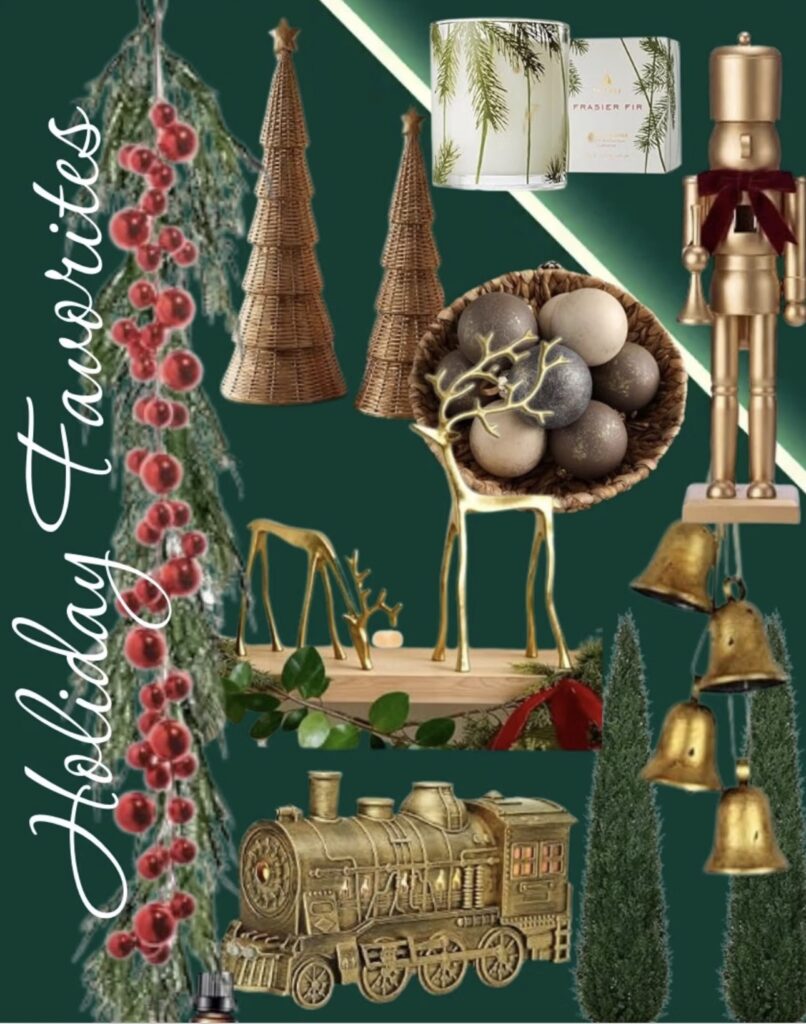
Some of the Christmas tree decorating hacks I’m sharing today involve things you probably already have around the house. We’re talking aluminum foil from the kitchen, fallen branches from the backyard, a cozy throw blanket, and even a travel flat iron!
I know. It sounds a little crazy.
But stick with me, my friend, because these unusual Christmas tree decorating ideas are surprisingly simple, incredibly affordable, and make such a difference.
So grab your coffee, come on in, and let me show you how I decorated my Christmas tree from top to bottom using six clever hacks that helped create a full, elegant, designer-inspired look.
YouTube Video Tutorial
**If you missed decorating the tree in real time, you can go back and watch it all unfold here on my YouTube video below!
This blog post contains affiliate links. The opinions are wholly my own from my own experience. I may earn a small commission from clicks through to the websites that end in a purchase.
Unusual and Affordable Christmas Tree Decorating Hacks
1. Make Christmas Tree Fluffing Easier (And Skip the Back!)
Let’s start with the part of Christmas decorating that nobody really talks about.
Fluffing the tree.
Does anyone actually enjoy this part?
I don’t know about you, but by the time I’ve pulled the tree out of storage, assembled it, and started separating all those branches, I’m already ready to get to the fun stuff.
So this year, I decided to make the process a little more enjoyable.
First, put on your favorite Christmas music. I promise it makes a difference! There’s just something about hearing your favorite holiday songs that makes even the most tedious decorating tasks feel a little more festive.
Second, give yourself something to look forward to.
Maybe it’s a few new ornaments, some beautiful ribbon, or a special decoration you’ve been saving for this year.
Having something new and exciting to add to your tree can be just the motivation you need to get through all that fluffing.
And now for my favorite tip.
Skip the back!
Yes, you heard me correctly.
If your Christmas tree is positioned against a wall and nobody can see the back, don’t spend all afternoon trying to make every single branch look perfect.
Focus your attention on the front and visible sides of the tree.
Fluff those branches beautifully, fill in the gaps, and make the areas everyone sees look full and gorgeous.
Of course, make sure the tree is properly assembled and secure. But as far as decorating those hidden branches goes?
My friend, give yourself permission to move on!
Christmas decorating should be fun, not another chore on your to-do list.
2. Use Aluminum Foil to Make Your Christmas Tree Sparkle
Okay, this might be my favorite Christmas tree decorating hack of the entire year.
And you’re probably going to laugh when I tell you what I used.
Aluminum foil.
Yep. The same foil sitting in your kitchen drawer right now!
You’ve probably seen those beautiful reflective disco ball ornaments people tuck inside their Christmas trees to make the lights sparkle.
Well, I thought, why not create a similar effect with something I already have?
Here’s what I did.
I took a piece of ordinary aluminum foil and loosely crumpled it up, making sure the shiny side was facing outward.
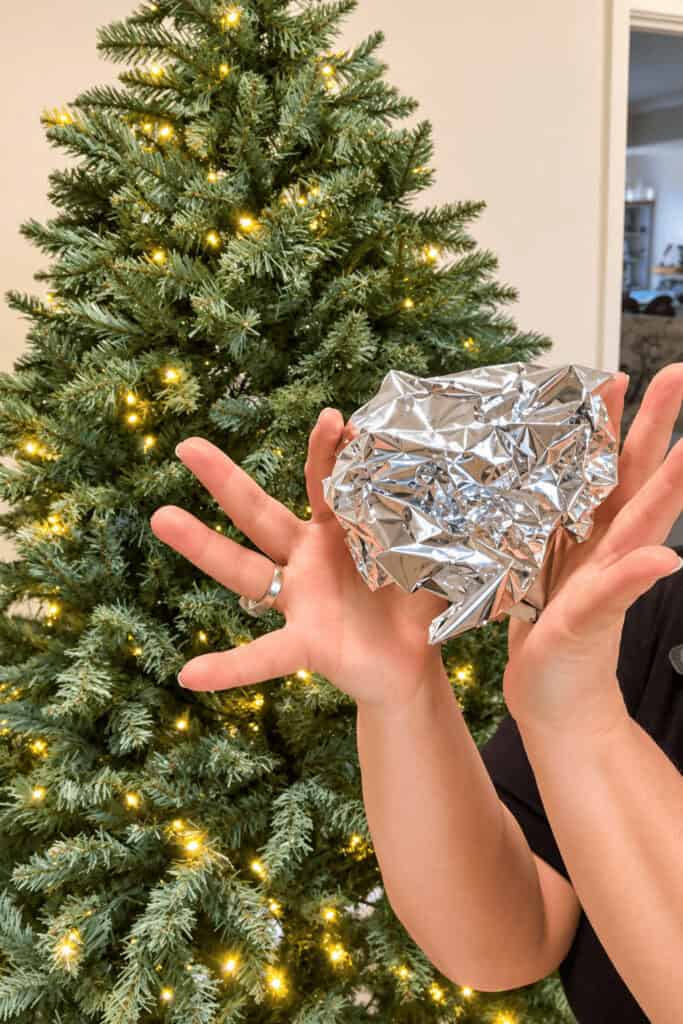
Then I tucked it deep inside my Christmas tree, close to the trunk.
The trick is to position it near your Christmas lights so the shiny foil reflects the light back through the branches.
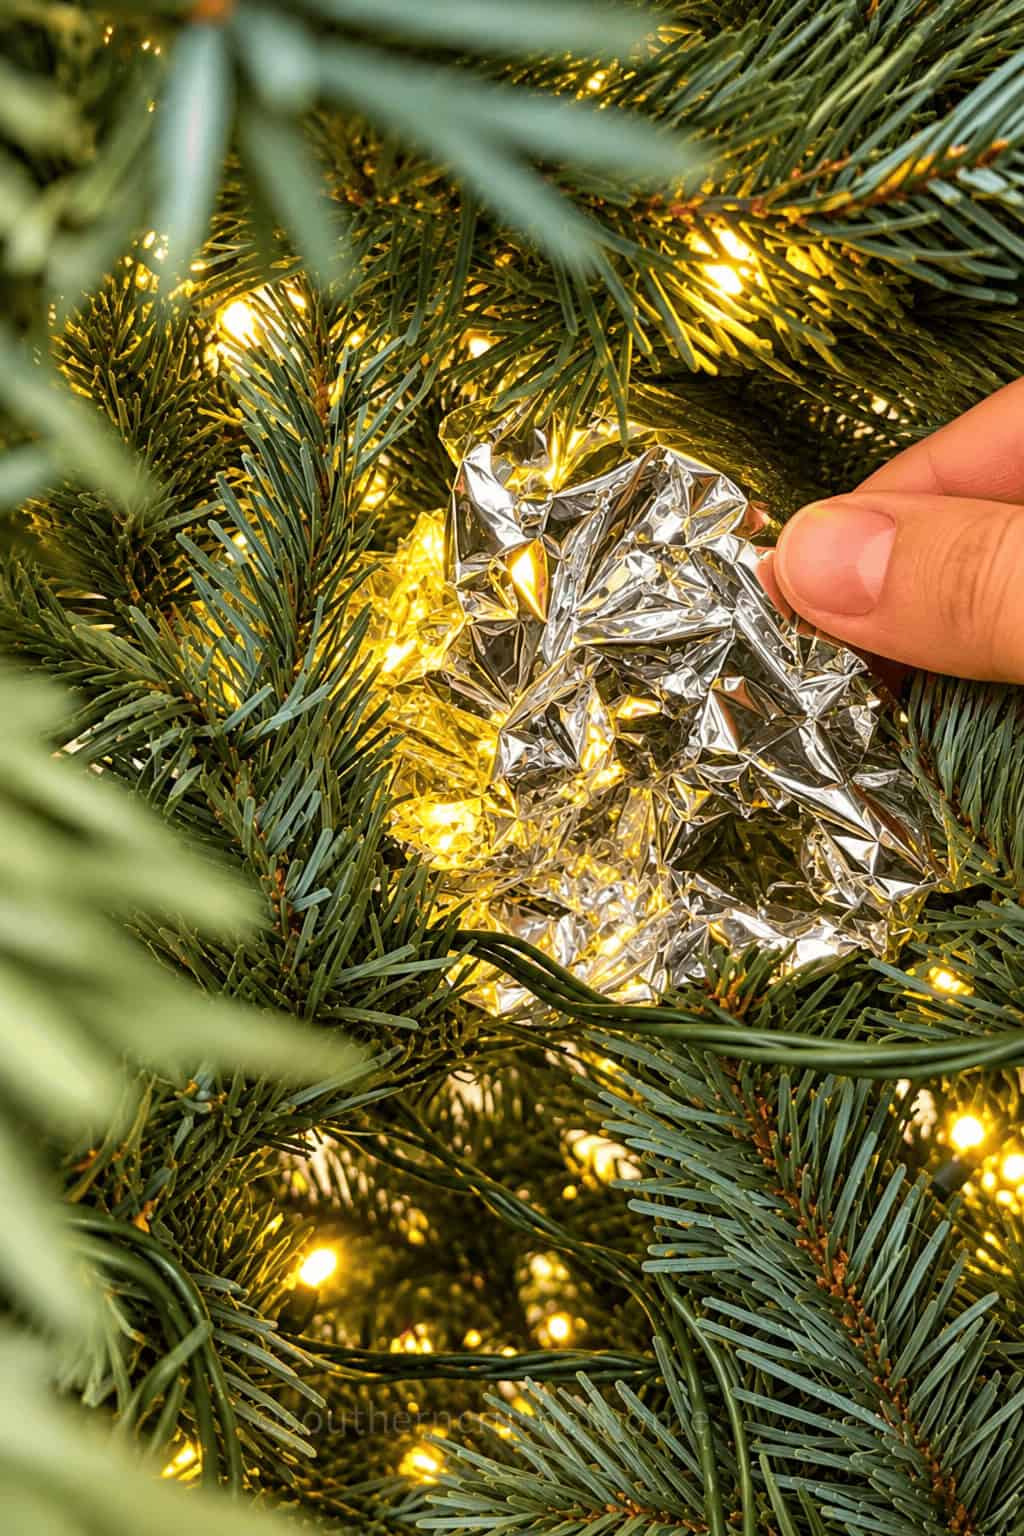
And oh my goodness, what a difference!
It creates extra sparkle and gives the tree more depth without adding another visible ornament.
The best part?
You can’t even see the foil!
It’s completely hidden inside the greenery, quietly doing its job of reflecting all those beautiful twinkling lights.
And considering that you probably already have aluminum foil in your kitchen, this might just be the most budget-friendly Christmas decorating trick I’ve ever shared.
Who needs expensive specialty ornaments when you can get creative with something so simple?
Just be sure to keep the foil clear of electrical connections, damaged wiring, and any exposed bulbs. This trick is best suited to a cool-running LED-lit tree.
I absolutely love finding unexpected ways to make Christmas decorating more affordable, and this one is a keeper.
3. Fill Christmas Tree Gaps With Spray-Painted Backyard Branches
Now we’re heading outside for this next Christmas tree decorating idea.
And when I say outside, I mean my own backyard!
We had some seriously windy weather here in West Texas, and I noticed several fallen branches scattered around the yard.
Instead of tossing them out, I had an idea.
Why not use those branches to fill in the empty spaces in my Christmas tree?
Sometimes the best decorating supplies are completely free.
I gathered a few fallen limbs and removed the smaller branches that had the prettiest shapes.
Then I gave them a coat of copper-brown spray paint.
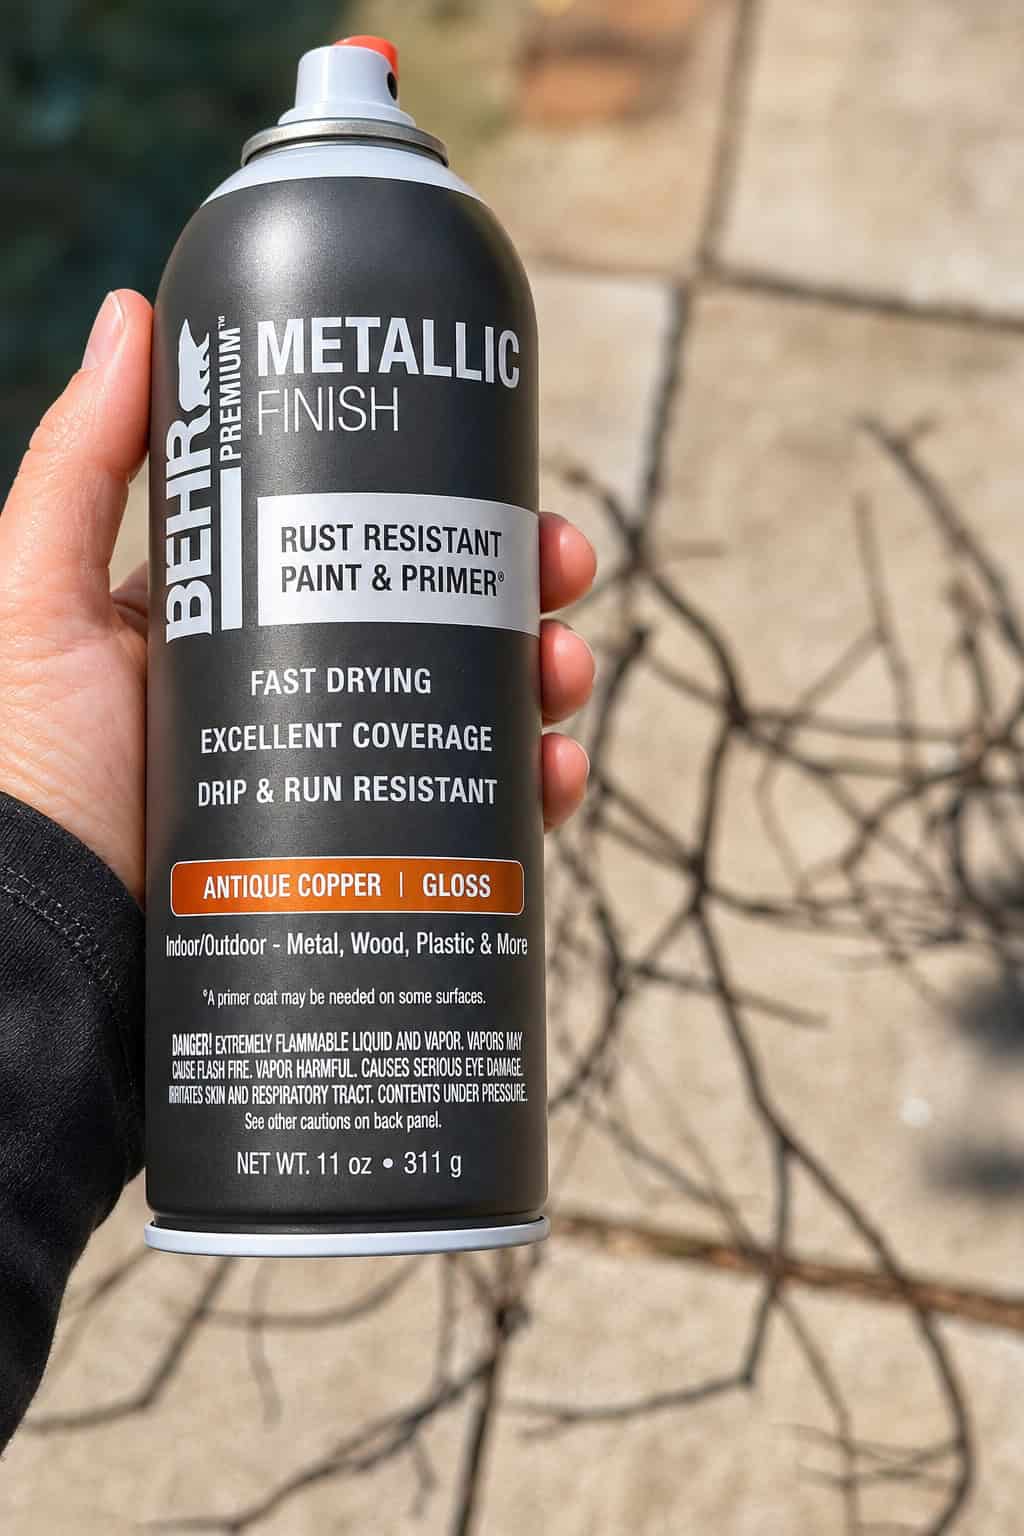
I chose this color because I wanted the branches to blend beautifully with the warm, natural tones of my Christmas tree while adding a subtle metallic touch.
Once the paint was completely dry, I brought the branches inside and started tucking them into the gaps between the artificial greenery.
And let me tell you, this made such a difference!
The branches add texture, dimension, and a natural element that makes the tree look fuller and more interesting.
But I didn’t stop there.
I also used cedar greenery picks to fill in even more empty spaces.
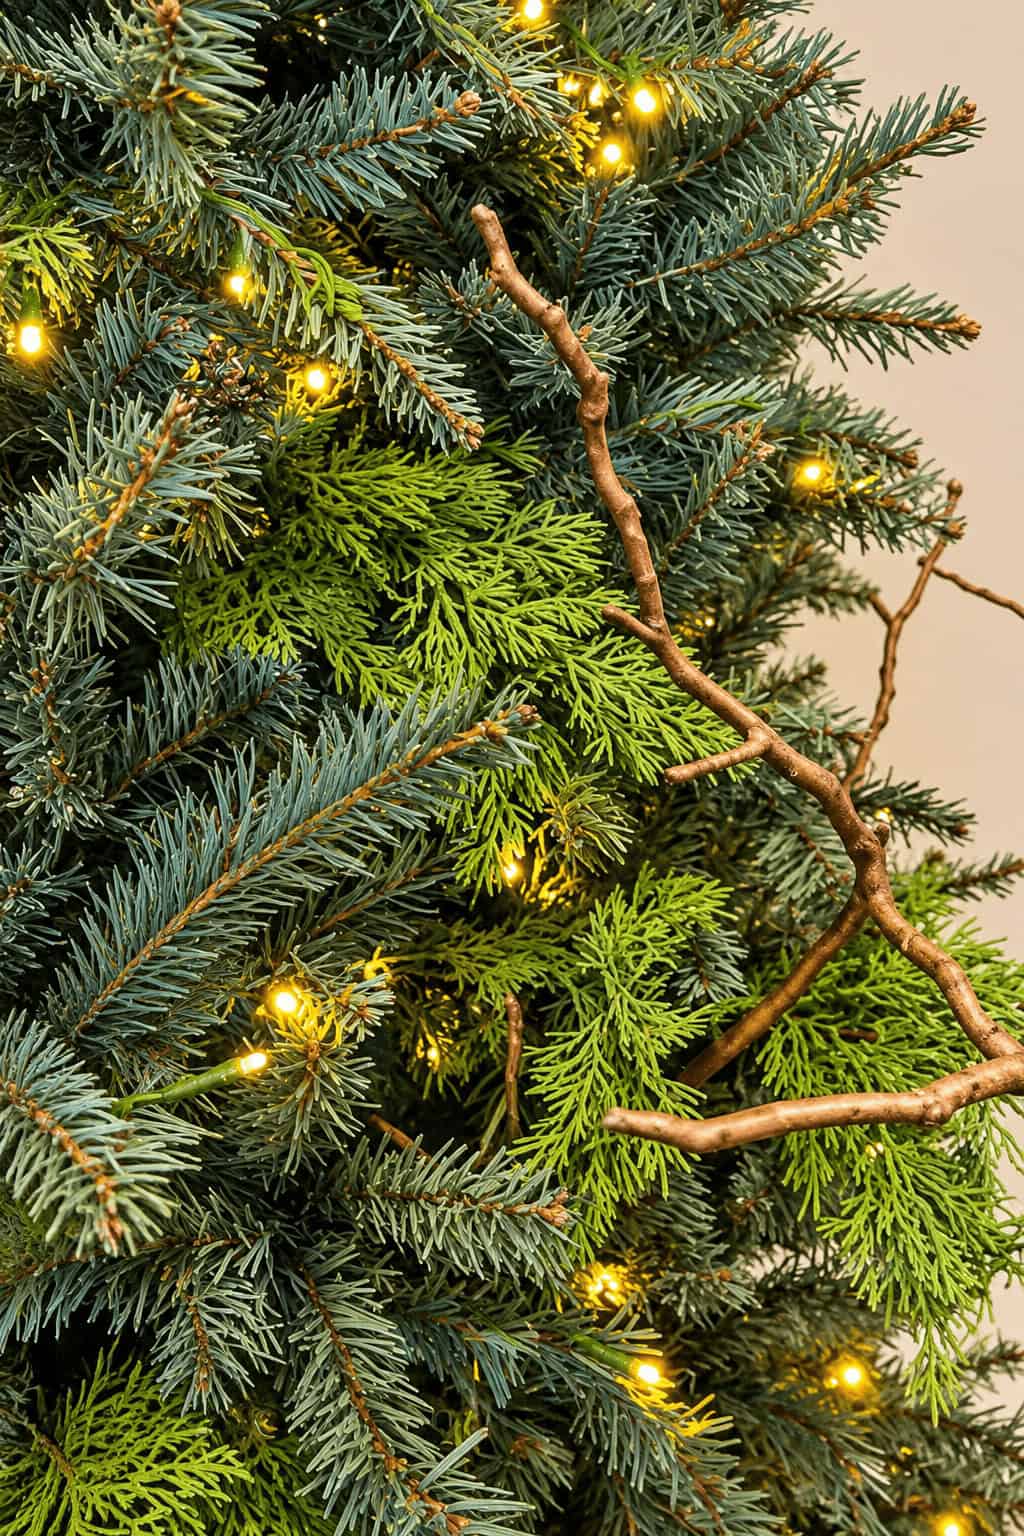
Here’s another little budget-friendly trick.
I took four sets of cedar branches and separated them into 12 individual pieces.
Instead of using each pick as one large decoration, I divided the greenery and gently tucked the smaller pieces throughout the tree.
This allowed me to spread the greenery farther and fill more gaps without buying additional supplies.
It’s such an easy way to stretch your Christmas decorating budget.
Between the spray-painted backyard branches and the separated cedar greenery, my tree started looking fuller, softer, and much more natural.
And isn’t that what we love about a beautifully decorated Christmas tree?
That collected, layered look that feels effortless but still has plenty of thoughtful details.
One little tip: If you’re bringing branches indoors, make sure they’re clean, dry, and free of insects. Keep them away from hot bulbs, and use your spray paint outdoors according to the product directions.
4. Refresh Last Year’s Christmas Bows With a Travel Flat Iron
Let’s talk bows!
I love using beautiful bows on my Christmas tree, but I don’t necessarily want to buy brand-new ones every single year.
And let’s be real.
After being packed away in a storage bin for months, those once-beautiful bows can come out looking a little sad.
They’re flattened, creased, and definitely not giving us that gorgeous designer look we’re going for.
But don’t throw them away!
I have the cutest little trick for bringing those bows back to life.
A travel flat iron!
If you don’t have a cordless one yet, you can find it below!
Yes, the kind you might use for your hair.
I use mine to gently smooth the creases out of my ribbon and reshape the loops.
The trick is to carefully work around each bow loop, restoring its rounded shape so it looks full and fluffy again.
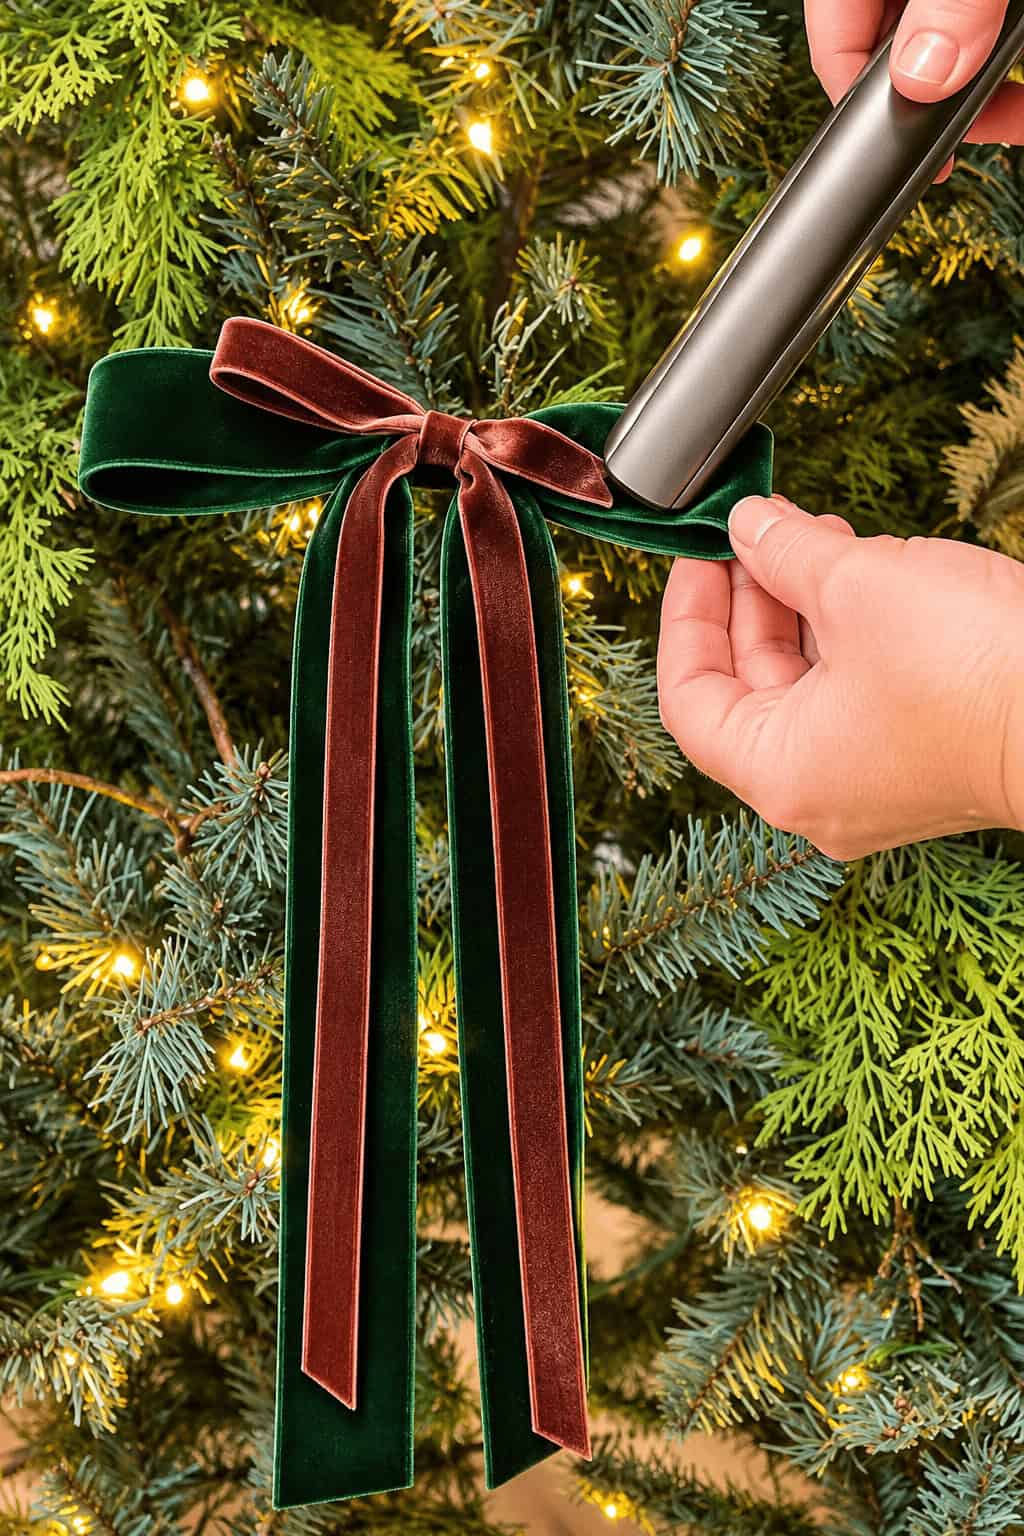
Be sure to check whether your ribbon can tolerate heat, and always test a small hidden area first. Use the lowest appropriate setting, especially with synthetic ribbon, which can melt.
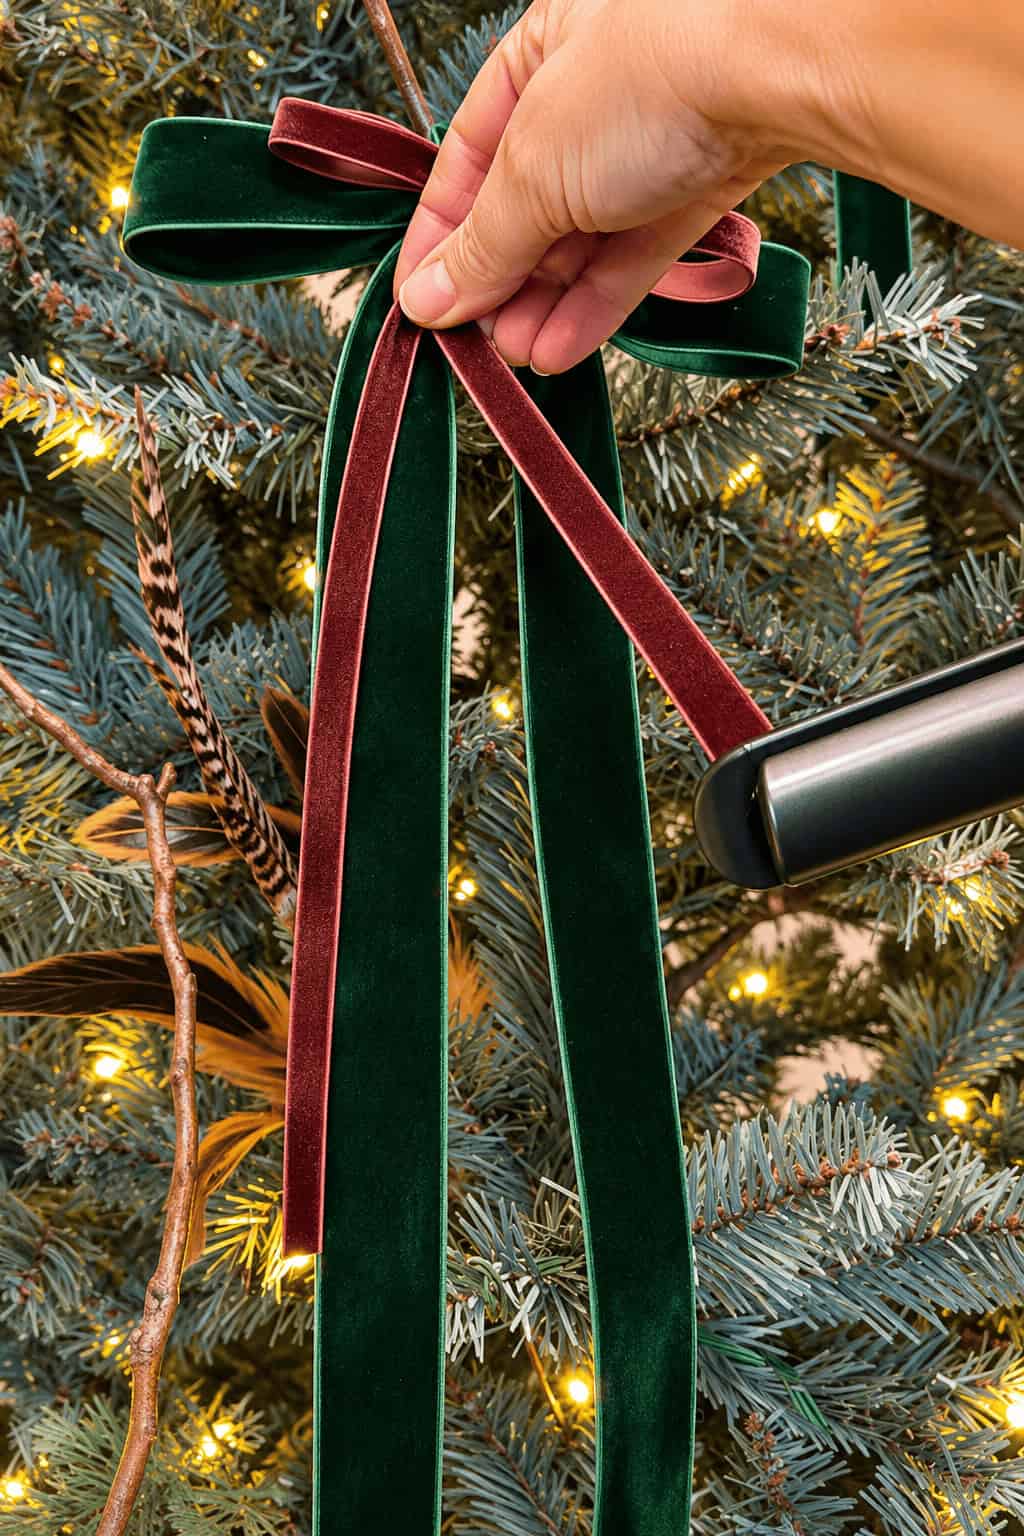
It’s amazing how much better a bow looks once those wrinkles are gone.
But here’s where I decided to get a little extra creative.
Instead of putting the exact same bows back on my tree in the exact same way, I layered them!
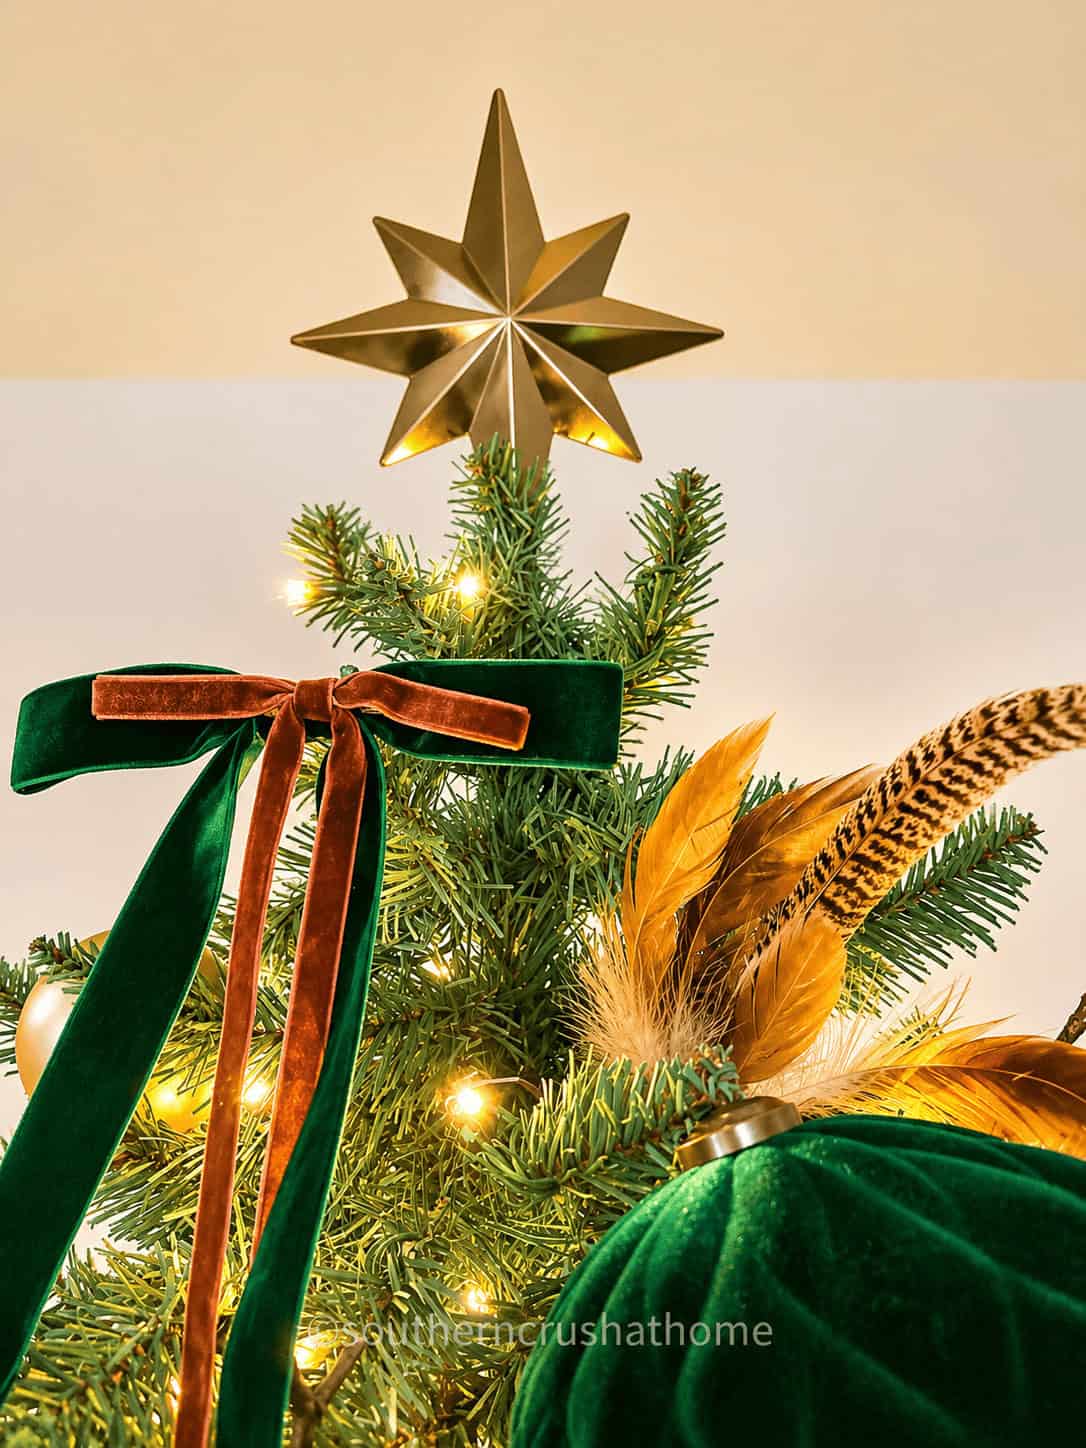
I took my bows from last year and added another bow to each one.
This instantly created a fuller, more dramatic look.
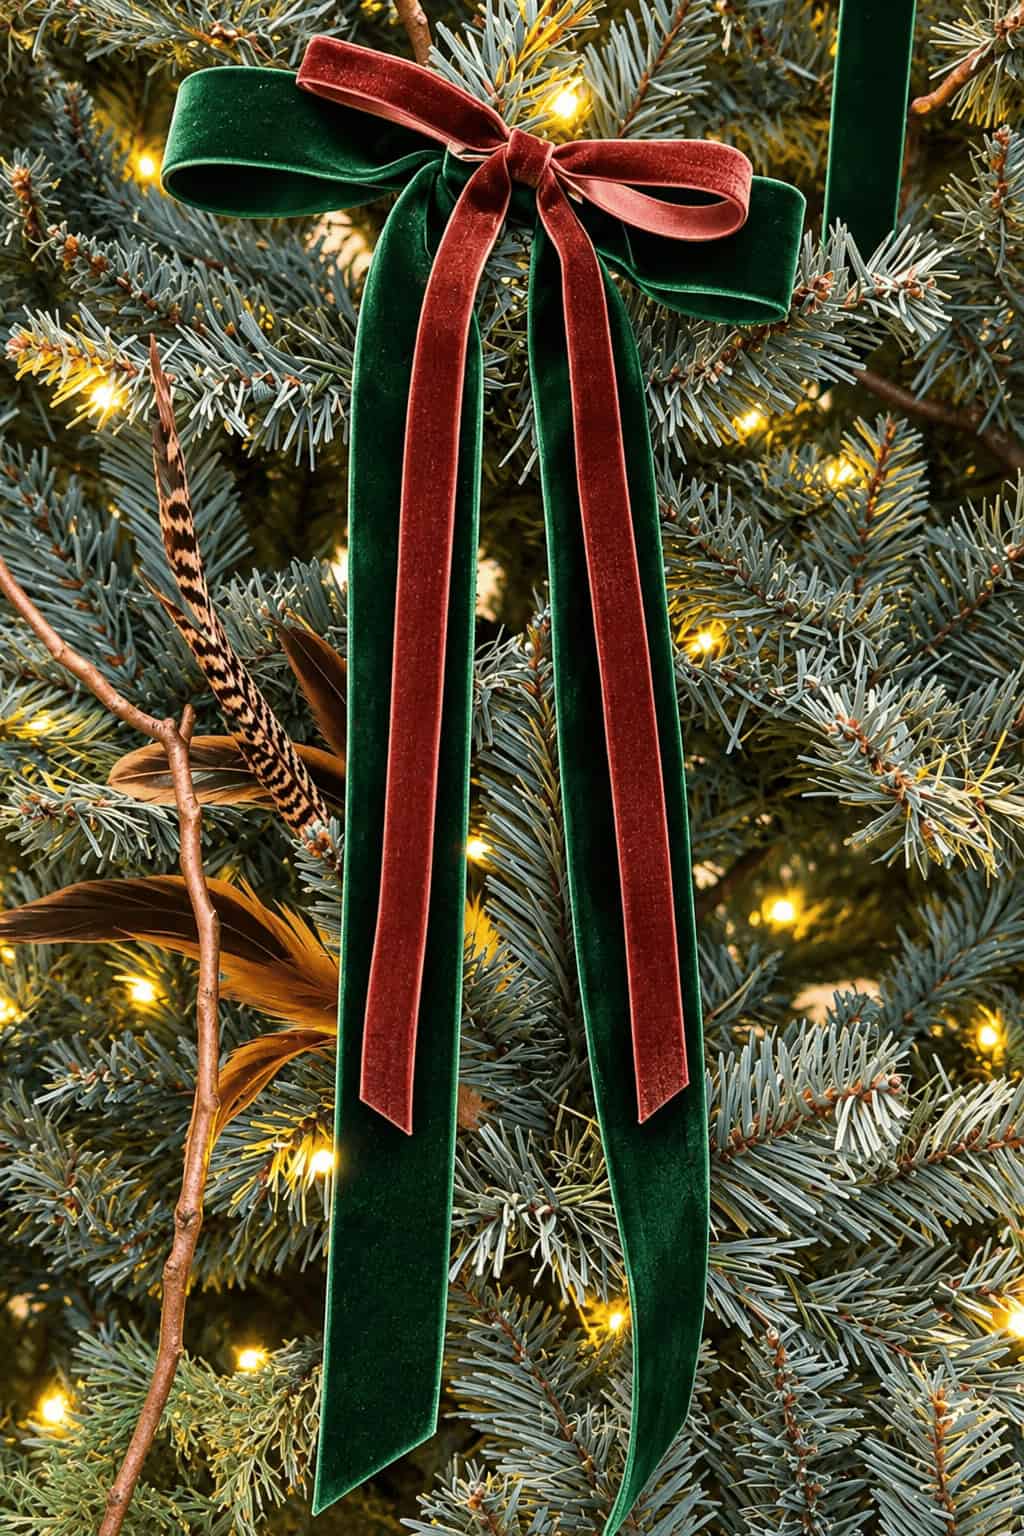
And it made my Christmas tree feel different from the year before without requiring an entirely new collection of decorations.
I love this trick because it’s such an easy way to update your Christmas décor while reusing what you already own.
Sometimes all it takes is one additional layer to make something old feel brand new.
And you know I’m all about that!
5. Hang Christmas Ornaments Without Ornament Hooks
Okay, my friend.
I have a little confession to make.
I don’t use ornament hooks on most of my Christmas tree ornaments.
I know those little metal hangers are the traditional way to decorate a tree, but I’ve found an easier method that works beautifully for me.
And it’s especially helpful when you’re using shatterproof ornaments.
Instead of attaching a hook, I simply tuck the ornament directly into the tree branches.
I position the little ornament cap downward so it’s hidden in the greenery.
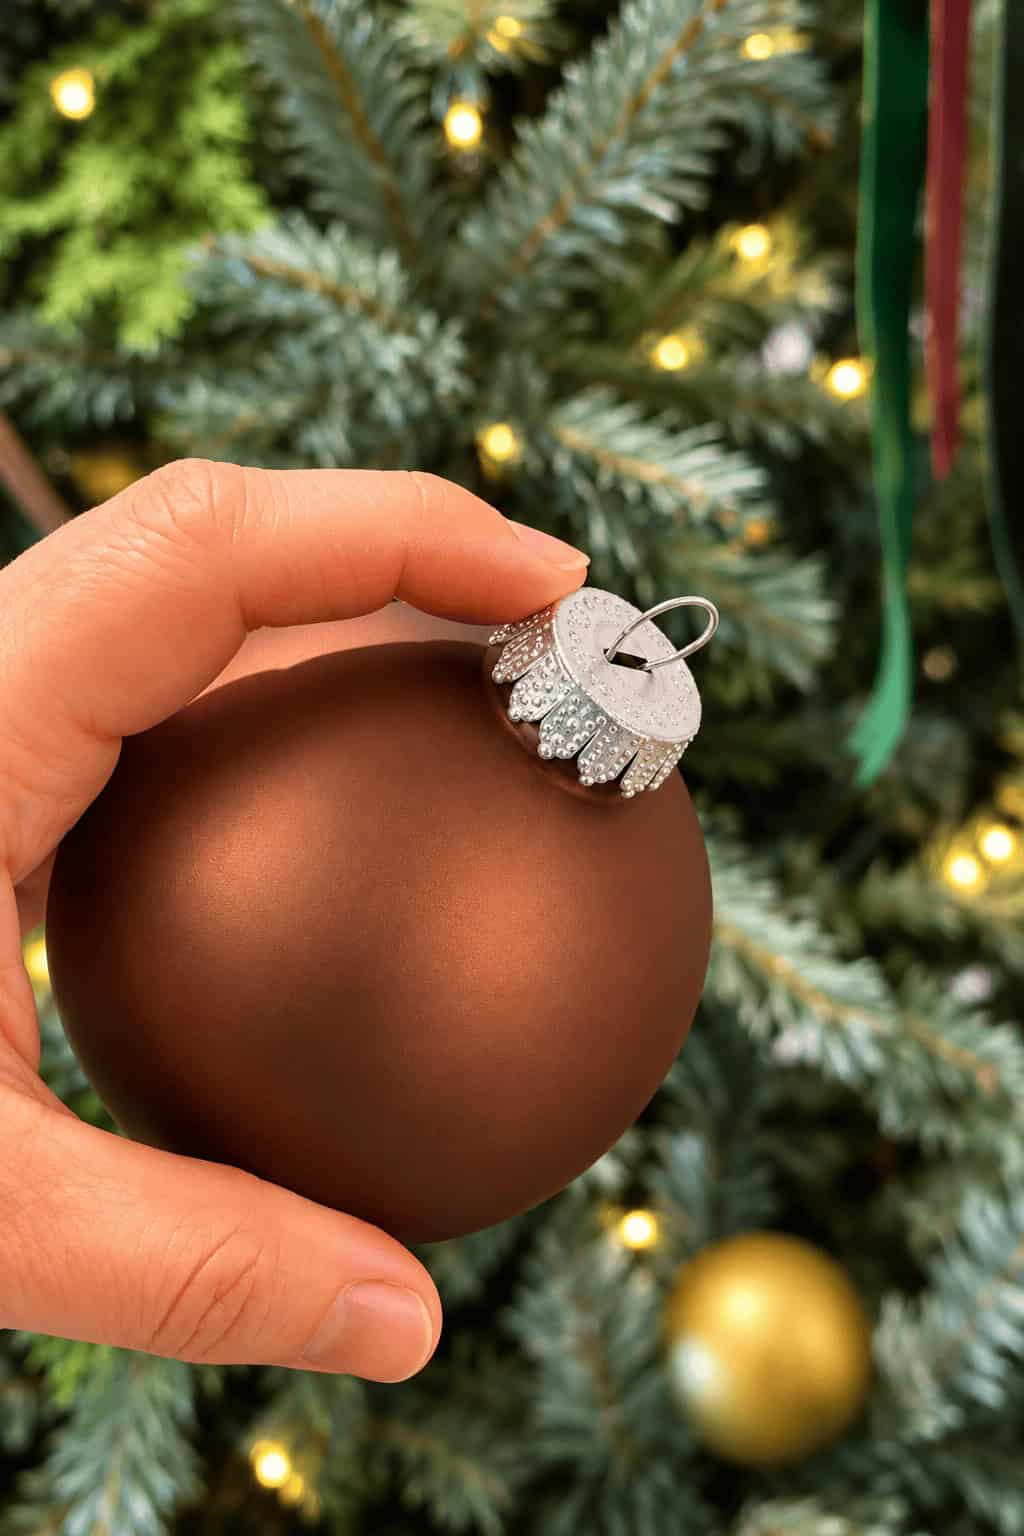
That way, it doesn’t matter whether the cap is silver, gold, or another color.
You never see it!
I just nestle the ornament into a sturdy section of the tree and make sure it stays securely in place.
For slightly heavier ornaments, I’ll position them near the end of a branch and gently bend the branch upward to help hold the ornament.
It’s such a simple little trick, but I love how much freedom it gives me.
I can place ornaments deeper inside the tree, arrange them at different angles, and fill those little empty spaces without worrying about where a hook will hang.
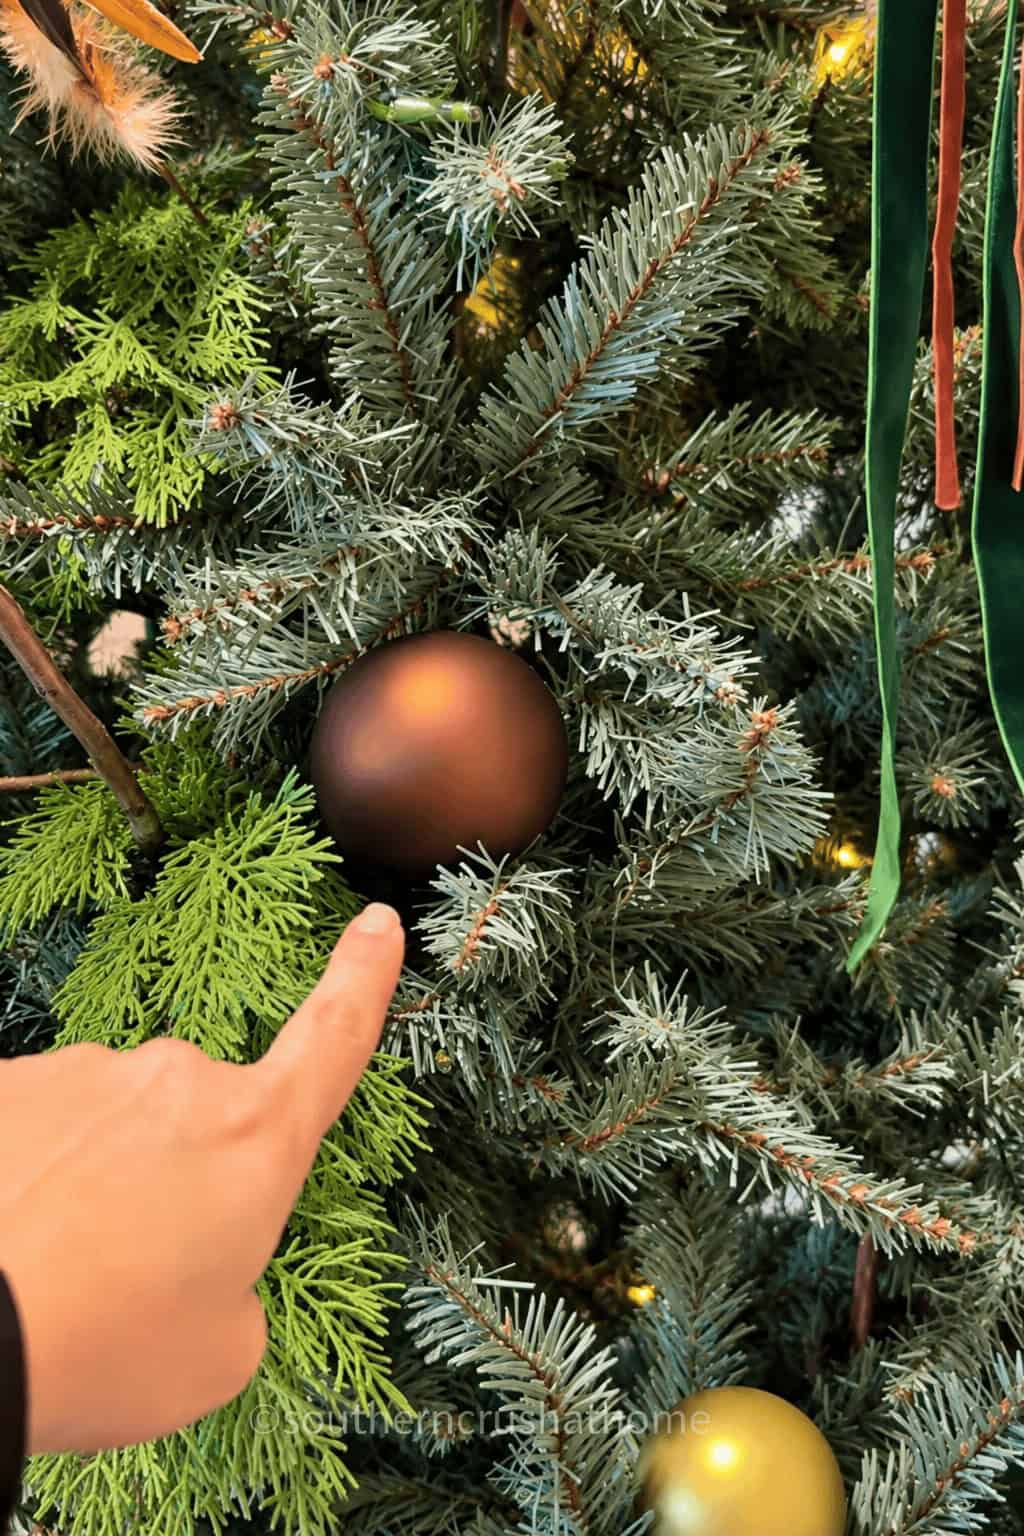
And because I use shatterproof ornaments, I don’t have to worry nearly as much about an accidental fall.
Of course, you’ll still want to make sure every ornament is secure, especially if you have little ones or pets around.
But for my tree, this has become one of my favorite ways to decorate.
No hooks.
No fuss.
Just beautiful ornaments tucked right where I want them.
6. Use a Cozy Throw Blanket Instead of a Christmas Tree Skirt
Now let’s move all the way down to the bottom of the tree.
Because we can’t forget about the tree skirt!
I love a beautiful Christmas tree skirt, but I don’t always love the price tag.
Especially when I want to change up my Christmas decorating style from year to year.
So I came up with a simple alternative.
Use a throw blanket!
I found a beautiful, rich, soft throw that coordinated perfectly with my Christmas tree.
And would you believe it was only $15?
The blanket measured 50 by 60 inches, which gave me plenty of fabric to arrange around the base of the tree.
I simply tucked and draped it underneath, creating a soft, luxurious look.
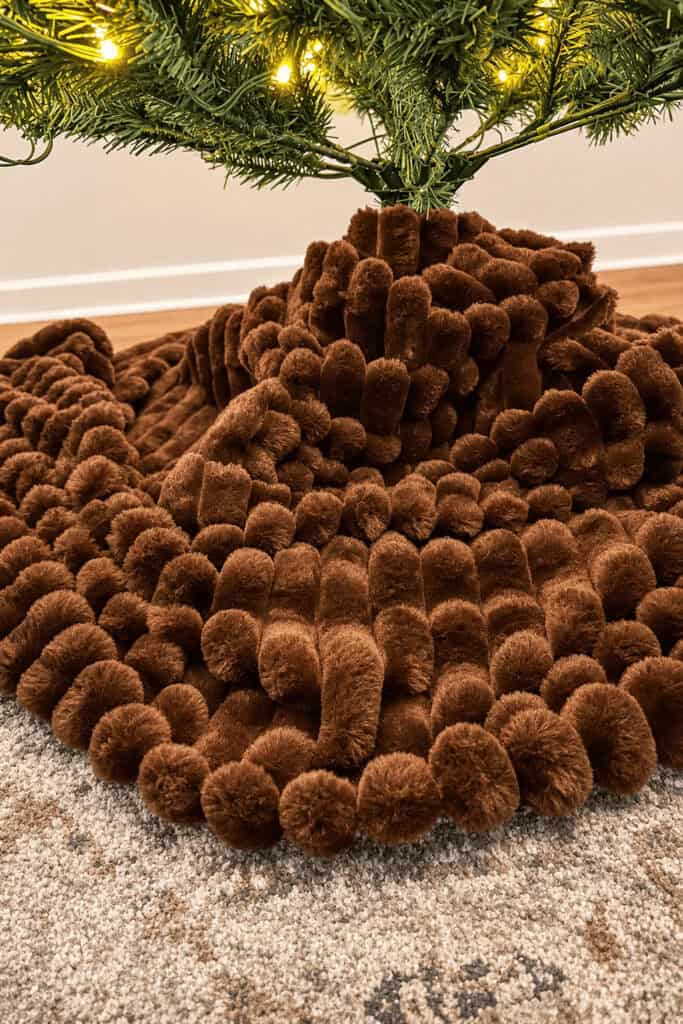
Just a beautiful throw blanket styled as a Christmas tree skirt.
And here’s what I especially love about this idea.
When Christmas is over, you still have a perfectly good throw blanket!
You can use it in your living room, drape it over a chair, or save it for next year’s Christmas tree.
It’s practical, affordable, and such an easy way to change the entire look of your holiday décor.
I also love the softness it adds underneath the tree.
The contrast between the greenery, metallic ornaments, and cozy fabric creates a beautiful layered look.
It feels elegant and inviting without being overly formal.
And for $15?
That’s my kind of Christmas decorating!
Bringing It All Together: My Designer-Inspired Christmas Tree on a Budget
Now that you’ve seen all six of my unusual Christmas tree decorating tricks, let’s talk about how they work together.
Because that’s really the secret to creating a beautiful Christmas tree.
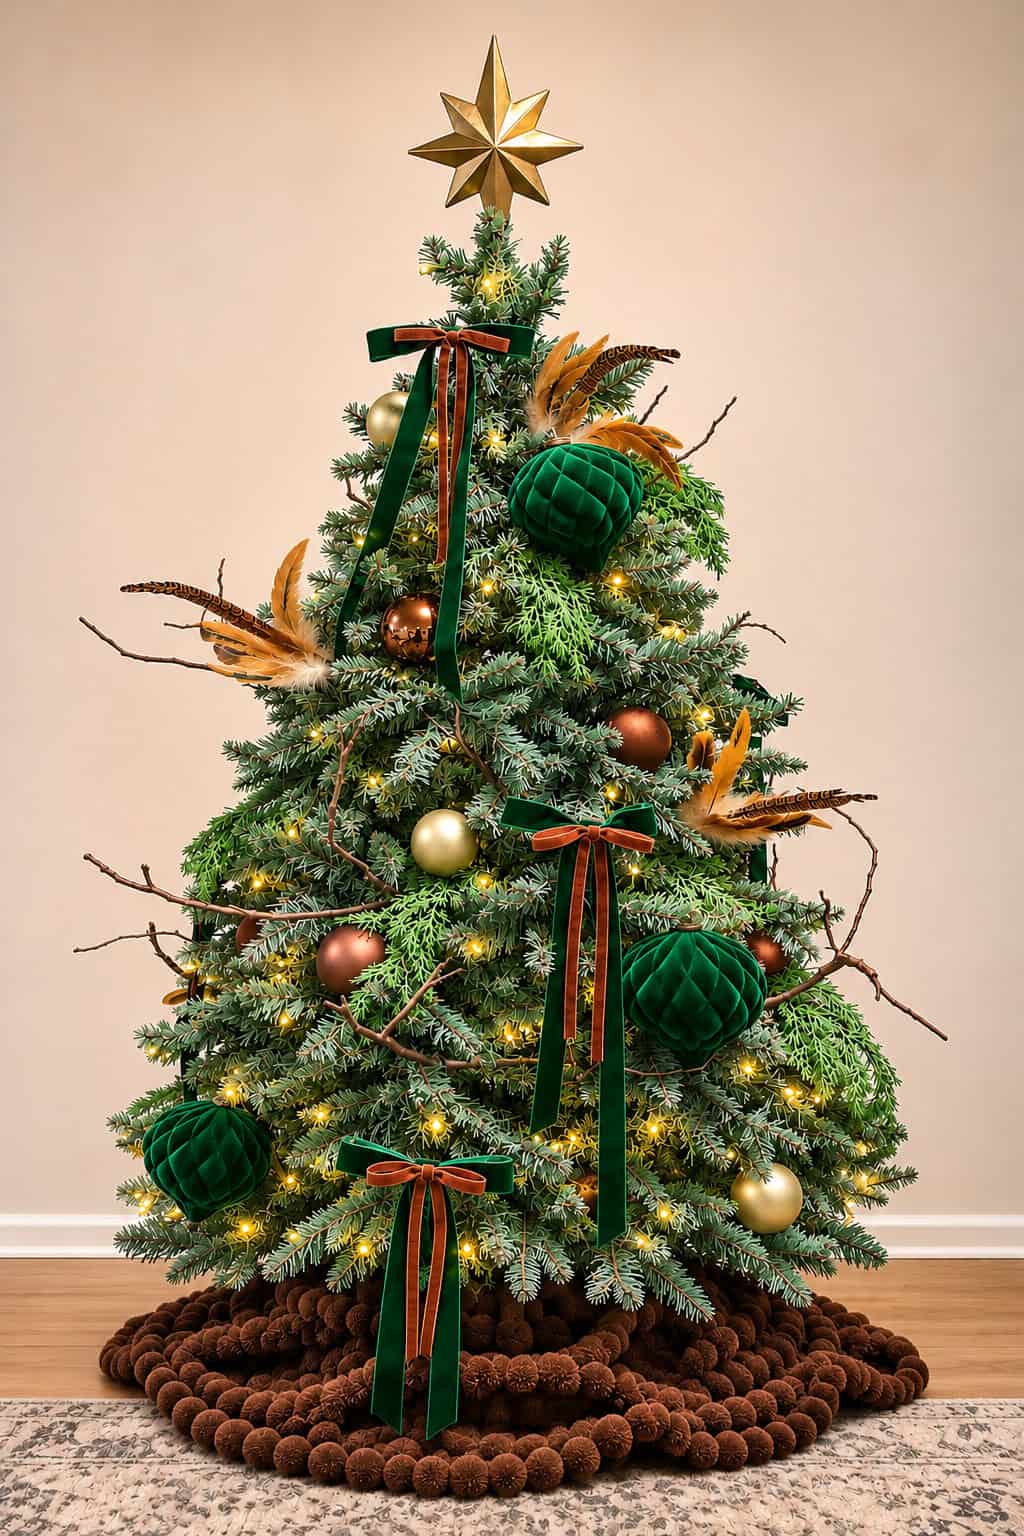
It’s not necessarily about any one expensive ornament or elaborate decoration.
It’s about layering simple details that complement one another.
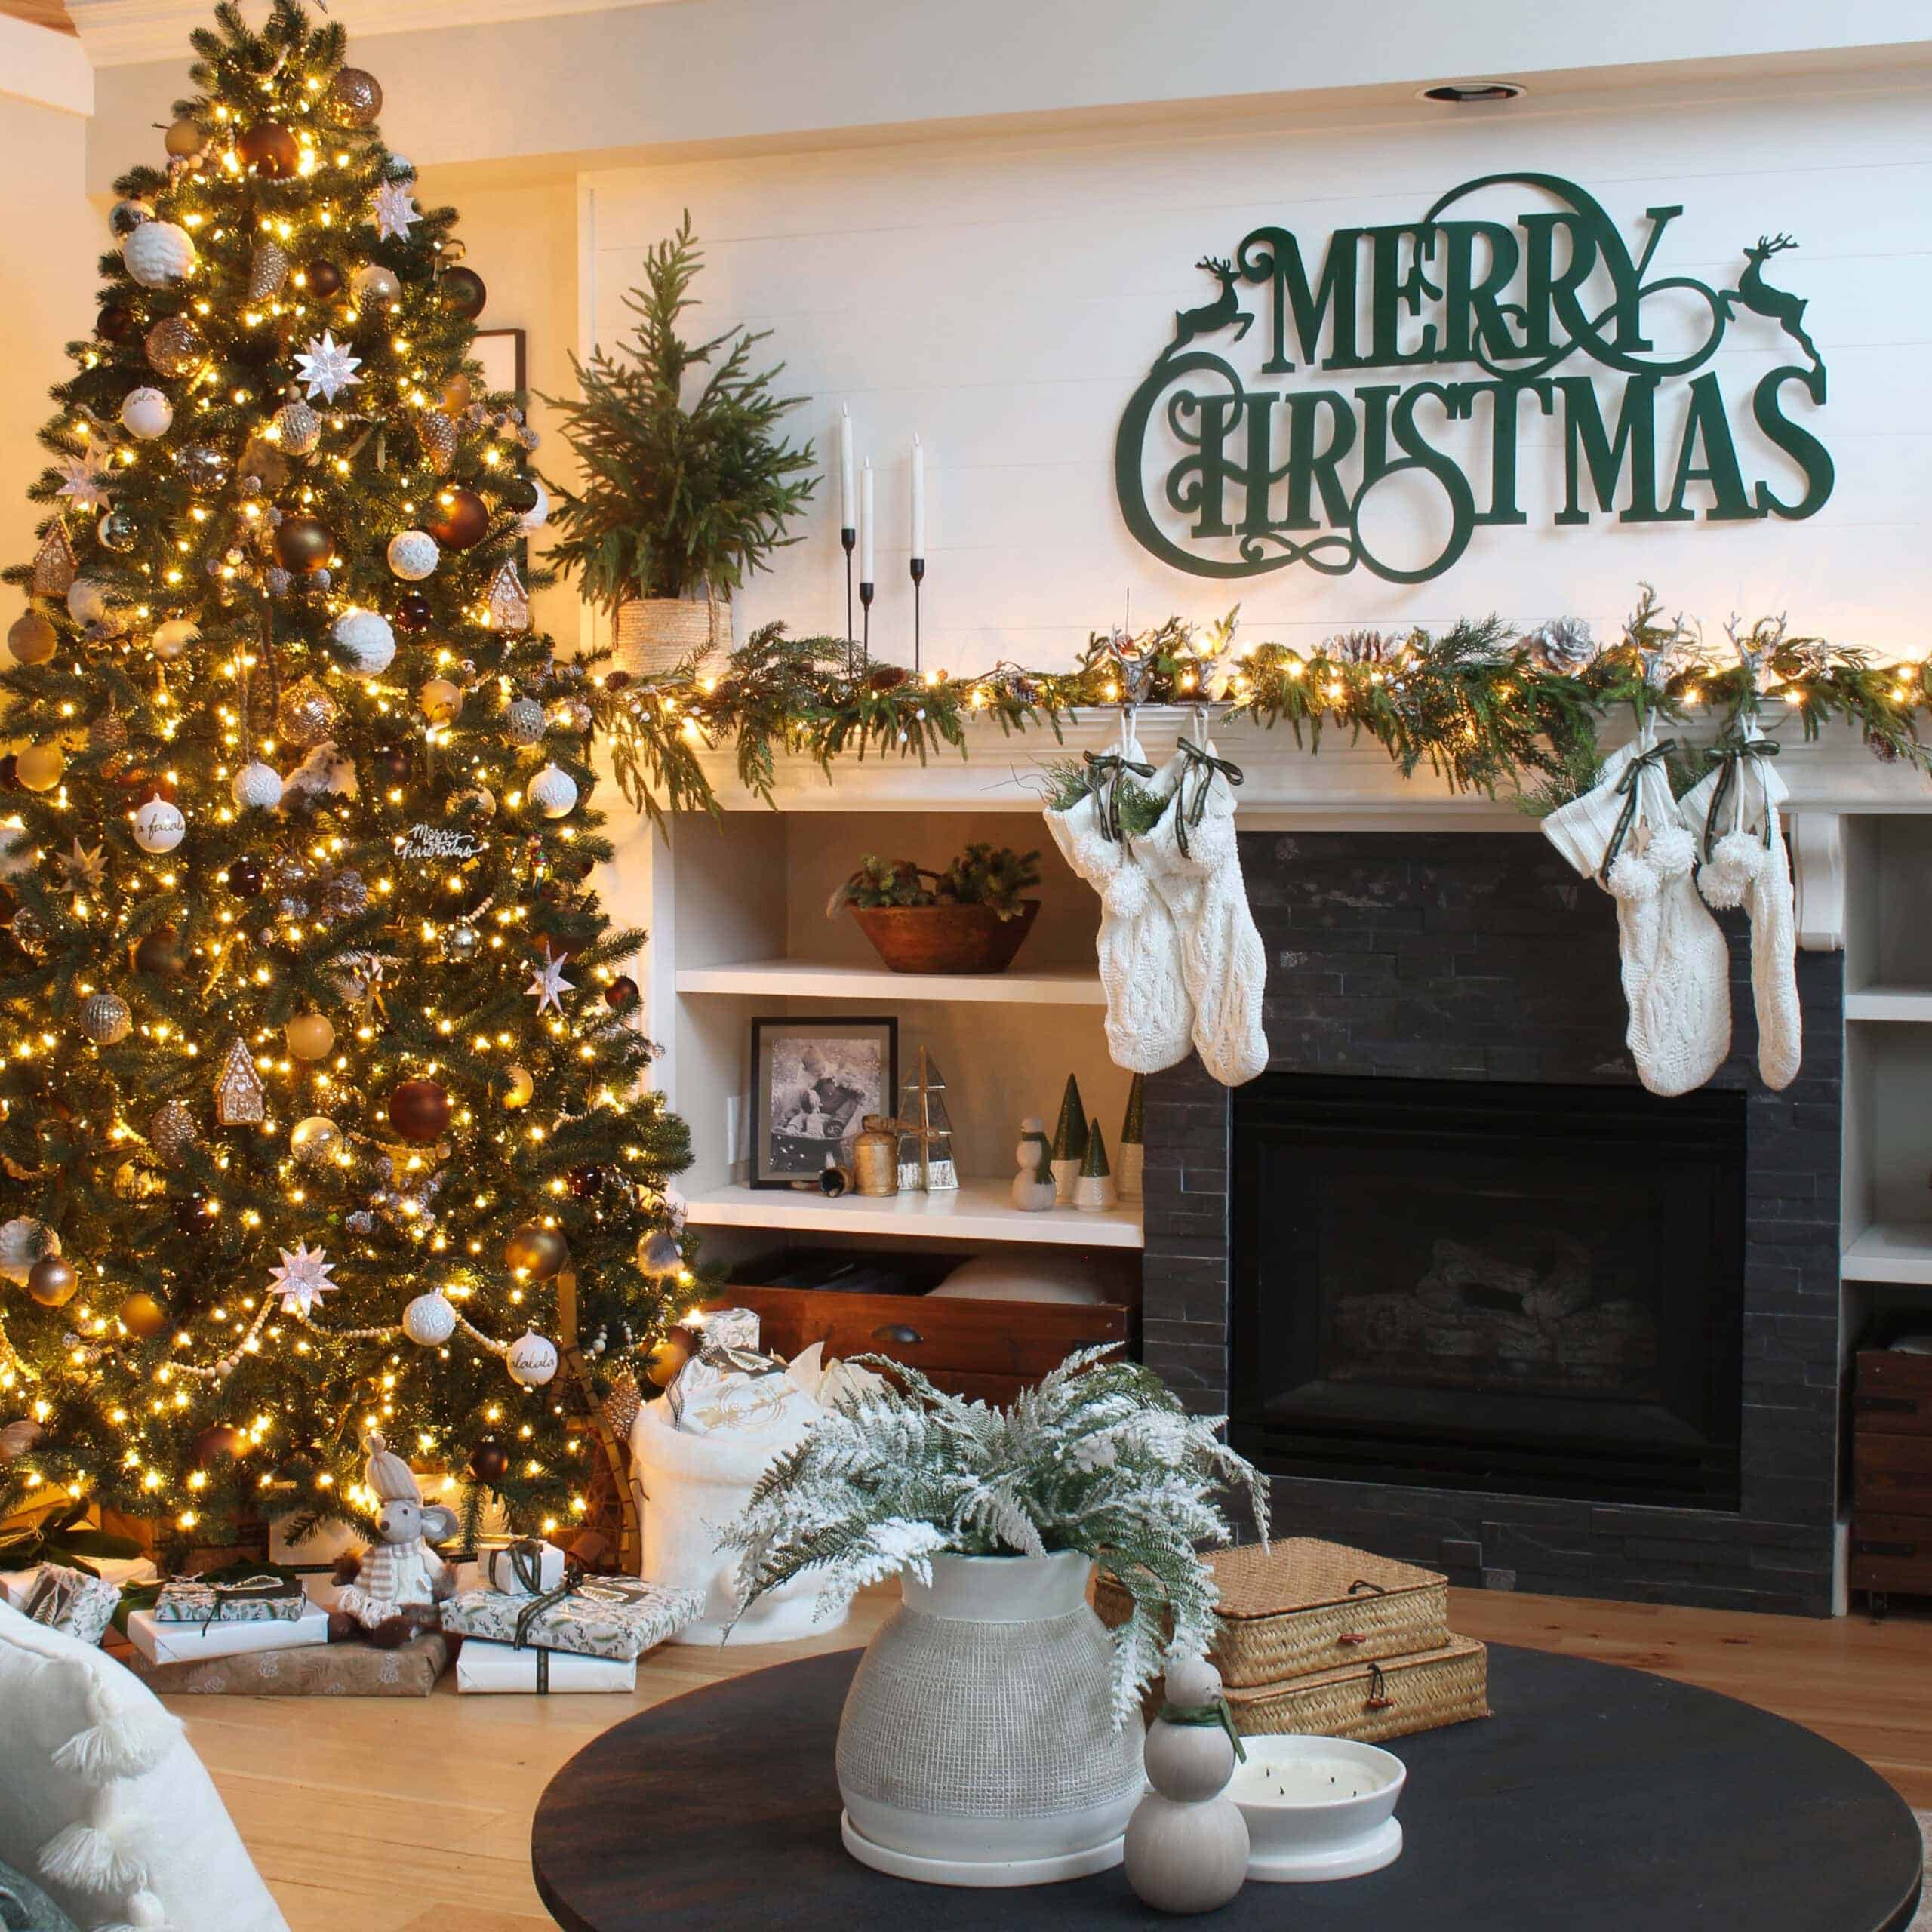
The aluminum foil tucked inside the tree reflects the Christmas lights and creates extra sparkle.
The spray-painted backyard branches and separated cedar greenery fill the gaps and add natural texture.
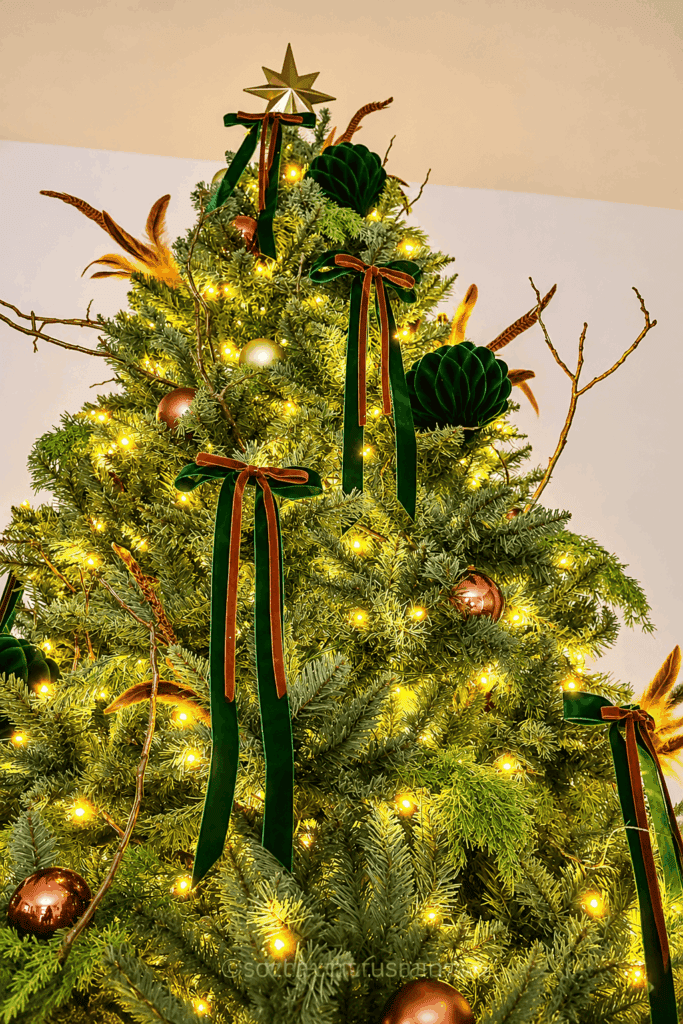
The refreshed, layered bows bring fullness and softness to the branches.
The shatterproof ornaments tuck easily into place without distracting hooks.
And the cozy throw blanket finishes everything off with a rich, beautiful look at the base.
Each idea is simple on its own.
But when you combine them?
Oh my goodness, my friend.
You get a Christmas tree that feels thoughtfully decorated, full of personality, and looks so much more expensive than it actually is.
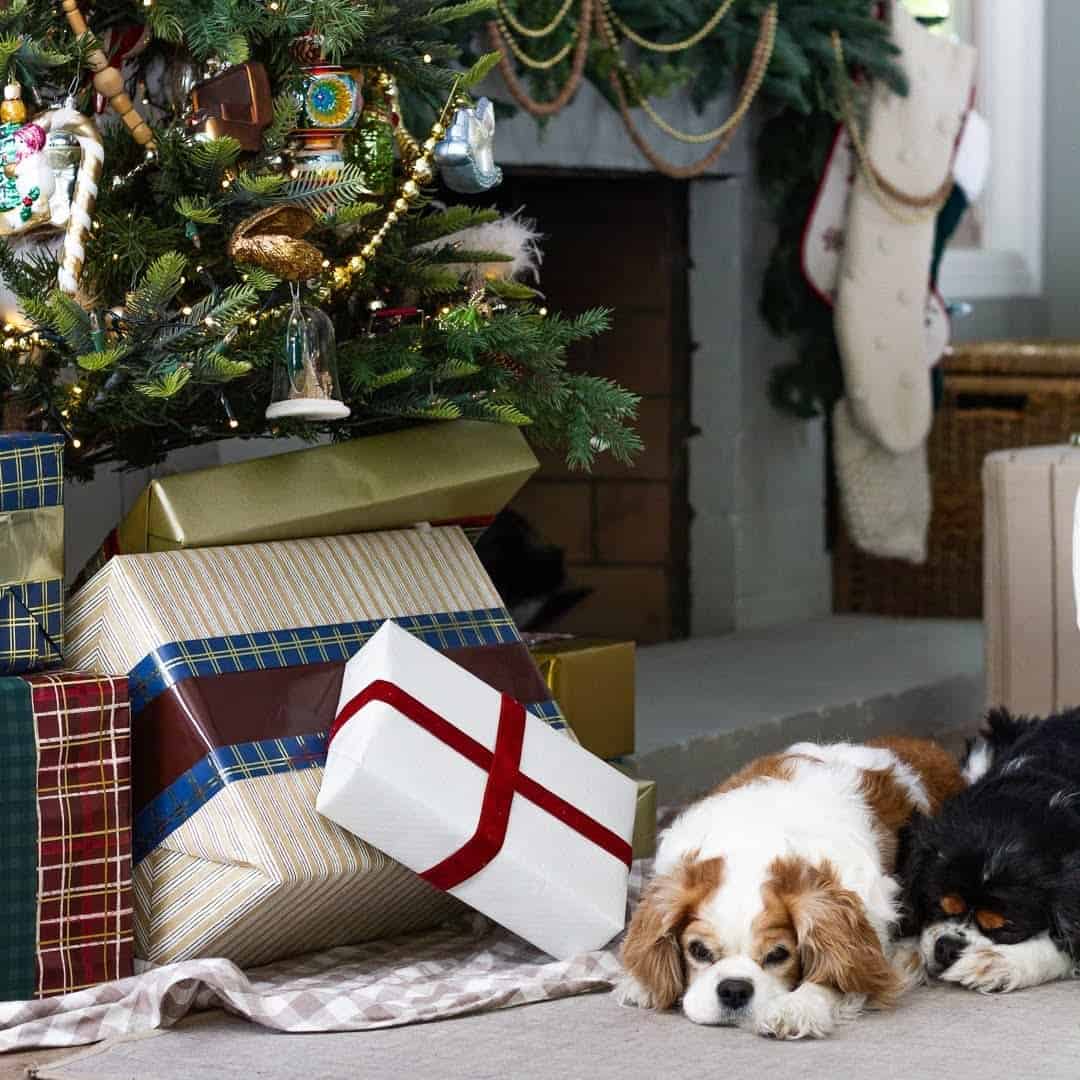
Oh and I had a little bit of help Christmas tree decorating my “grand dog”… lol! Isn’t he adorable?

My Favorite Christmas Decorating Advice? Use What You Have!
If there’s one thing I hope you’ll remember from this holiday home tour, it’s this:
You don’t have to buy all new Christmas decorations to create an entirely new look.
Sometimes you just need to look at what you already have a little differently.
A fallen branch becomes a beautiful tree filler.
A piece of aluminum foil becomes a hidden light reflector.
Last year’s bows get a little makeover.
A cozy throw blanket becomes an elegant tree skirt.
And suddenly, you’re creating something beautiful without spending a fortune.
That’s the kind of creativity I love sharing here at Southern Crush at Home.
It’s about finding inspiration in everyday things and giving yourself permission to try something unexpected.
You don’t need to be a professional decorator.
You don’t need a huge budget.
And you certainly don’t need everything to be perfect.
You just need a little imagination and the willingness to have fun with it.
Well, my friend, there you have it!
My Christmas tree, decorated from top to bottom using some of my most unusual and affordable Christmas decorating ideas.
I hope this little holiday home tour has inspired you to try something different with your own tree this year.
Maybe you’ll tuck some aluminum foil behind your Christmas lights.
Maybe you’ll head into your backyard looking for a few pretty branches.
Or maybe you’ll finally give yourself permission to skip fluffing the back of that tree!
Whatever you decide, I hope you have fun creating a Christmas tree that feels beautiful and uniquely yours.
Because at the end of the day, the holidays aren’t about having the most expensive decorations or the most perfectly styled home.
They’re about creating a warm, welcoming place filled with the things and people we love.
And a little Christmas sparkle certainly doesn’t hurt!
Now I want to hear from you!
Which of these six Christmas tree decorating tricks surprised you the most?
Was it the aluminum foil, the backyard branches, the travel flat iron, the hook-free ornaments, or the throw blanket tree skirt?
Leave me a comment below and tell me which idea you’re going to try.







Until next time, my friend, stay creative!
Christmas tree decorating ideas on a budget, designer Christmas tree ideas, DIY Christmas tree decorations, how to make a Christmas tree look fuller, Christmas tree filler ideas, Christmas tree ribbon bows, alternative Christmas tree skirts.
