Easy Spackle Pumpkin Canvas Art for Fall Decor
Looking for a unique and affordable fall decor idea that’s not your average orange pumpkin? This Dollar Tree DIY spackle pumpkin canvas art project is a fun and creative way to use everyday materials to craft something totally custom for your autumn home decor.
With just a 10×10 canvas, some DAP lightweight spackle, and a few tools you likely already have, you can create a textured pumpkin that looks like something you'd find in a boutique. It’s perfect for a shelf, entryway table, or layered in a fall mantel display.
This blog post contains affiliate links. The opinions are wholly my own from my own experience. I may earn a small commission from clicks through to the websites that end in a purchase.
Supplies You’ll Need
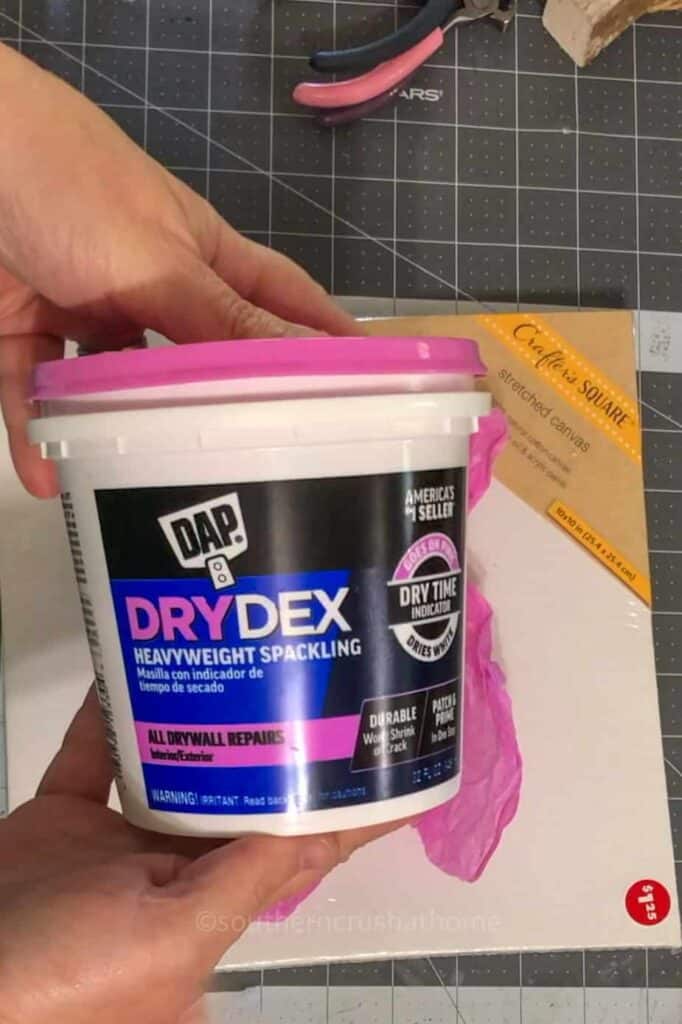
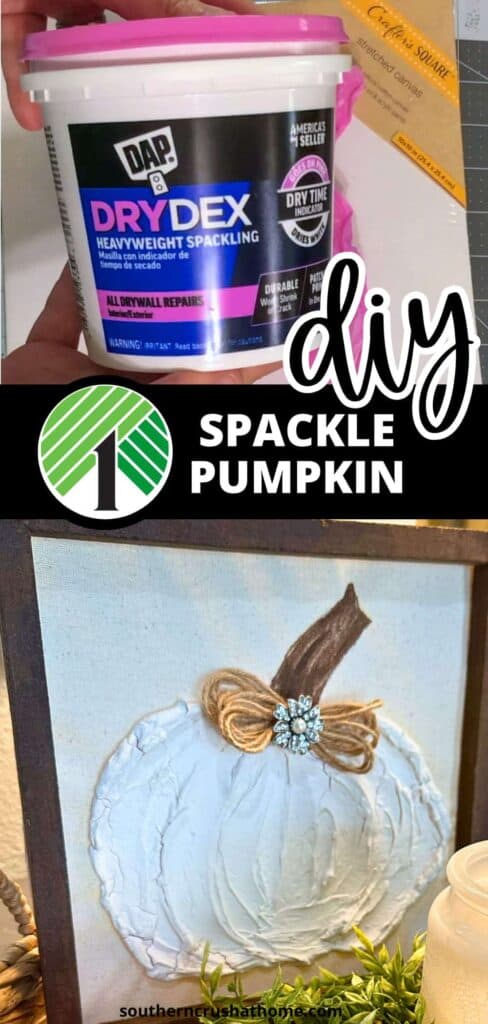
- 1 tub of DAP Lightweight Spackle (Medium)
- 10×10 white stretched canvas (Dollar Tree)
- Scissors
- Wood stain (optional for frame)
- Large spoon + small spoon
- Heat tool (or time to let air dry)
- Permanent marker or craft paint
- Hot glue gun + glue sticks
- Ribbon or bow of your choice
YouTube Tutorial
Step-by-Step Instructions
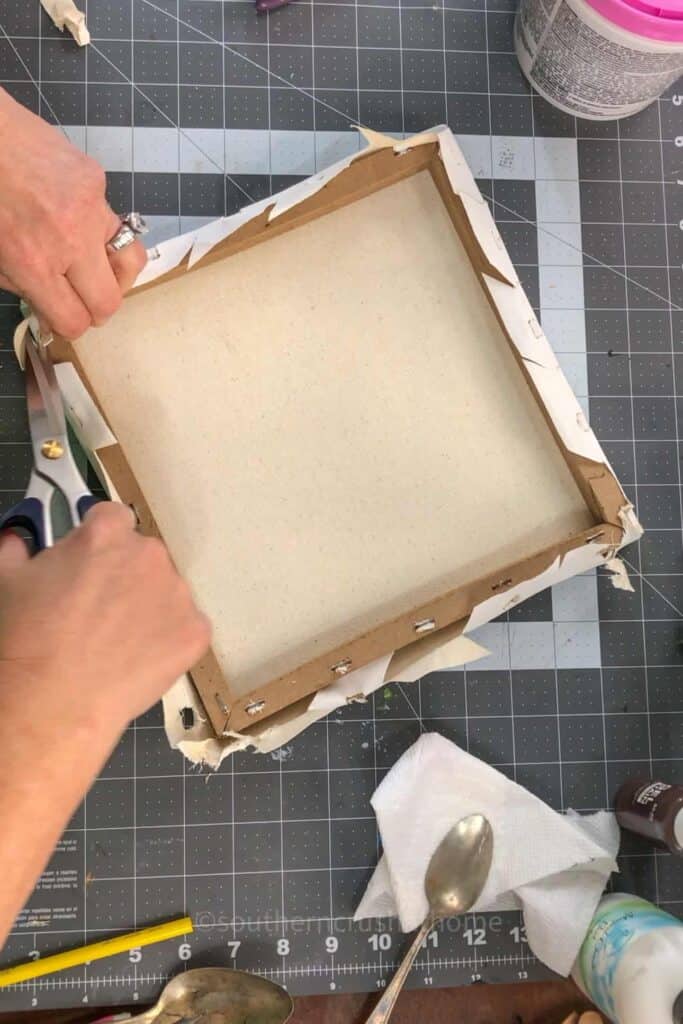
Step One: Remove Canvas from the Frame
Carefully use scissors or a craft knife to remove the canvas from the wooden frame.
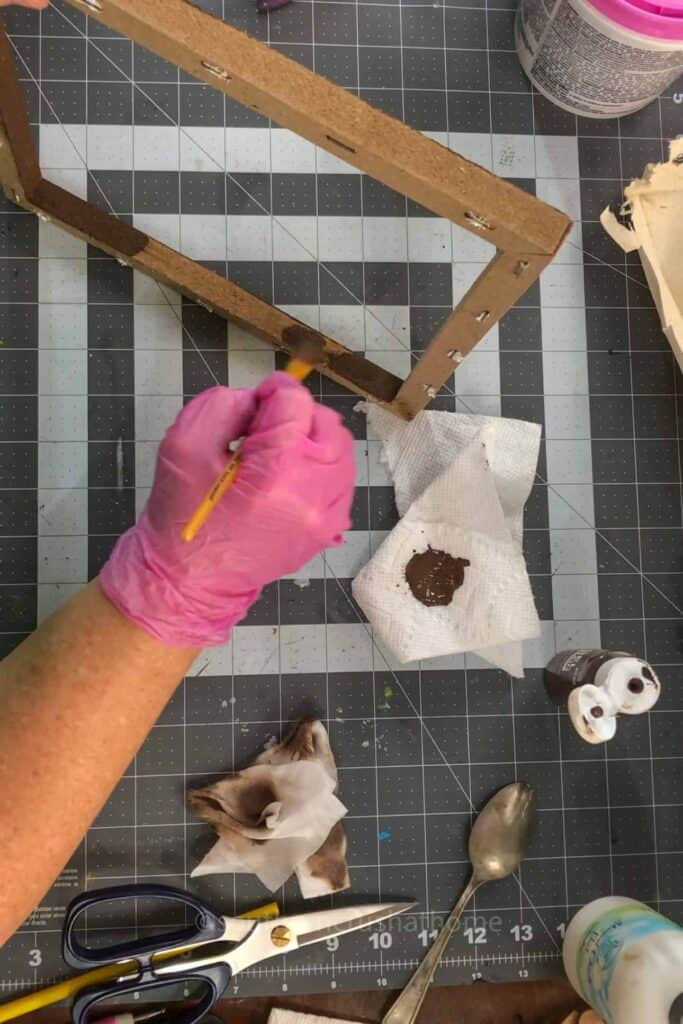
Step Two: Stain the Frame (Optional)
If you want a rustic or finished look, stain the wooden frame using your favorite wood stain color. Let it dry completely while you continue with the project.
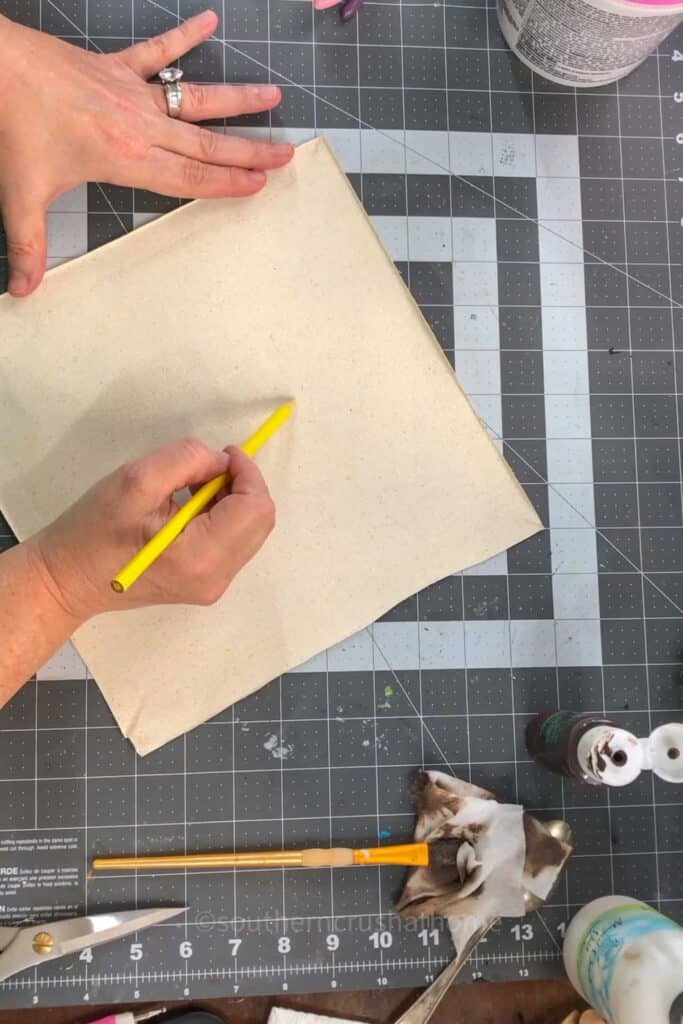
Step Three: Draw a Faint Outline of Your Pumpkin
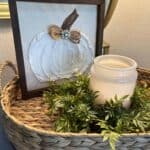
Use a pencil or marker to lightly sketch a simple pumpkin shape onto the canvas. Think basic curved lines—nothing fancy! This will help guide your spackle application.
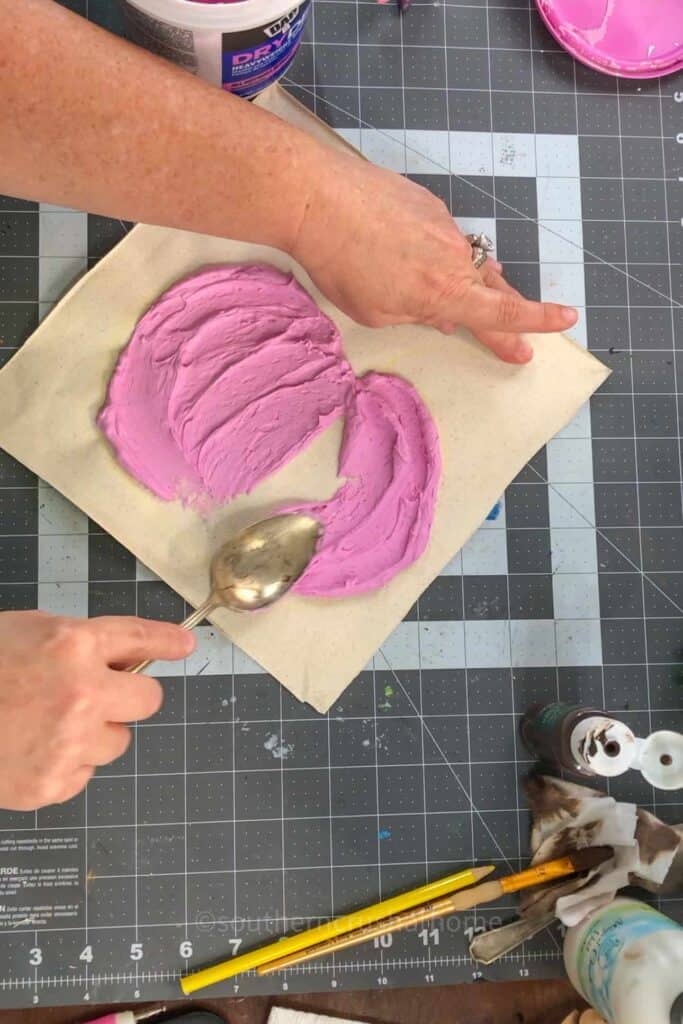
Step Four: Apply the Spackle
Using the back of a large spoon, scoop up a generous amount of DAP lightweight spackle and spread it onto the canvas within your outline. Create texture by swirling and layering it, just like frosting a cake.
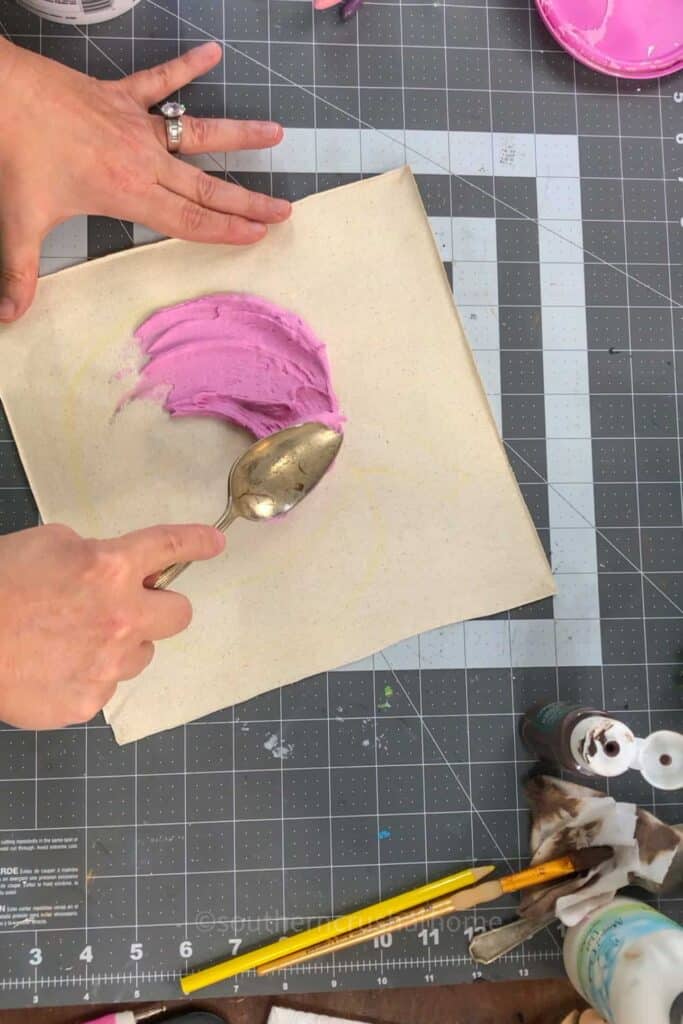
A small spoon can be helpful for tighter corners or details.
Step Five: Dry the Spackle
You can either use a heat tool to speed up the drying process or let it air dry for at least 5 hours (or overnight for best results). Make sure the spackle is completely hardened before moving on.
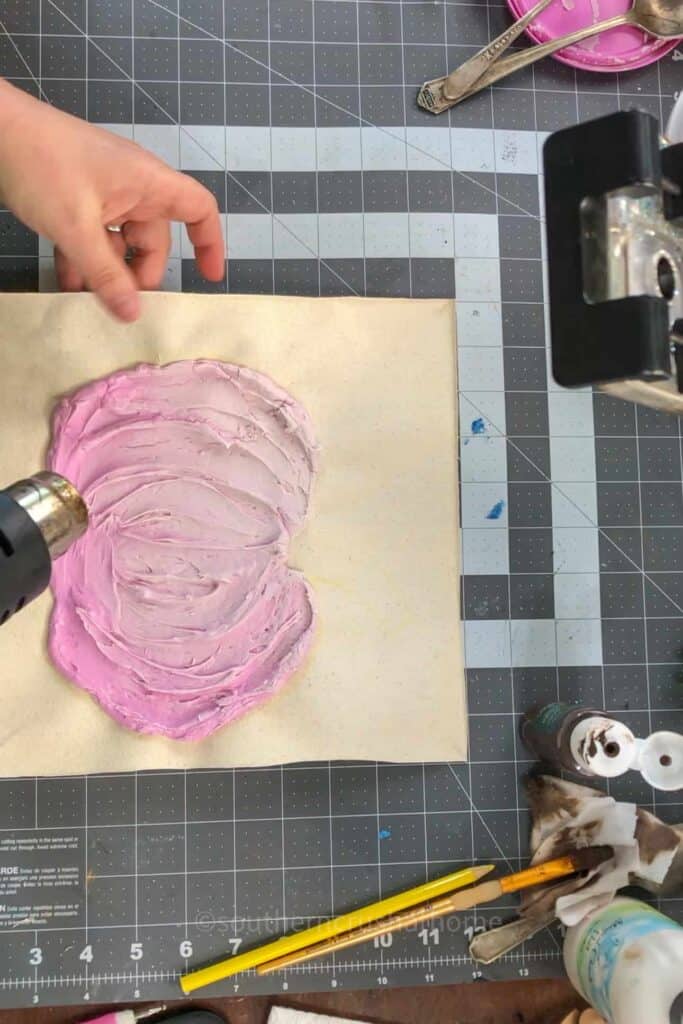
The pink spackle will then turn white! It's like magic! I Love it!
Step Six: Add the Pumpkin Stem
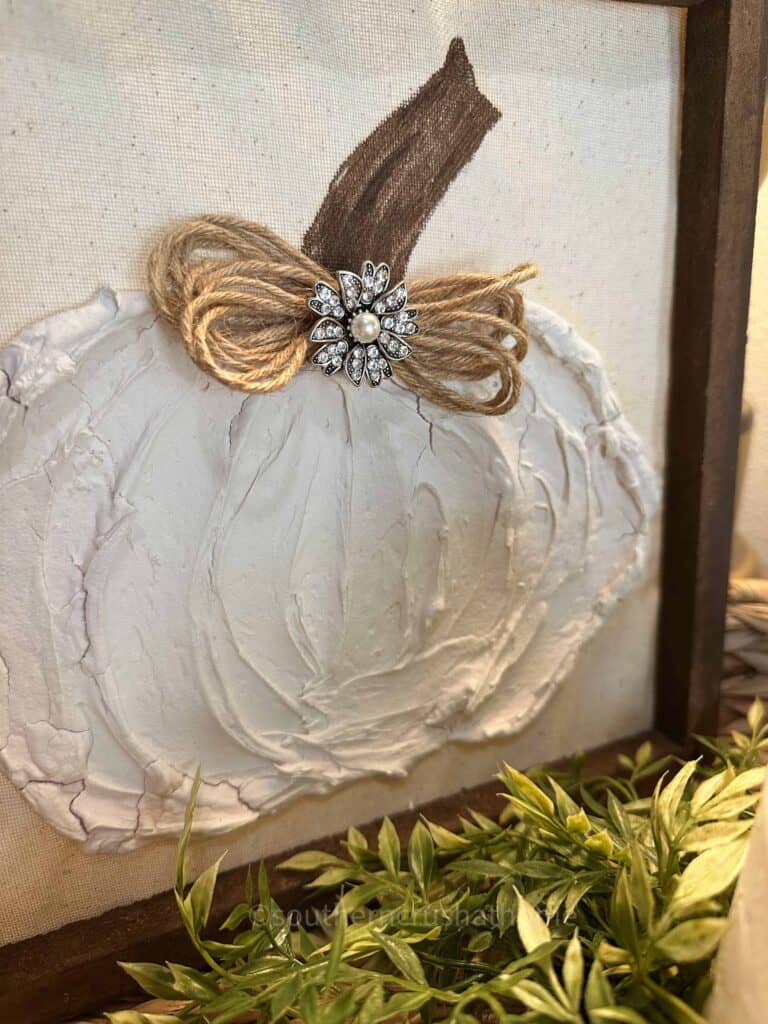
Once the spackle is dry, draw or paint on a pumpkin stem at the top. A brown marker or craft paint works great. You could even get creative and add leaf details or a little curl of vine.
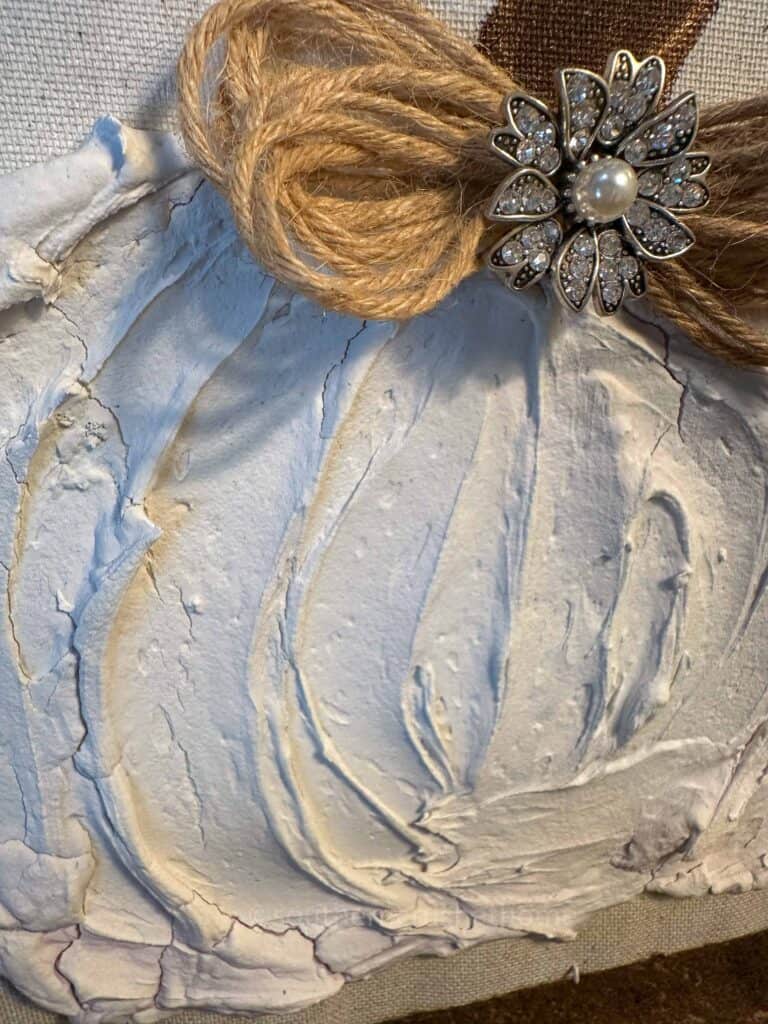
Step Seven: Add a Cute Bow
Attach a bow made from fall ribbon, burlap, or jute twine right at the top or stem area using hot glue. It’s the perfect touch of charm and seasonal flair.
Step Eight: Reattach the Canvas to the Frame
Use hot glue to secure the painted and spackled canvas back onto the wooden frame. Press down firmly and make sure your pumpkin is centered.
Step Nine: Trim Any Excess Canvas
If needed, trim any canvas edges that peek out from around the frame using scissors for a neat finish.
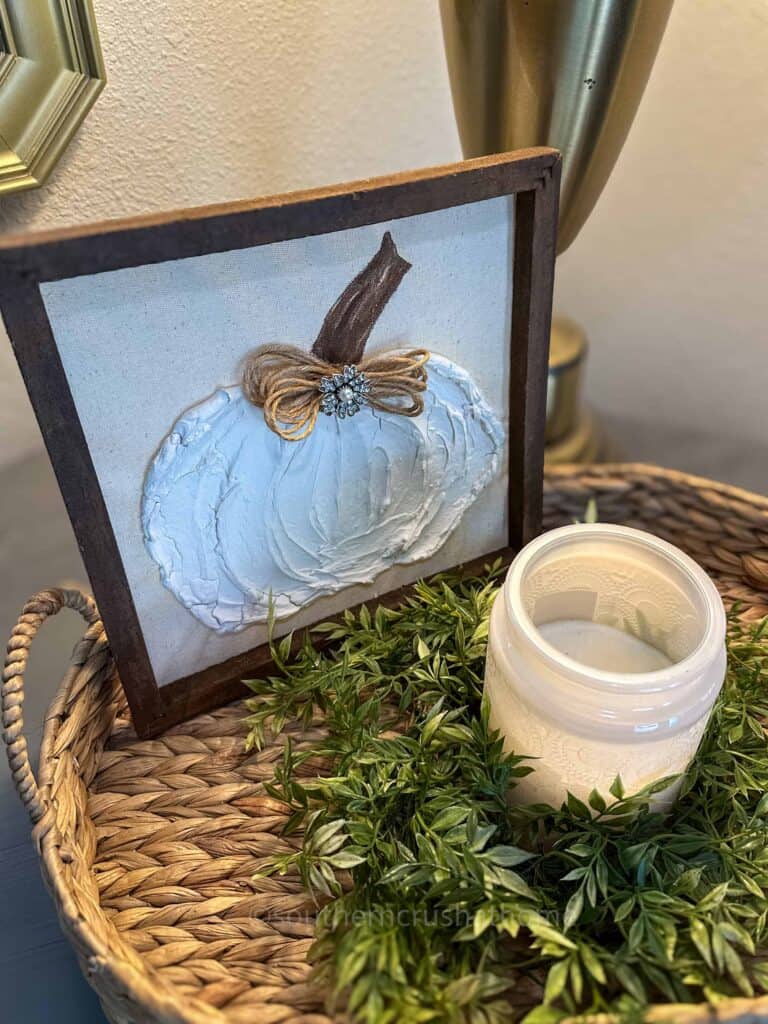
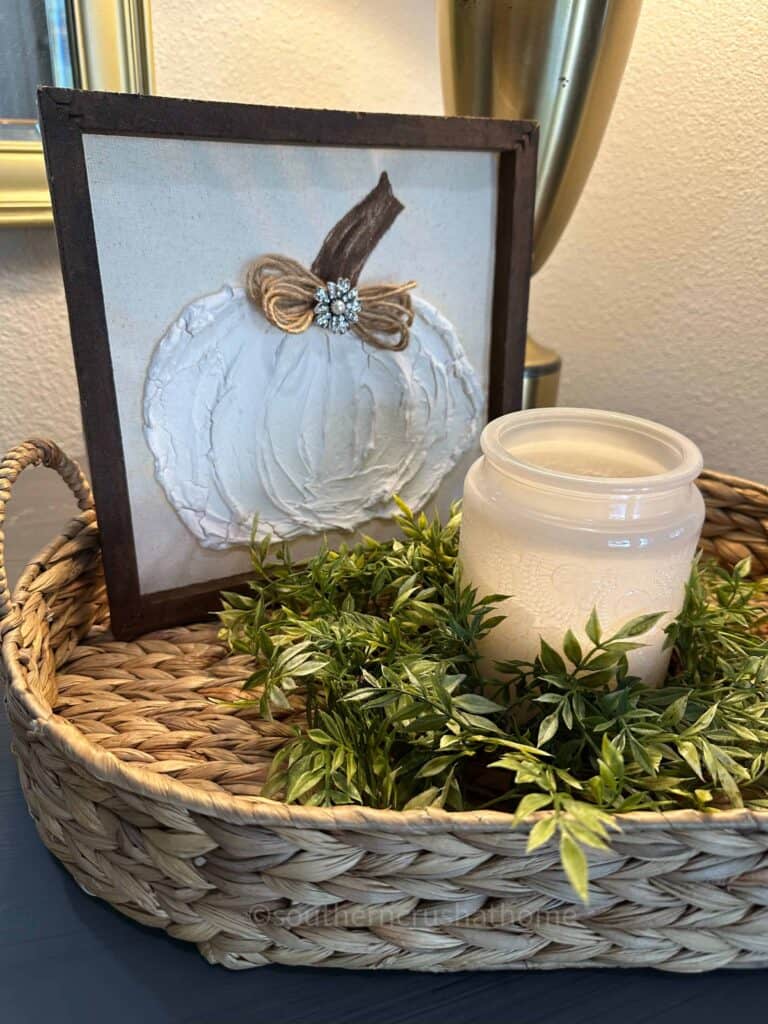
Step Ten: Display Your DIY Pumpkin!
And just like that, your DIY spackle pumpkin decor is complete. Display it anywhere in your home to welcome in the cozy vibes of fall.
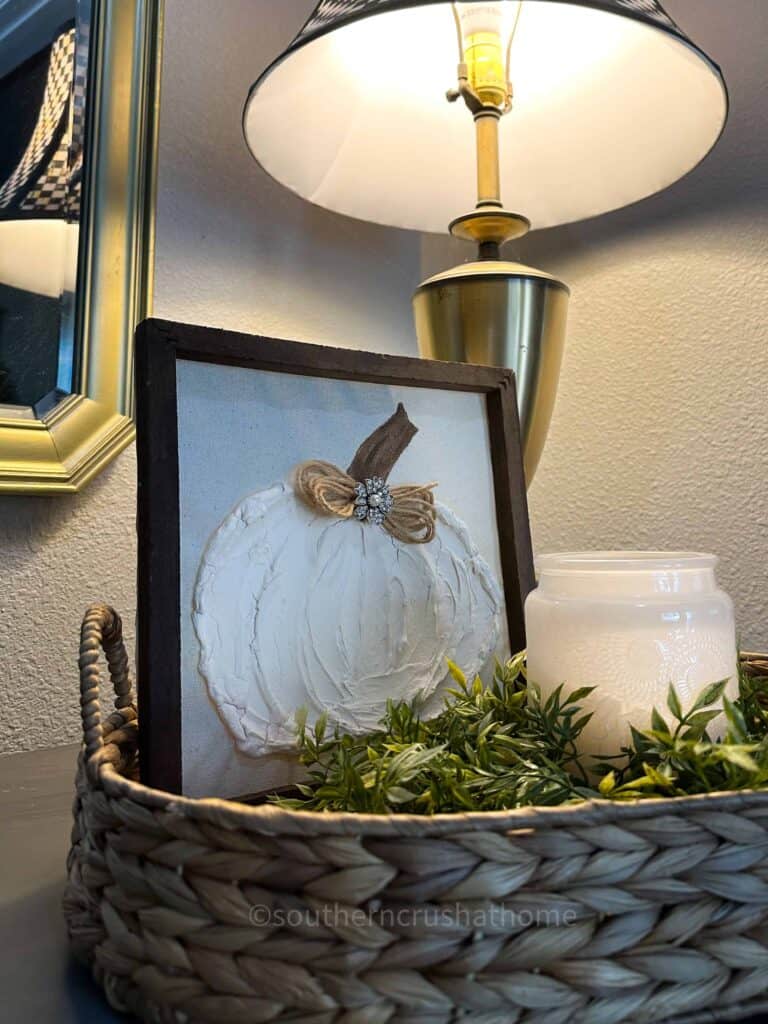
Where to Display Your Spackle Pumpkin
This sweet little pumpkin art can go just about anywhere, but here are a few cute ideas:
- Layered in a fall vignette with stacked books and mini pumpkins
- Propped on your entryway table to greet guests
- Sitting on your kitchen counter or tiered tray
- Hung on a gallery wall or leaned on a shelf
- Added to your fireplace mantel with leaves and candles
Since the colors and design are totally customizable, you can make it match your personal fall style—whether that’s farmhouse, modern, boho, or classic autumn tones.
Fall Decorating Ideas
This project is a great addition to your fall decorating plans. Think about mixing textures like wood, burlap, and soft textiles for a cozy look. Add lanterns, amber bottles, faux leaves, and seasonal signs to really embrace that fall home vibe.
Want more pumpkin projects? You could even make a set of spackle pumpkins in various shapes and sizes for a full wall display!
Bonus Project: Spackle Ghost Decor (As Seen on TikTok!)
If you’re into trending Halloween DIYs, don’t miss the viral spackle ghost decor everyone’s talking about on TikTok.
Just like the spackle pumpkin, the ghost is made using lightweight spackle to create a raised, textured ghost shape on canvas or wood. People are adding cute little faces and even 3D bows to give them personality.
You can use:
- A flat canvas or thrifted wood sign
- White DAP lightweight spackle
- Black paint or vinyl for eyes and mouth
- Optional blush or tiny bows for a girly ghost
This ghost project is perfect for spooky season and goes great next to your spackle pumpkin as part of a seasonal display. Stay tuned—I’ll be sharing photos and even more ideas soon!
If you're looking for a budget-friendly, beginner-friendly fall project, this Dollar Tree DIY spackle pumpkin is it. You don’t need fancy tools or expensive materials—just a little creativity and a tub of spackle.
It’s a fun craft to do on a weekend, with friends, or even with older kids. Plus, it looks amazing wherever you decide to style it!
So grab your canvas, scoop that spackle, and let’s make something festive together. I’d love to see your version—tag me when you make your own!
PIN this for later!
Easy Spackle Pumpkin Canvas Art for Fall Decor
Materials
- 1 tub of DAP Lightweight Spackle Medium
- 10 x10 white stretched canvas Dollar Tree
- Scissors
- Wood stain optional for frame
- Large spoon + small spoon
- Heat tool or time to let air dry
- Permanent marker or craft paint
- Hot glue gun + glue sticks
- Ribbon or bow of your choice
Instructions
Step One: Remove Canvas from the Frame
- Carefully use scissors or a craft knife to remove the canvas from the wooden frame. Take your time so you don’t accidentally tear or fray the canvas.
Step Two: Stain the Frame (Optional)
- If you want a rustic or finished look, stain the wooden frame using your favorite wood stain color. Let it dry completely while you continue with the project.
Step Three: Draw a Faint Outline of Your Pumpkin
- Use a pencil or marker to lightly sketch a simple pumpkin shape onto the canvas. Think basic curved lines—nothing fancy! This will help guide your spackle application.
Step Four: Apply the Spackle
- Using the back of a large spoon, scoop up a generous amount of DAP lightweight spackle and spread it onto the canvas within your outline. Create texture by swirling and layering it, just like frosting a cake. A small spoon can be helpful for tighter corners or details.
Step Five: Dry the Spackle
- You can either use a heat tool to speed up the drying process or let it air dry for at least 5 hours (or overnight for best results). Make sure the spackle is completely hardened before moving on.
Step Six: Add the Pumpkin Stem
- Once the spackle is dry, draw or paint on a pumpkin stem at the top. A brown marker or craft paint works great. You could even get creative and add leaf details or a little curl of vine.
Step Seven: Add a Cute Bow
- Attach a bow made from fall ribbon, burlap, or jute twine right at the top or stem area using hot glue. It’s the perfect touch of charm and seasonal flair.
Step Eight: Reattach the Canvas to the Frame
- Use hot glue to secure the painted and spackled canvas back onto the wooden frame. Press down firmly and make sure your pumpkin is centered.
Step Nine: Trim Any Excess Canvas
- If needed, trim any canvas edges that peek out from around the frame using scissors for a neat finish.
Step Ten: Display Your DIY Pumpkin!
- And just like that, your DIY spackle