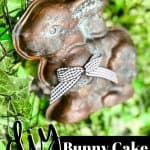
Easter Wreath with Bunny Cake Pan DIY
Ramp up your Easter decorations with this easy and fun DIY project! Inspired by my love for the bronze and copper patina look, this Easter wreath using an aluminum bunny cake pan comes to life.
Materials
- Vintage Easter Bunny Cake Pan
- Modern Masters Metal Effects Patina Kit in Bronze
- Foam Brushes
- Metal Wreath Form
- English Ivy Garland
- Ribbon of your choice
- styrofoam block
- hot glue gun
- zip ties
Instructions
Patina Bunny Cake Pan
- Apply the first coat of Metal Effects Primer by Modern Masters. Apply with a sponge applicator in thin, light strokes to cover the entire mailbox. Allow to dry for at least 30 minutes.
- Apply a second coat of Primer. This time allow for a generous layer to fill in any missing areas of the first layer. Allow to dry for at least 30 more minutes.
- Using a new sponge brush, apply a first coat of the special oxidizing bronze paint. This is where the aluminum vintage bunny cake pan turns into a more high-end metal-looking easter decoration. Allow cake pan to dry for another 30 minutes.
- For the final coat of bronze paint, apply in small sections at a time.
- After applying a few strokes of paint, spritz the blue patina aging solution over the wet paint area.
Wreath Assembly
- Attach the English Ivy or greenery garland around the metal wreath frame using zip ties.
- Place your new bronze patina Easter Bunny cake pan in the center of the wreath.
- Add a coordinating bow to the wreath using a zip tie.
