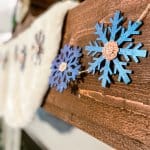
How to Make a DIY Christmas Garland with Dollar Tree Snowflakes
This easy DIY Christmas garland made with wooden Dollar Tree snowflakes is the perfect way to add a touch of holiday cheer to your home. Using just a few simple materials, you can create a beautiful garland that is perfect for draping over mantles, doorways, or windows. And best of all, this garland can be made in no time at all using Rustoleum Imagine Color Shift spray paint!
Equipment
- Pair of Scissors
Materials
- 3 Strands of wooden snowflakes
- 1 Rustoleum Imagine Color Shift spray paint in the black base color
- 1 Rustoleum Imagine Color Shift spray paint in the color Turquoise Waters
- Scrap cardboard box
- Jute twine
- Bling Embellishments (optional)
Instructions
- Start by removing the tiny rubberbands that tie the snowflakes together on the strand.
- Next use scissors to cut off any tags from snowflakes.
- Arrange snowflakes in a scrap piece of cardboard for spray painting. Take the project outside or to a well-ventilated area for spraying.
- Using even strokes approximately 12-14" away from the project, apply a coat of Rustoleum Imagine Color Shift black base spray paint to the snowflakes. Allow to dry, flip snowflakes over and repeat on the opposite side of the snowflakes.
- Once the base coat is dry, apply a coat of the Rustoleum Imagine Color Shift Turquoise Waters spray paint to one side of the snowflakes.
- This colored side will be the front of the snowflakes. Isn't it beautiful?
- Once the snowflakes are completely dry, bring inside and hot glue jewels or bling onto the center of each snowflake to kick them up a notch! I used these pretty rose gold colored rhinestones.
- Finally, reattach each snowflake to each other to create the garland using some simple jute twine.
